Ingredients
- a Raspberry Pi with HomeGenie installed (a model Zero 2 W is cheap and perfect for this)
- a DHT-xx humidity and temperature sensor (DHT-11 or DHT-22)
- a Relay Switch
What you will get
A smart thermostat that works 100% offline and where your own your data, with logging, statistics, powerful scheduler, automation engine, smart-home-ready gateway with support for ZigBee, Z-Wave and X10, UPnP/DLNA control point, and more... all for less than $25.
Step 1 - connecting components
Connect components as shown in the following schema:
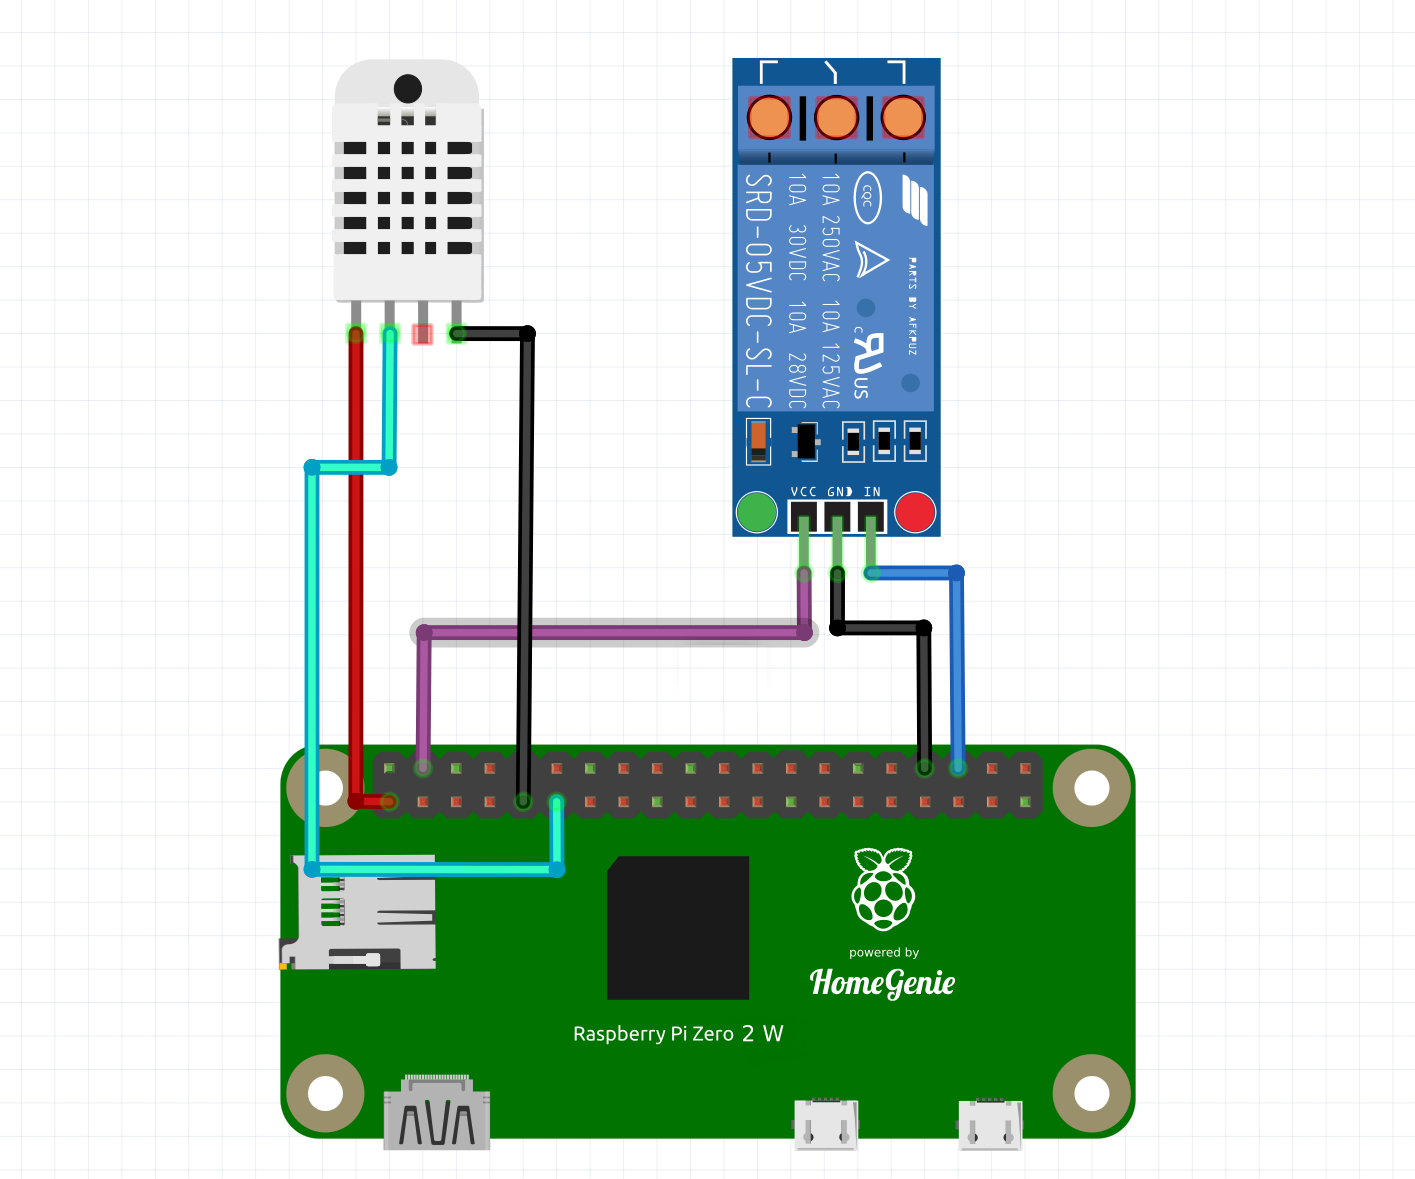
DHT-xx
- Pin 1 (VCC) -> to GPIO pin 1 (3V3)
- Pin 2 (DATA) -> to GPIO pin 11 (GPIO17)
- Pin 4 (GND) -> to GPIO pin 9 (GND)
Relay Module
- Pin 1 (VCC) -> to GPIO pin 4 (5V)
- Pin 2 (GND) -> to GPIO pin 34 (GND)
- Pin 3 (IN) -> to GPIO pin 36 (GPIO16)
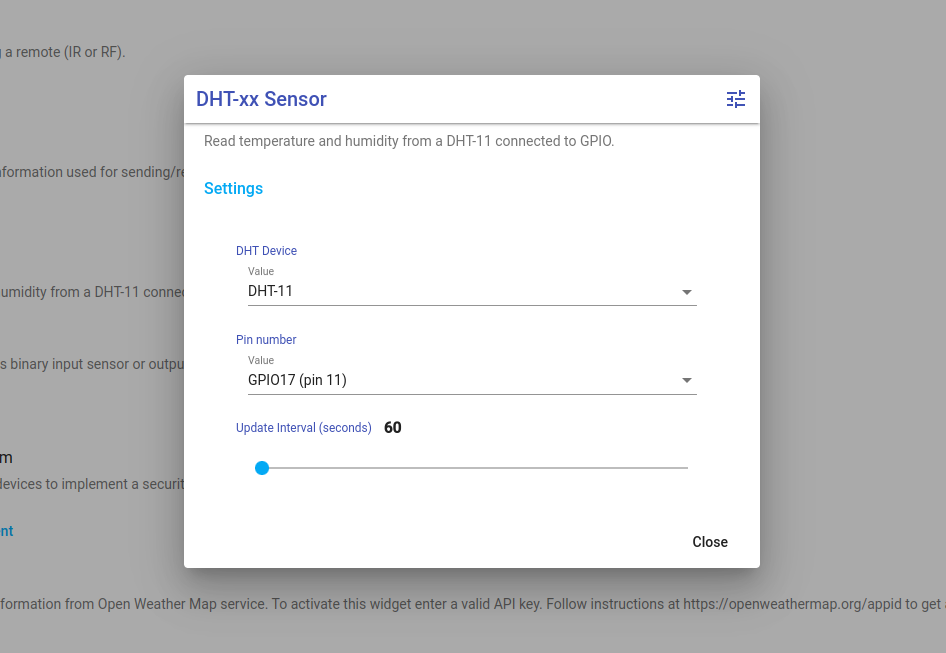
Step 2 - configuring DHT-xx and relay switch
Enable DHT-XX and GPIO Pin programs from the Automation Programs page,
then you can configure both programs from the System Settings page as shown in the pictures below.

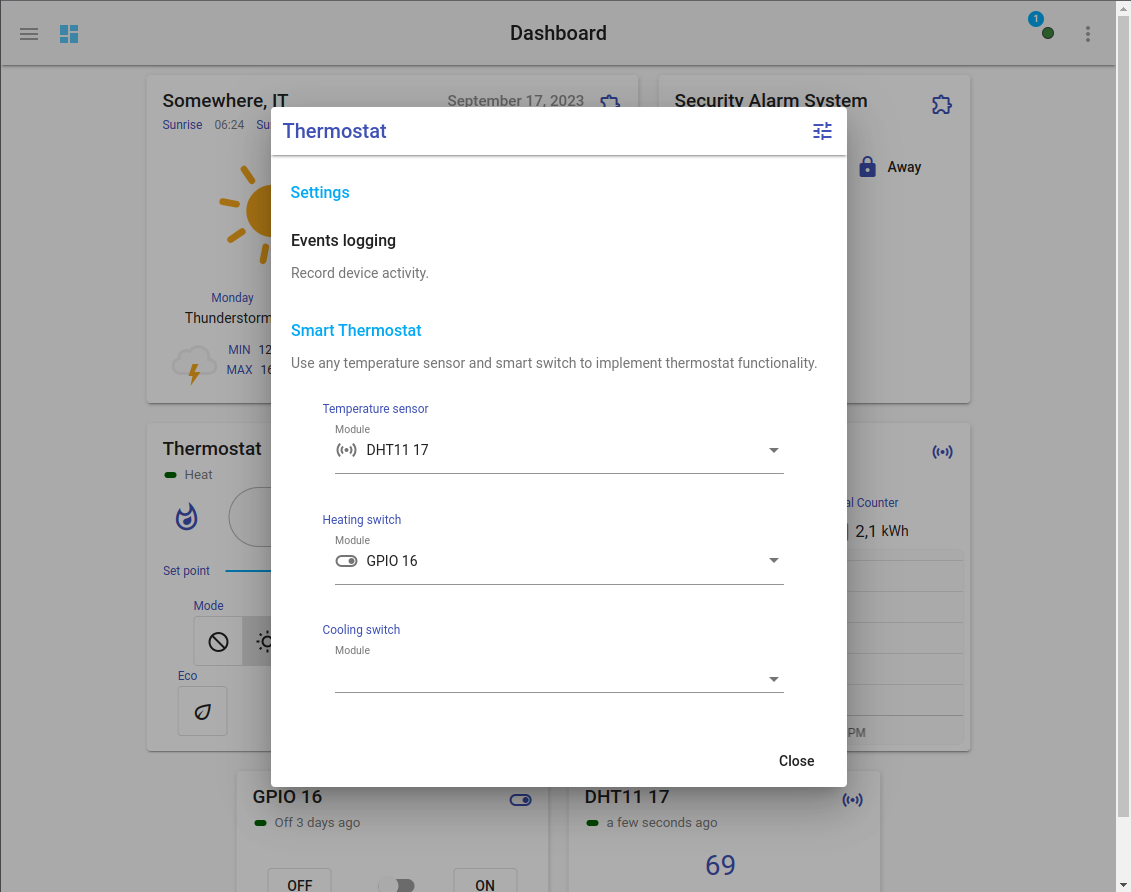
Step 3 - configuring the Smart Thermostat
Open the default dashboard and click the menu button of the Thermostat widget and select "Settings" to set the device to read the temperature from (DHTxx 17) and the switch to be used to activate the heating (GPIO 16).
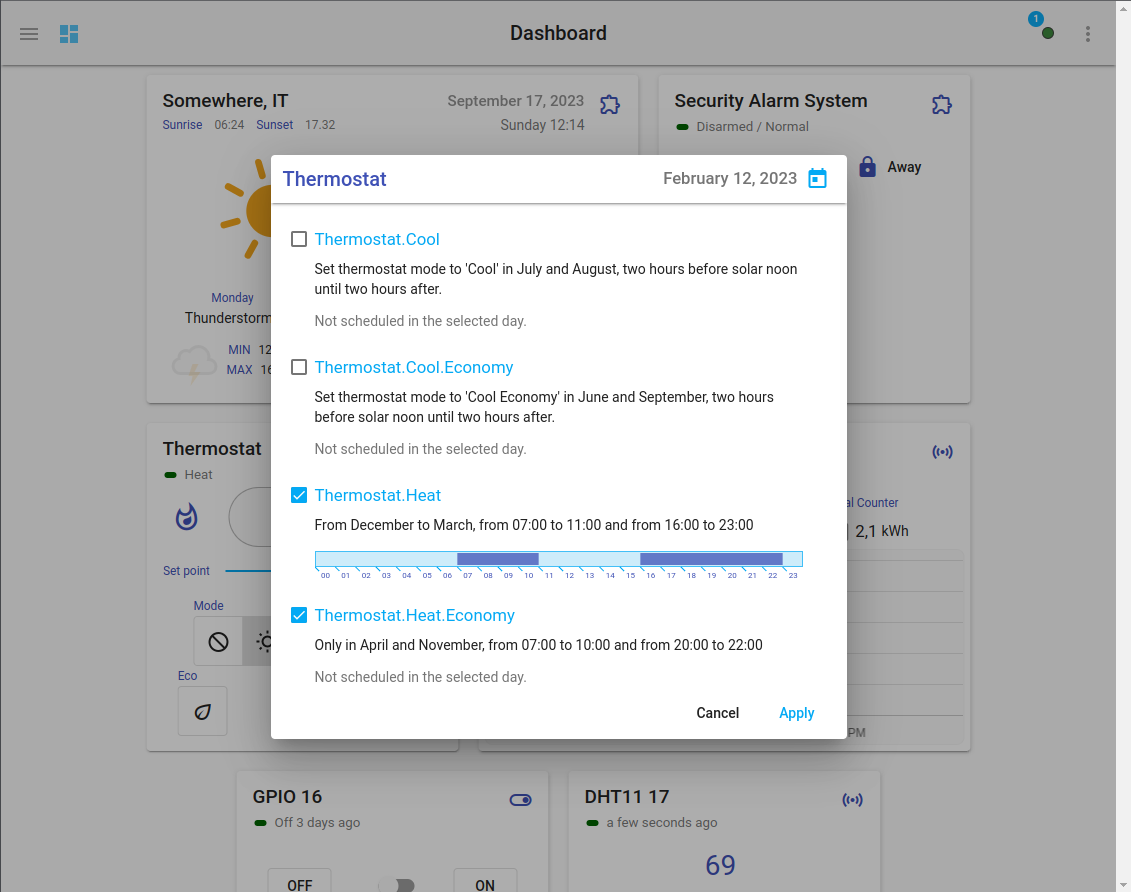
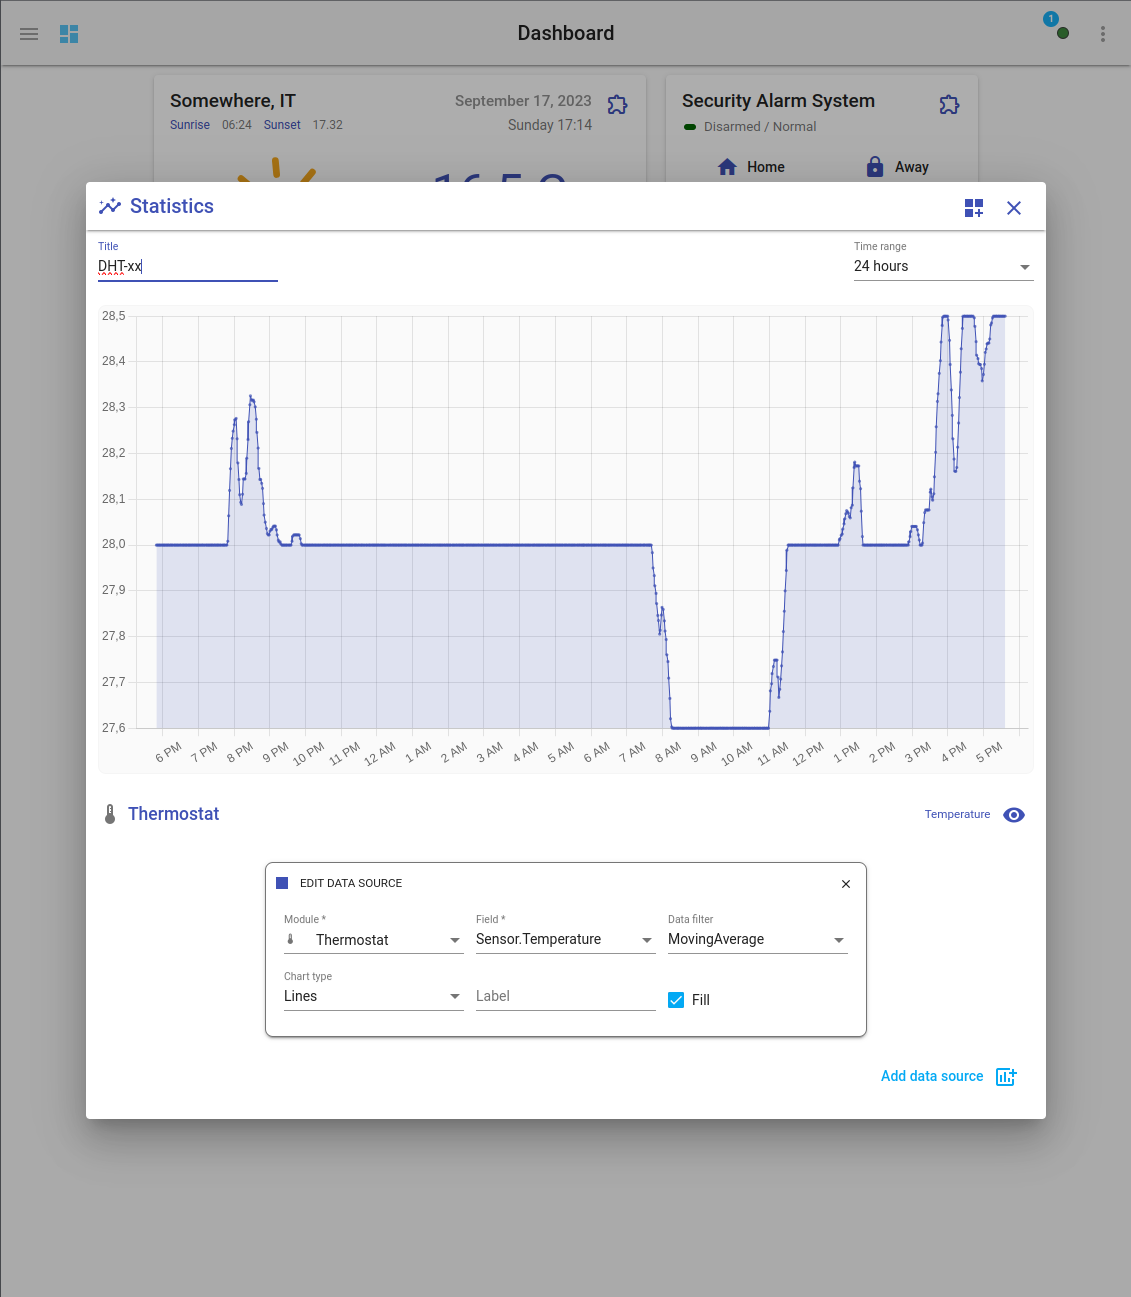
The Smart Thermostat is now ready to be used. You can change the schedules or show statistics and use all other features available in HomeGenie.