More than just Smart Home
Despite the name, HomeGenie is not just a Smart Home server. HomeGenie is a general-purpose automation server that routes and processes "signals" and that integrates a series of tools to customize the user interface and the system intelligence by the mean of small automation programs and widgets that can be implemented and tested directly in the browser.
It is exactly the set of installed widgets and programs that determines and shapes this general-purpose automation system into something specific, like a Smart Home Server, a Smart Thermostat, or even a Robot :)
For example if HomeGenie were installed on a single board computer (such as Raspberry Pi) with a temperature sensor, a switch relay and a display, it that case it would specifically implement a smart thermostat.
A multiple HomeGenie installation on an interconnected system of single board computers with sensors, actuators, motors and such, in that case it would be probably about implementing some kind of robot 🤖
Deploy and share your creations easily
Whatever purpose you are using HomeGenie for, as described in the System settings page, all custom widgets and automation programs can then be organized into packages or whole system backups can also be created, to easily redistribute and deploy your creations.
Programmable features
To understand what "programmable features" means, let's see a basic example about how to implement a custom "Blink" feature that when enabled on a light or switch, will make it blink continuously.
We simply add a new automation program giving it the name of the feature, "Blink", and a brief description that states what this feature will do: "Make this device blink continuously".
The code required to implement such feature is as simple as the following:
// Setup
Program.AddFeature(
  "", // affected domain filter or empty string for all
  "Light,Dimmer,Color,Switch", // affected types filter
  "ExampleFeature.Blink.Enable", // feature field name
  "Blink every half a second.", // feature description
  "checkbox" // type of input to control this feature field
);
With the Program.AddFeature API method, the program is adding to the system a new feature that will shows up in the Settings dialog of every device matching the given domain/type filter, with a "checkbox" input to enable or disable the Blink feature as shown in the following image:

To actually blink all devices with the "Blink" option enabled, the program will use the following code:
// Main
while (Program.IsRunning) {
  Modules
    .WithFeature("ExampleFeature.Blink.Enable")
    .Toggle();
  Pause(.5);
}
where the Modules helper class is used to select all devices with the "Blink" feature enabled and toggle them.
So, basically, whenever the feature Blink is enabled on a device, it will start to toggle on and off every half a second as shown in the following video.
So, as just seen in the video above, other features such as Events logging, Remote Control, Security Alarm System, Smart Device are also available in HomeGenie — they all are implemented using small automation programs like the Blink program, and therefore they can be enabled, disabled or even edited and customized!
Common interface for all things
In the previous example we've seen the Modules helper class used to select all devices with the Blink feature enabled and to make them blink using the .Toggle() command. This will work on all devices despite the brand or different protocols used.
Either you want to integrate directly an electronic component, smart home devices from different brands and protocols, or external services, in HomeGenie they all will speak the same language and will share a common set of API commands.
As an example let's see how a DHT-22 temperature and humidity sensor can be easily integrated in HomeGenie using an automation program.
// assign an arbitrary domain/address to identify this device
var domain = "Components.DHT22";
var address = "23"; // the GPIO number connected to DHT data pin
// Add a new module for the DHT sensor
Program.AddModule(domain, address, "Sensor");
// Get the Module instance
var dhtModule = Modules
      .InDomain(domain)
      .WithAddress(address).Get();
With the instructions above, the program is adding a new module that will be used to signal new values read from the DHT-22 sensor using the Emit(..) API method:
// [code to read values from sensor omitted]
// emit sensor values
dhtModule
   .Emit("Sensor.Humidity", humidity.Percent)
   .Emit("Sensor.Temperature", temperature.DegreesCelsius);
And with just those few instructions, we now have a fully functional sensor integrated in the system with event logs, data processing, monitoring and all other features implemented for any module of type "Sensor", as shown in the following video:
Data processing and visualization
Also data processing and visualization can be customized using automation programs, and it's possible to add custom data filters or new kind of charts.
For this purpose the API methods Program.Implements(..) and Api.Handle(...) can be used as described in the Data Processing page later in this guide.
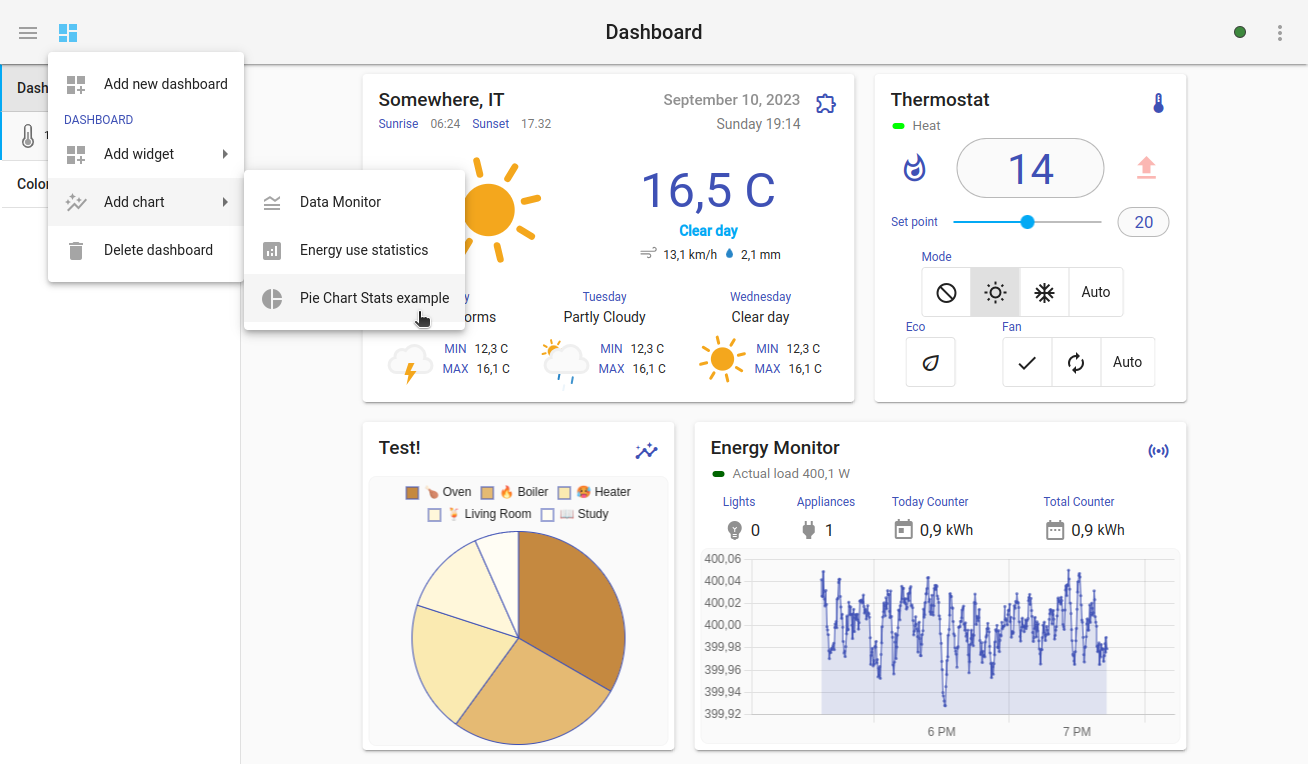
The data monitor component is designed for real-time data visualization and proven to be blazing fast on mobile devices too as shown in the video below.
Custom Widgets
Even if HomeGenie built-in widgets could already be enough for most applications, it is possible to create custom widgets using the integrated widget editor.
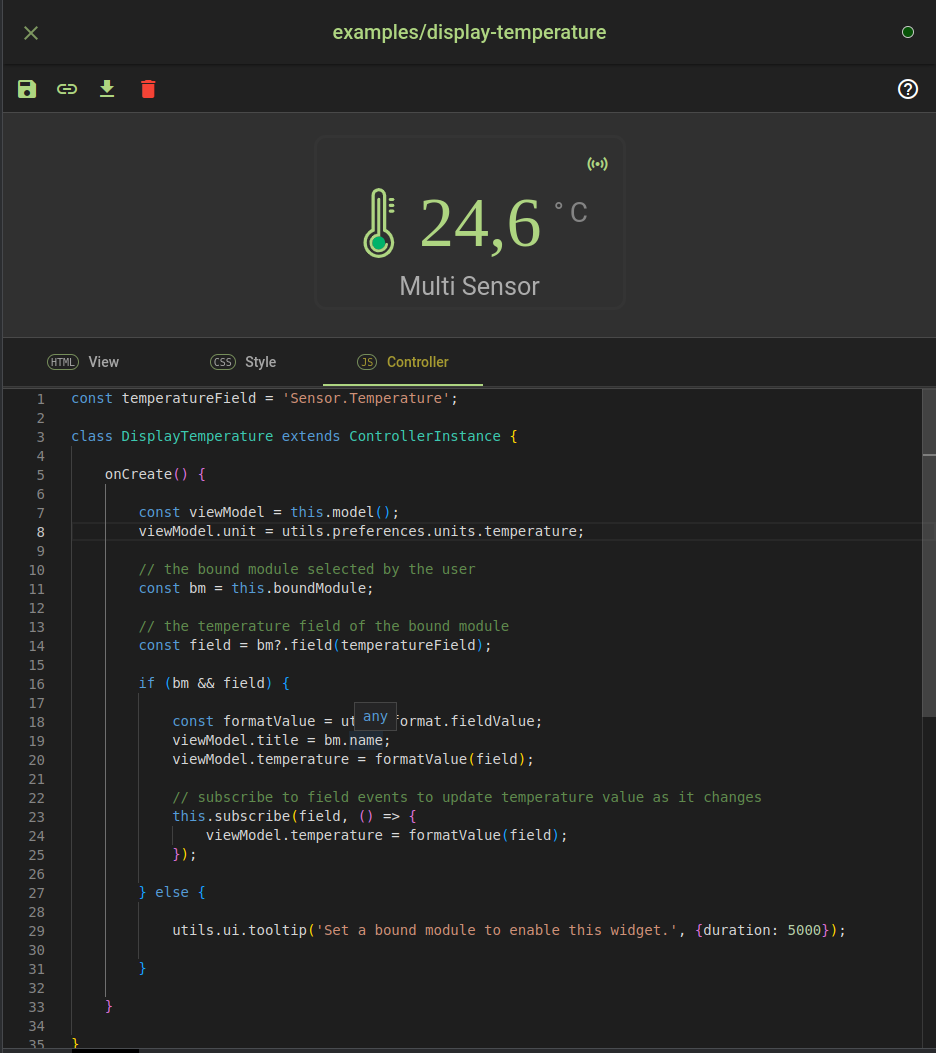
See the Custom Widgets page for a complete documentation about writing custom widgets.