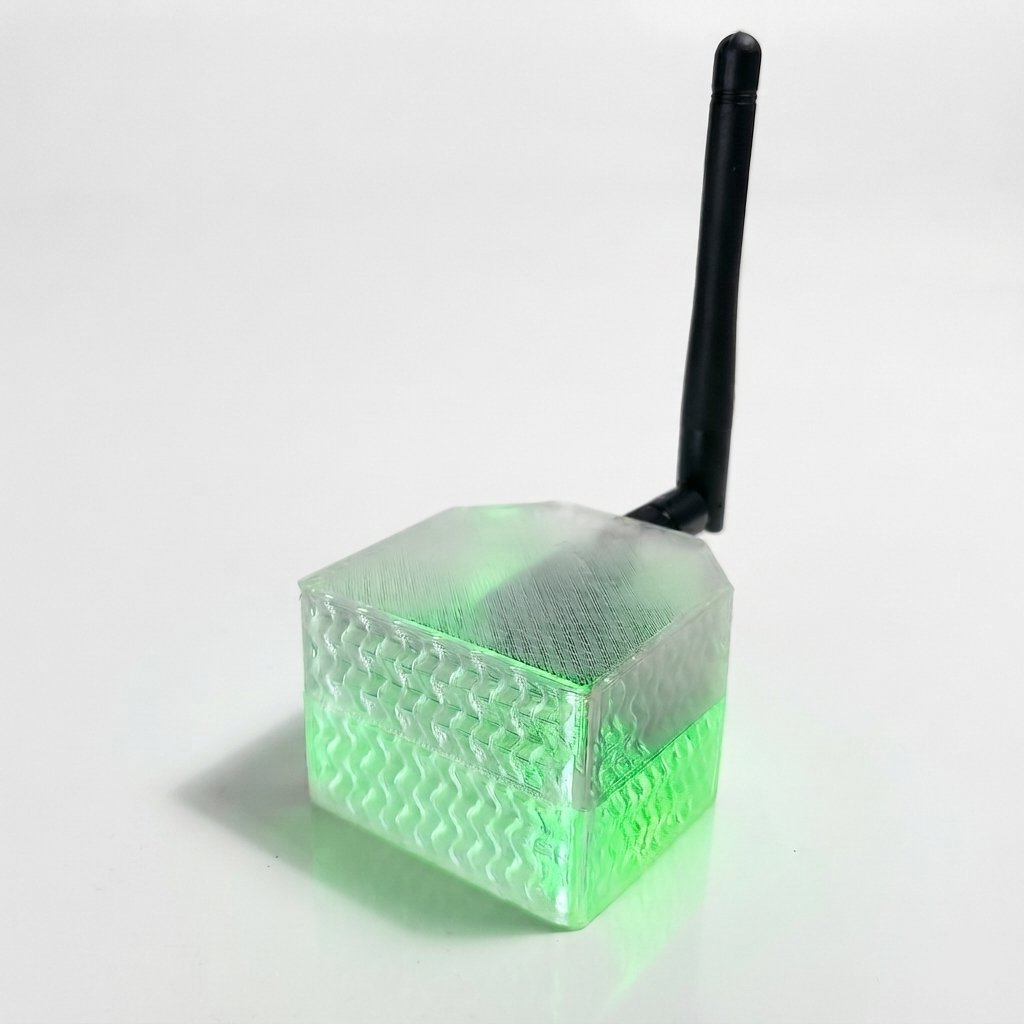
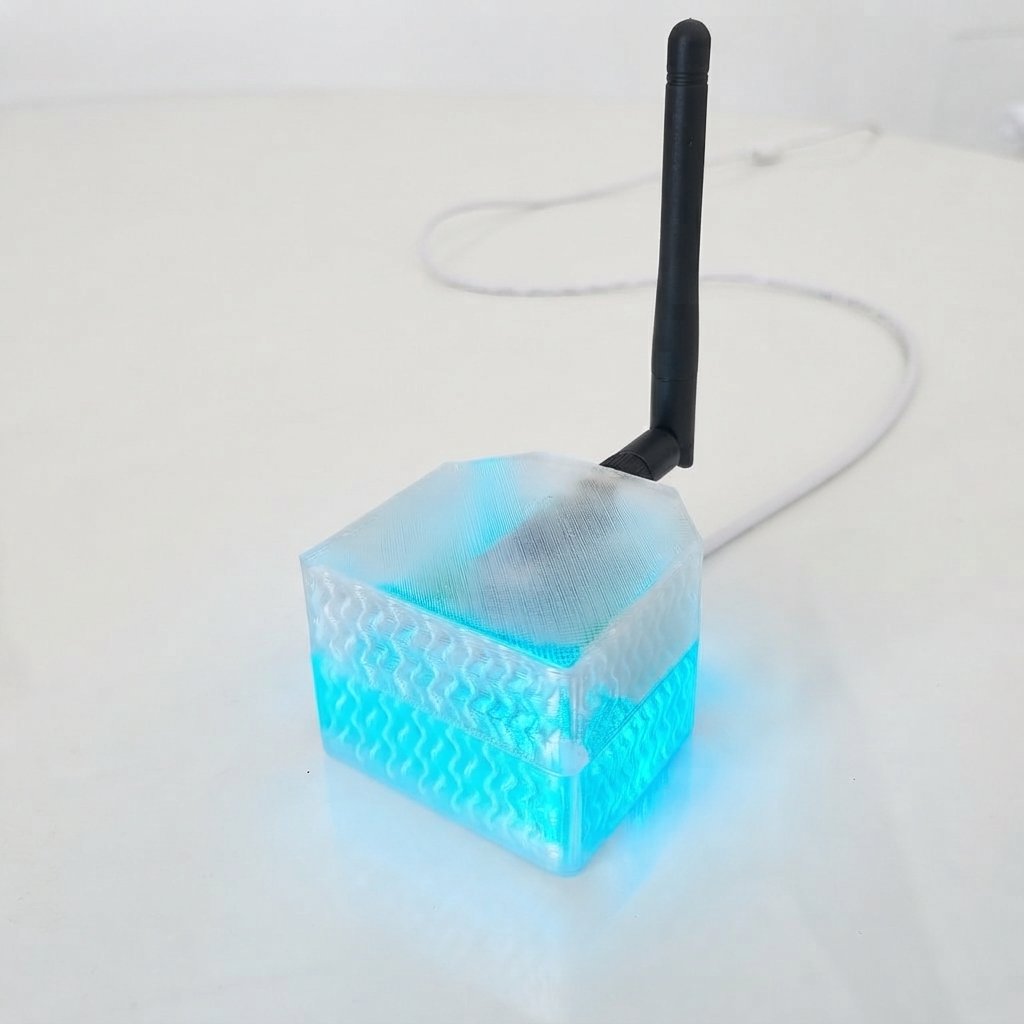
Firefly is an open-source smart hub that connects your traditional appliances—such as air conditioners, TVs, driveway gates, and wireless sockets—to your modern Wi-Fi smart home. It bridges standard infrared, 433/315 MHz radio remotes, and classic X10 automation devices into a single app.
With Firefly, you can:
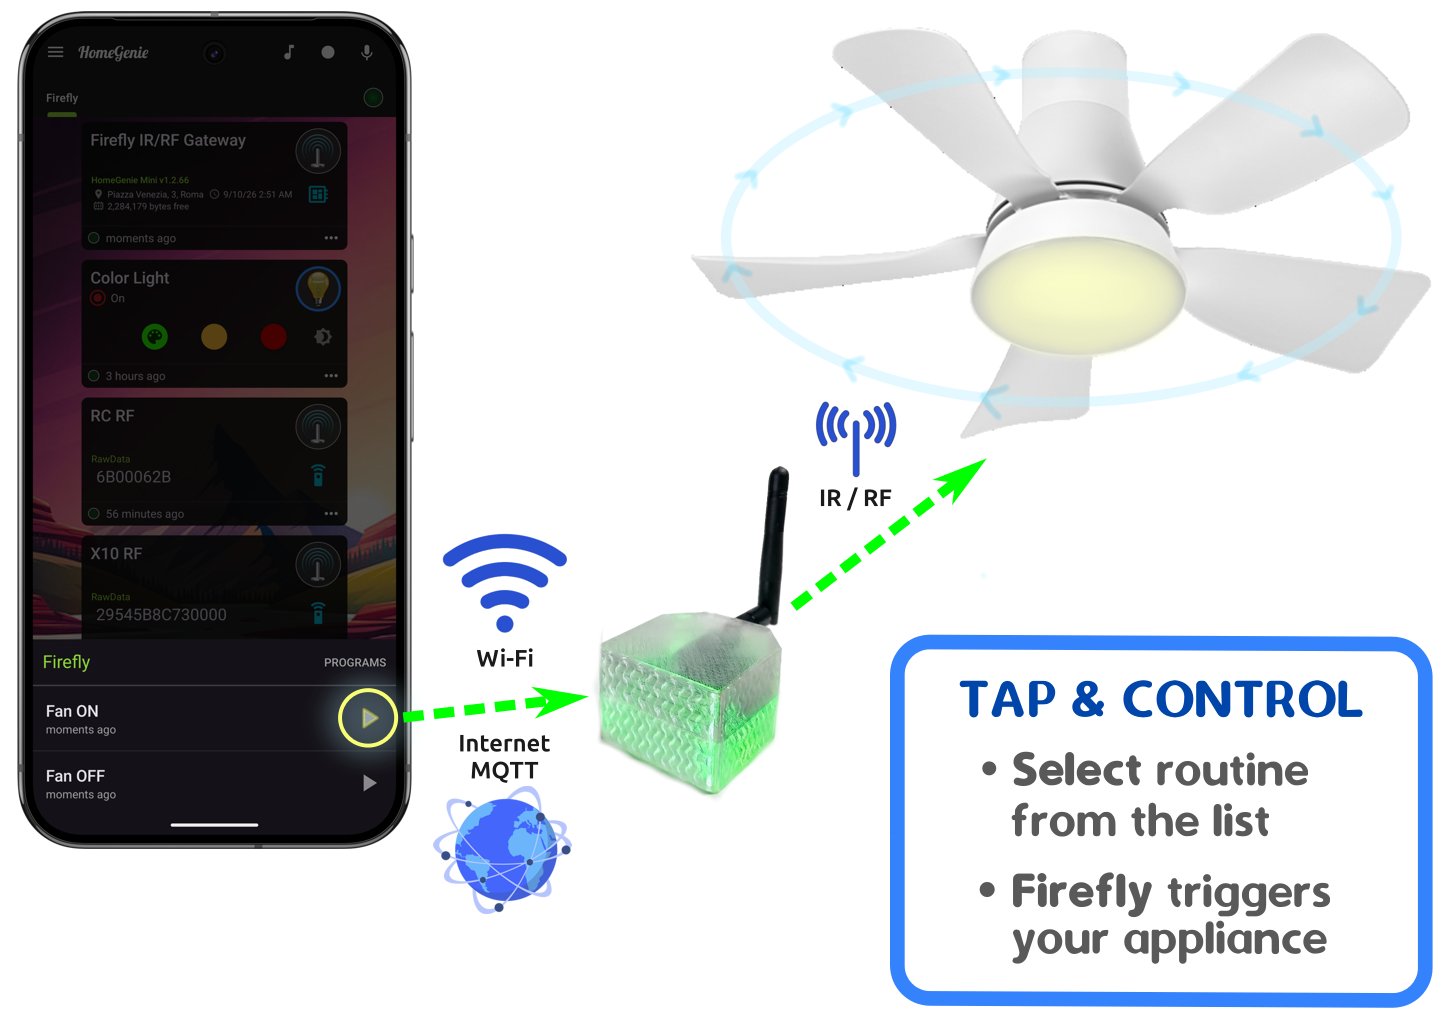
Control from anywhere: Operate your traditional appliances from your smartphone or web browser, both at home and remotely over the Internet.
Automate daily routines: Schedule seasonal climate routines or trigger smart lights using wireless RF buttons.
Clone existing remotes: Learn and combine multiple IR and RF remote controls into one-tap routines.
Bridge legacy systems: Seamlessly integrate classic X10 powerline and RF devices into your smart home.
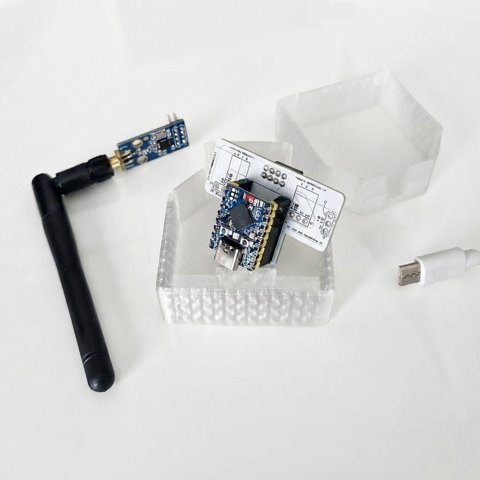
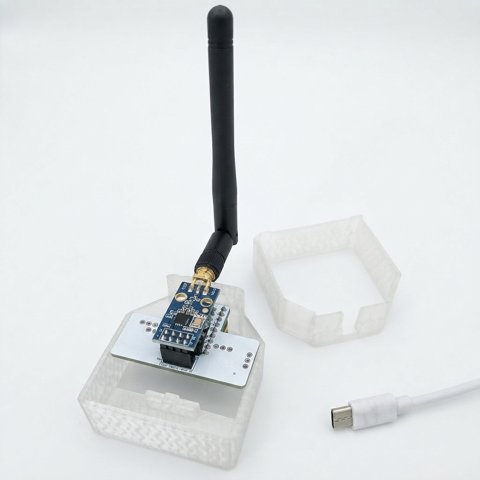
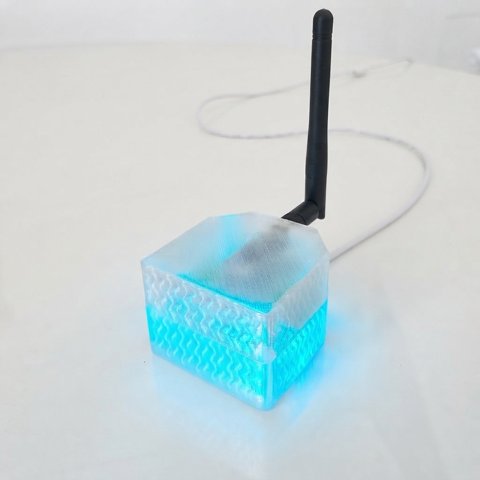
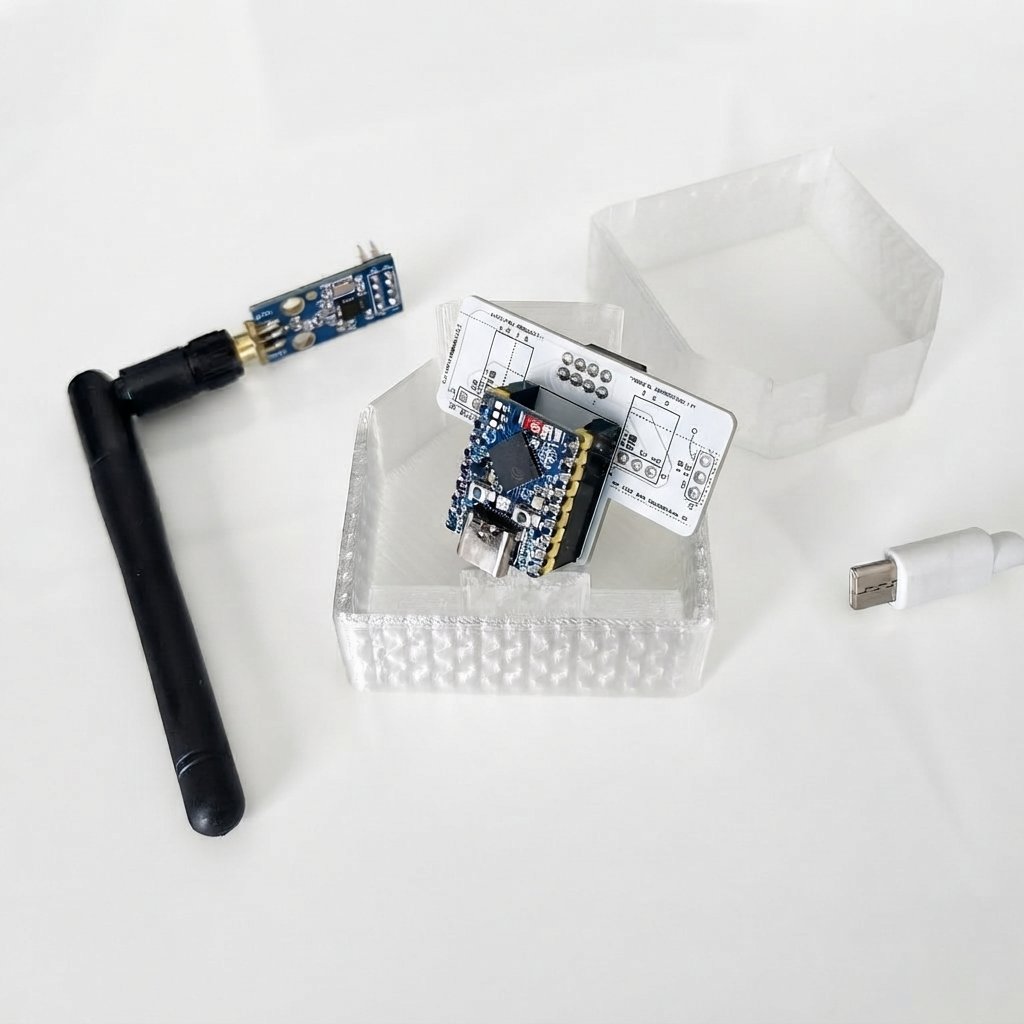
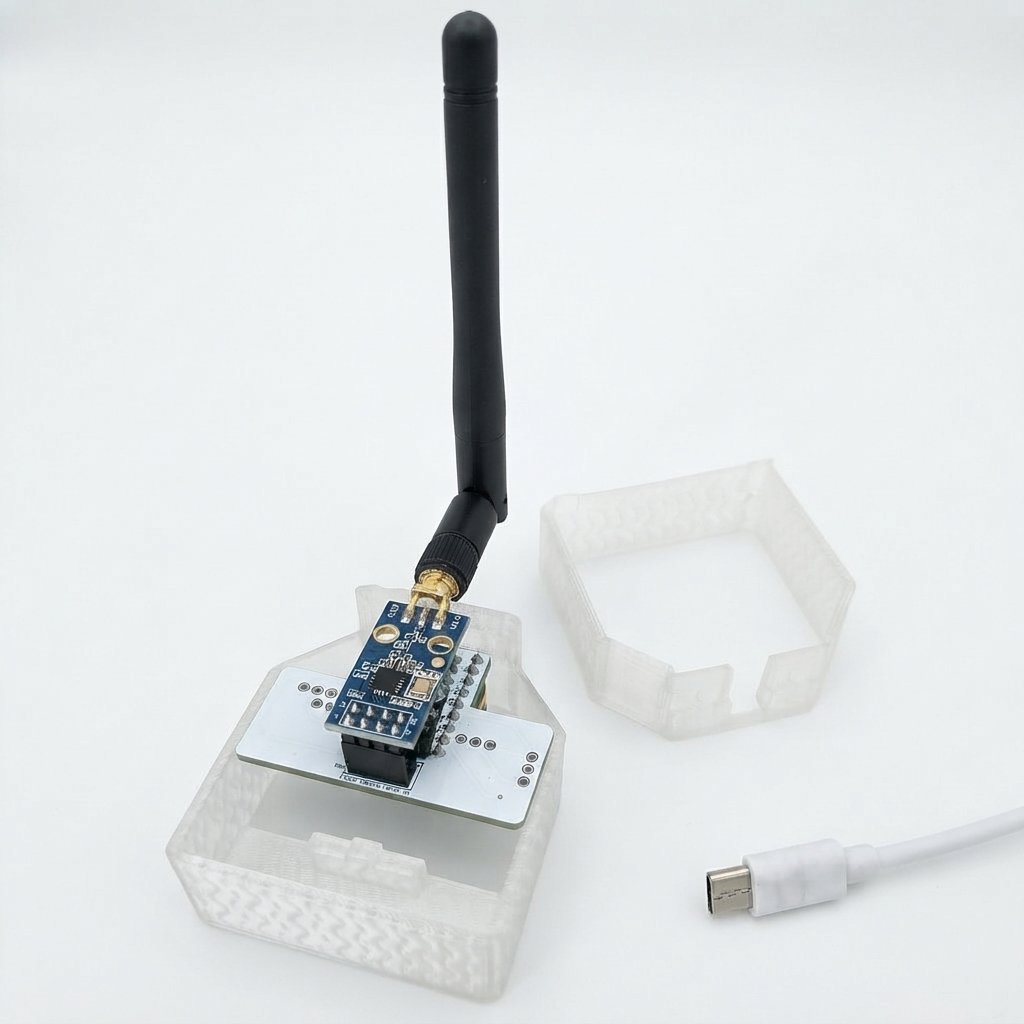
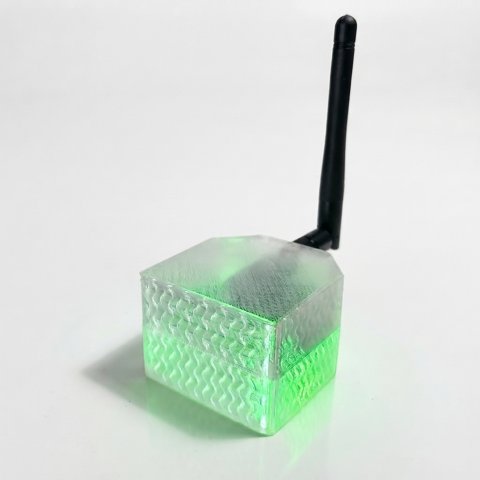
Even though it is a DIY project, building it is surprisingly simple. There is no messy wiring and zero soldering required: standard, off-the-shelf electronic modules plug directly into the Firefly board like Lego bricks, fitting neatly inside a 3D-printed translucent case that doubles as an ambient mood light.
The Concept: Snap-together modules
Instead of a single, complex circuit board, Firefly relies on four separate, interchangeable modules. Each component handles a dedicated task and connects directly to the carrier board via standard pin headers:
1. Microcontroller Core ESP32-S3
The processing brain of the gateway. It runs the HomeGenie Mini runtime, manages Wi-Fi connectivity, local automations, and scheduling. It plugs face-down into the Firefly board, directing its integrated RGB LED toward the base to serve as an ambient status light. Common models / Search keywords:Waveshare ESP32-S3-Zero
2. Sub-GHz Transceiver (TI CC1101)
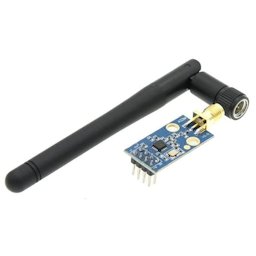
A software-configurable SPI radio transceiver equipped with an external antenna. It handles bidirectional 433.92 MHz and 315 MHz communication for standard RF remote controls, wireless wall switches, security sensors, and X10 home automation devices. Common models / Search keywords:CC1101 433MHz 8-pin SPI Wireless Module with SMA antenna
3. High-Power IR Transmitter (38 kHz, 5V)
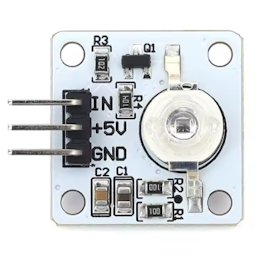
Emits 38 kHz infrared signals to control appliances such as air conditioners, TVs, and audio systems. Powered directly from the 5V USB bus, it provides maximum optical output power and long-distance coverage (8–10+ meters). Common models / Search keywords:5V High-Power Infrared Transmitter 3-pin
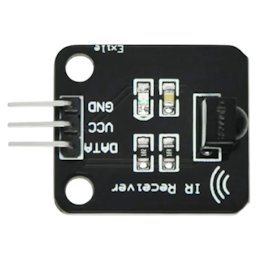
4. IR Receiver Module (38 kHz)
Captures and demodulates 38 kHz infrared signals emitted by physical remote controls in real-time, allowing Firefly to learn new commands instantly without manual code entry. Common models / Search keywords:KY-022 IR Receiver Module
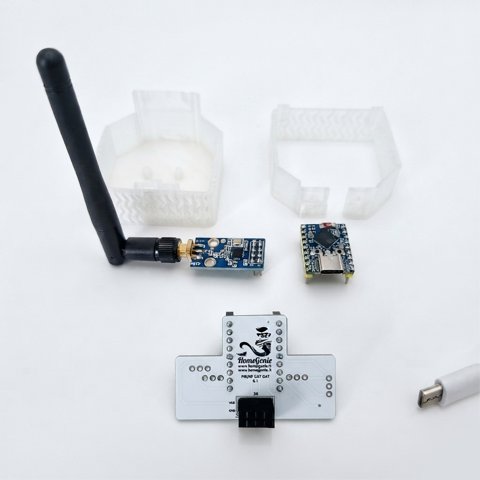
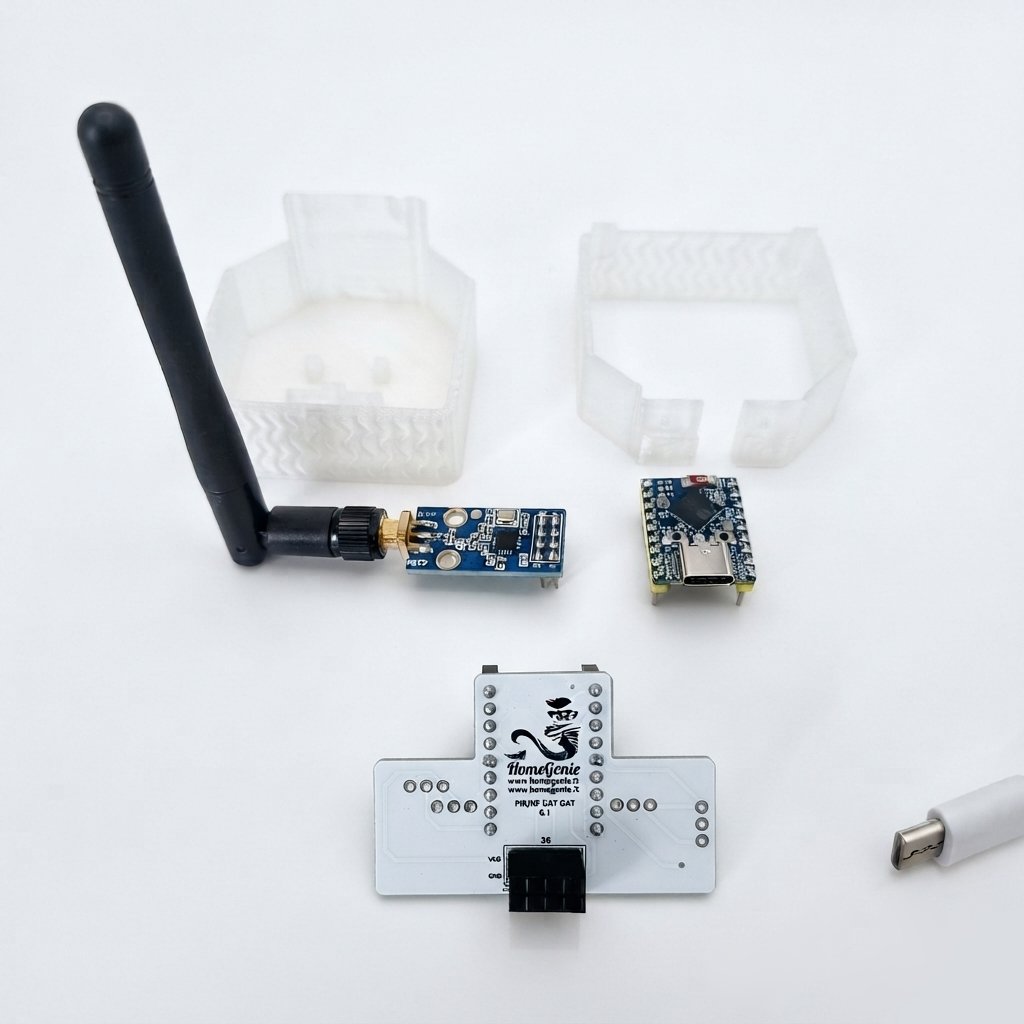
1. Components: ESP32-S3-Zero, TI CC1101 Sub-GHz module with antenna, Firefly PCB shield, and 3D-printed enclosure
All four components are standard, widely produced electronic modules that cost very little. They are readily available on major marketplaces (such as AliExpress, Amazon, or eBay) and can be snapped together in less than 5 minutes—making it an accessible, rewarding build for anyone.
In short, to build your own Firefly gateway, simply get these four modules and plug them into the Firefly board. You can get this board (PCB) and its enclosure by ordering them from online fabrication services like JLCPCB or PCBWay using the open-source Gerber and 3D print files provided below.
With the Firefly gateway and the HomeGenie Panel app, you can easily capture commands sent by your existing remote controls and wireless sensors. Once recorded, these sequences can be replayed on demand or scheduled automatically using the built-in Scheduler, without writing a single line of code.
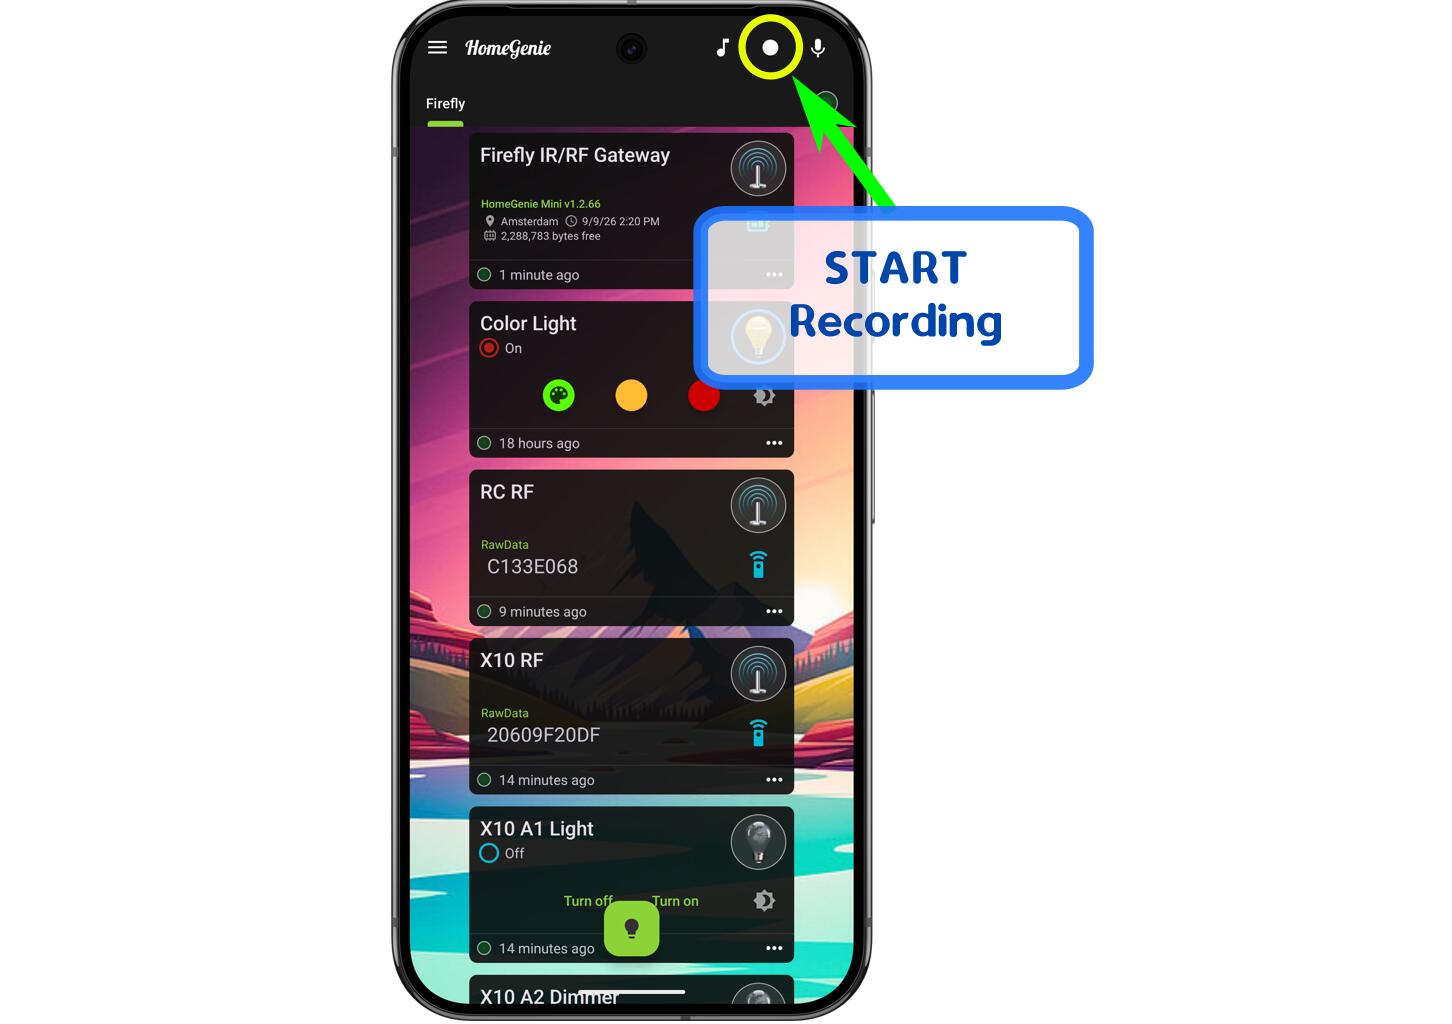
fiber_manual_recordStart Recording: Open the HomeGenie Panel app and tap the Record Script icon in the upper-right corner. A status bar will appear at the bottom with a blinking timer showing 00:00.000, which stays on hold until the first signal is received, so you can take your time without rushing.
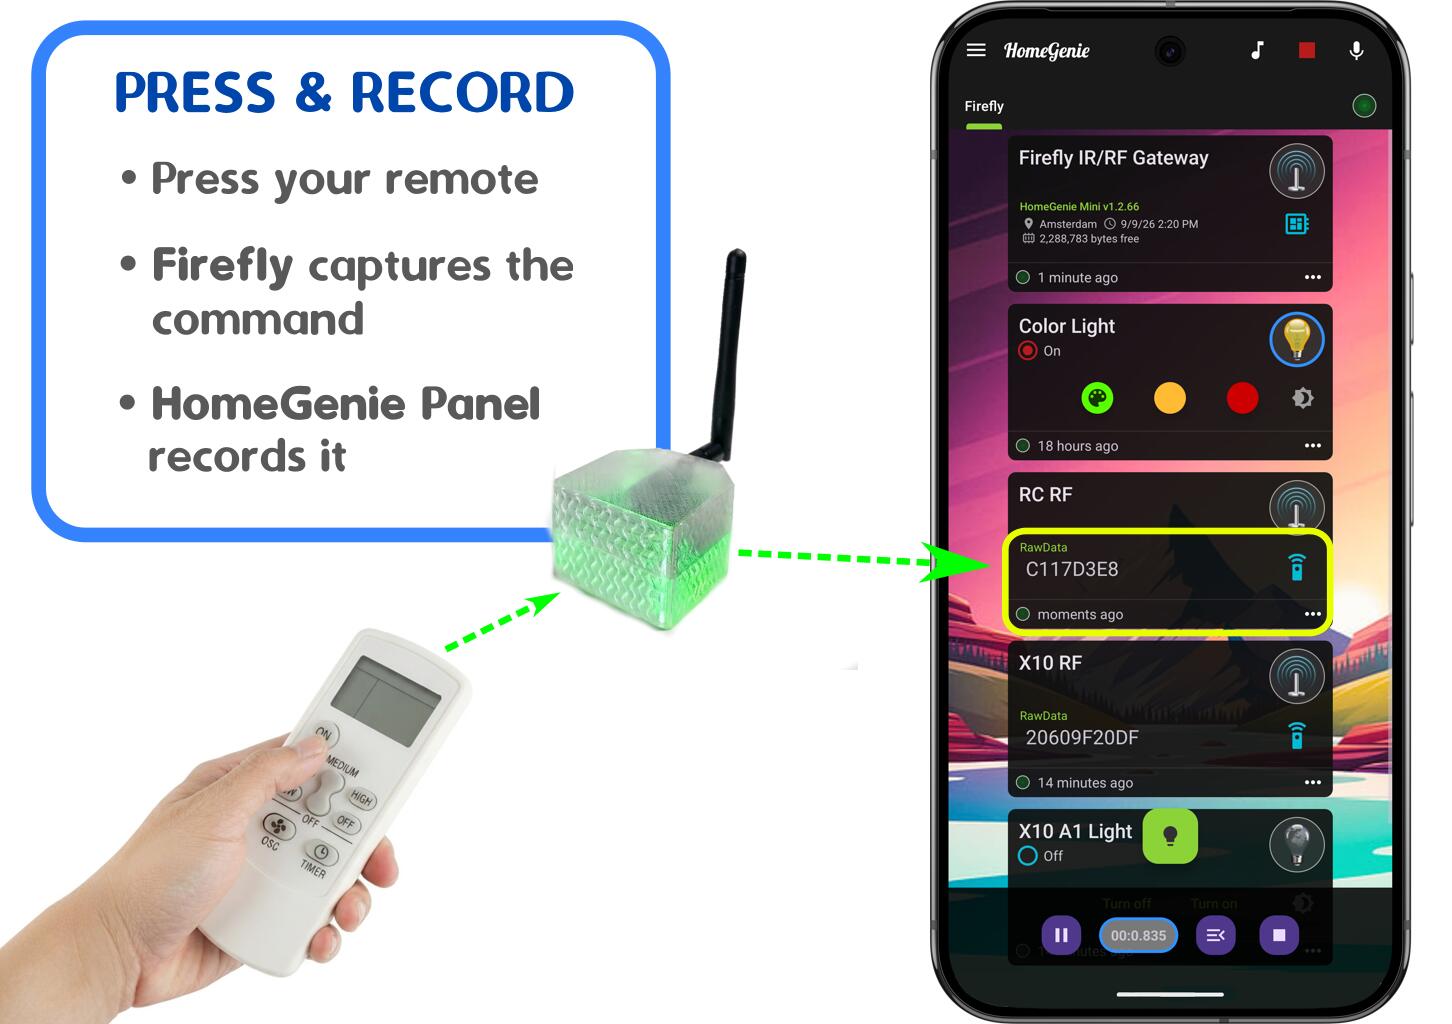
tv_remotePress Remote Buttons: Aim your IR or RF remote at Firefly and press the buttons you want to record. You can combine commands from multiple remotes into the same sequence, and the recorder will faithfully preserve the exact pauses and timing intervals between button presses for authentic replay.
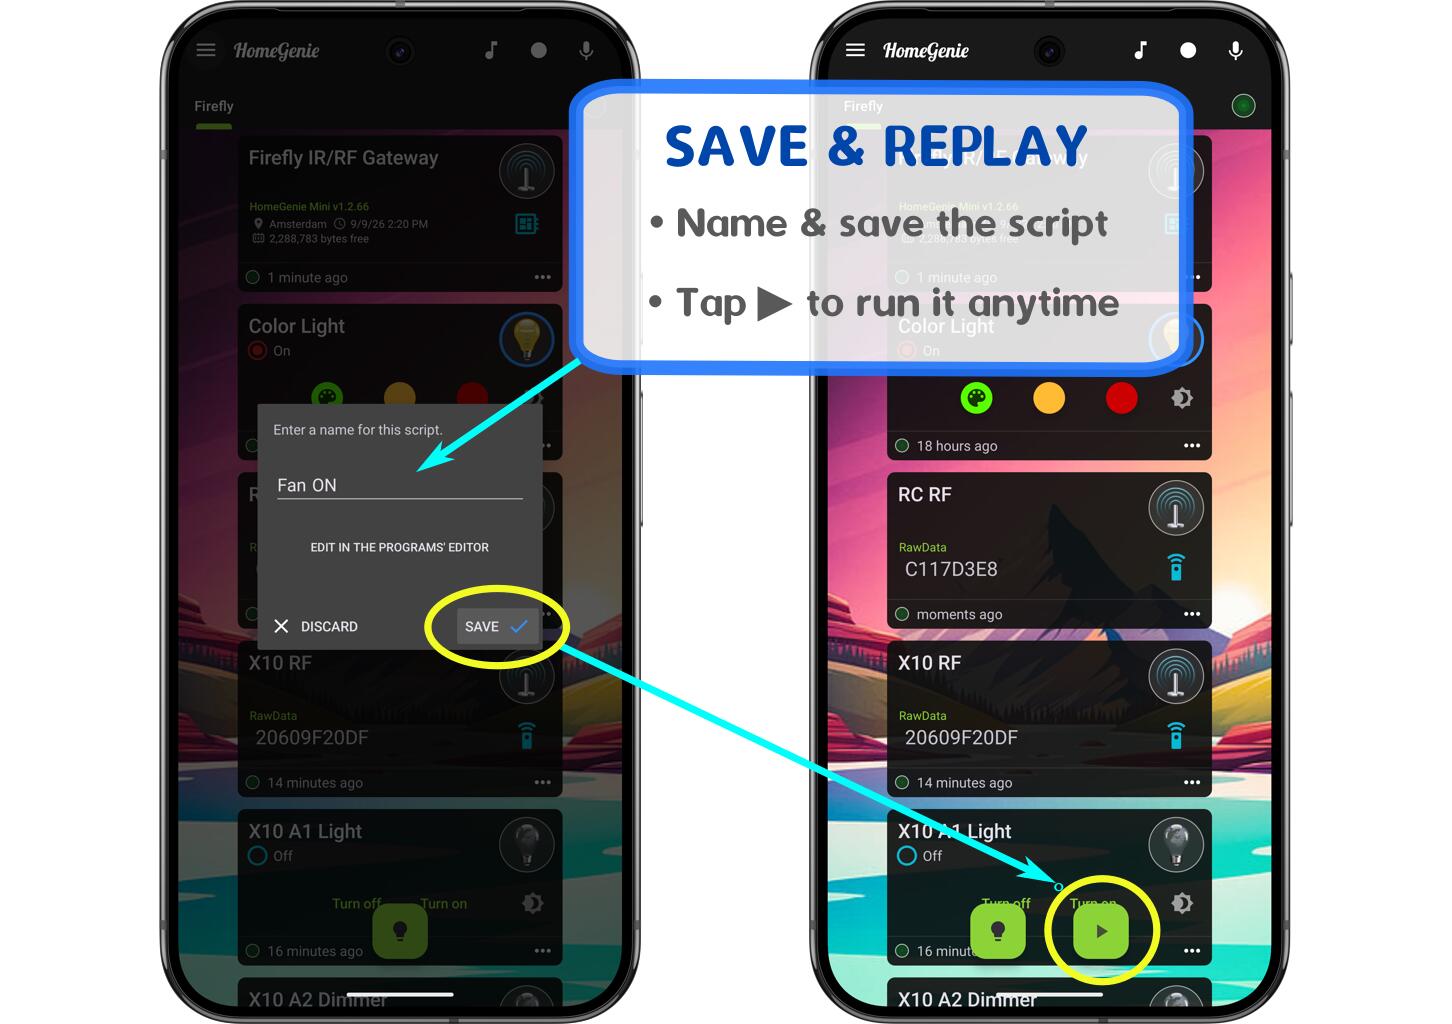
stopSave the Script: Tap the Stop button on the bottom bar, enter a descriptive name for your new routine (e.g., "Fan ON" or "Movie Time"), and confirm with Save.
play_arrowReplay Anytime: Tap the Play button at the bottom of the screen to open the saved programs list, then tap the play icon next to your routine (e.g., "Fan ON") to have Firefly instantly transmit the command to your appliance.
You can use this exact same workflow to automate and control virtually any IR or RF device in your home:
🚪 Gates & Garage Doors: Open driveway gates and garage doors directly from your smartphone.
❄️ Climate & Water Heaters: Trigger water heaters on RF sockets or pre-cool rooms with your AC.
📺 TV & Entertainment: Power on TVs, soundbars, receivers, and motorized projector screens.
🪟 Blinds & Awnings: Control motorized roller shutters, sun shades, and garden awnings.
HomeGenie Panel lets you connect as many Firefly devices as you need. Since they can all be accessed securely over the Internet, you can effortlessly manage multiple appliances across different rooms and locations using a single app!
Smart Climate & Seasonal Schedules
The Firefly gateway comes with a powerful built-in scheduler that lets you automate appliances completely locally, without relying on third-party cloud subscriptions or internet connectivity:
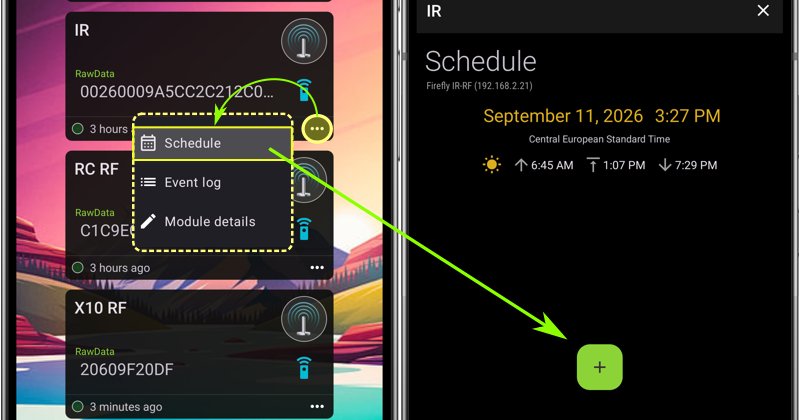
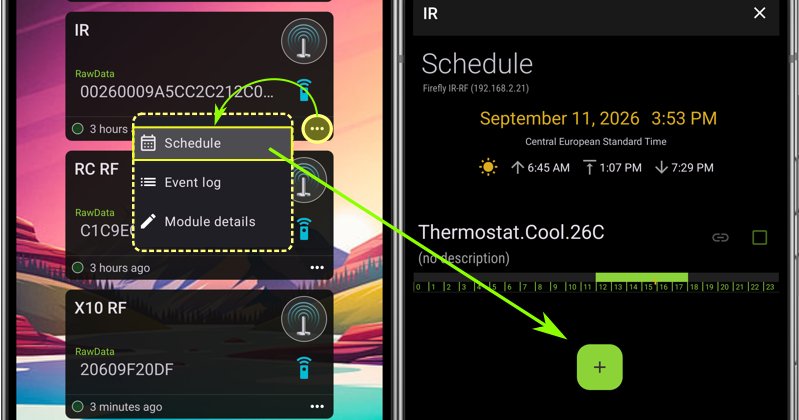
calendar_add_onOpen Module Schedule: Tap the options menu (⋯) on the IR or the RF widget, select Schedule, and tap the Add (+) button to create a new automated rule.
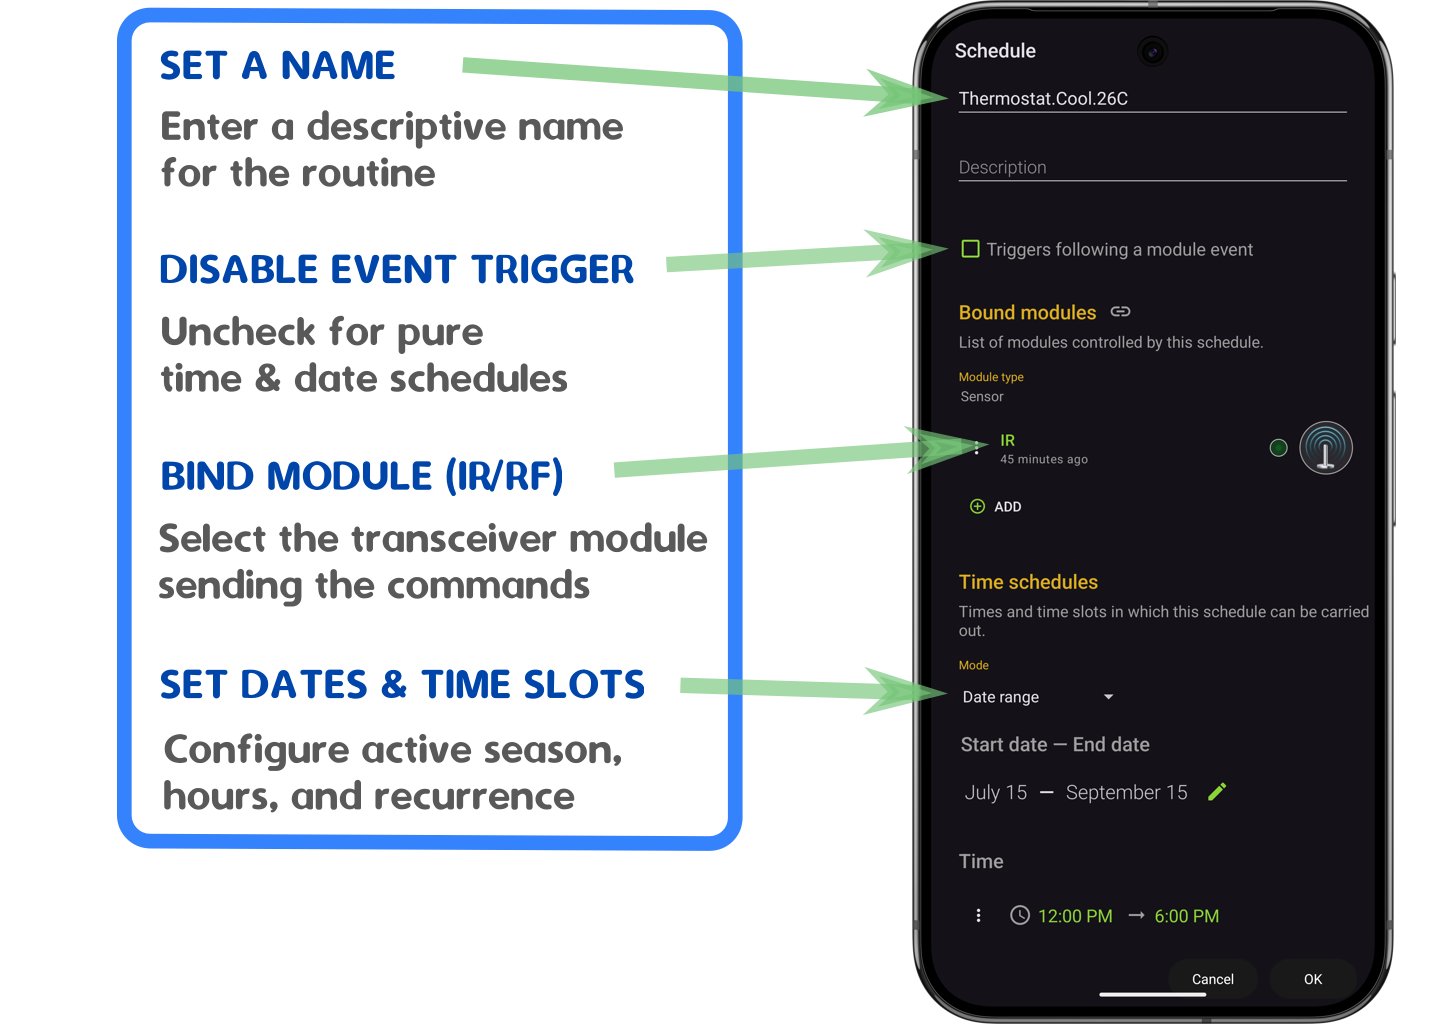
date_rangeSet Name, Target Module, and Timeframe: Enter a name for the schedule (e.g., "Summer AC Cooling"), uncheck "Triggers following a module event" to use calendar-based scheduling, and configure the following parameters:
Bound Modules: Ensure the correct transceiver module (IR or RF) is selected under Bound modules. The Firefly device needs to know which hardware module will dispatch the commands.
Date Range: Select the active season (e.g., July 15 — September 15).
Active Hours: Set the operational timeframe (e.g., 12:00 PM → 6:00 PM).
Repeat: Choose the active days (e.g., Every day or Weekdays only).
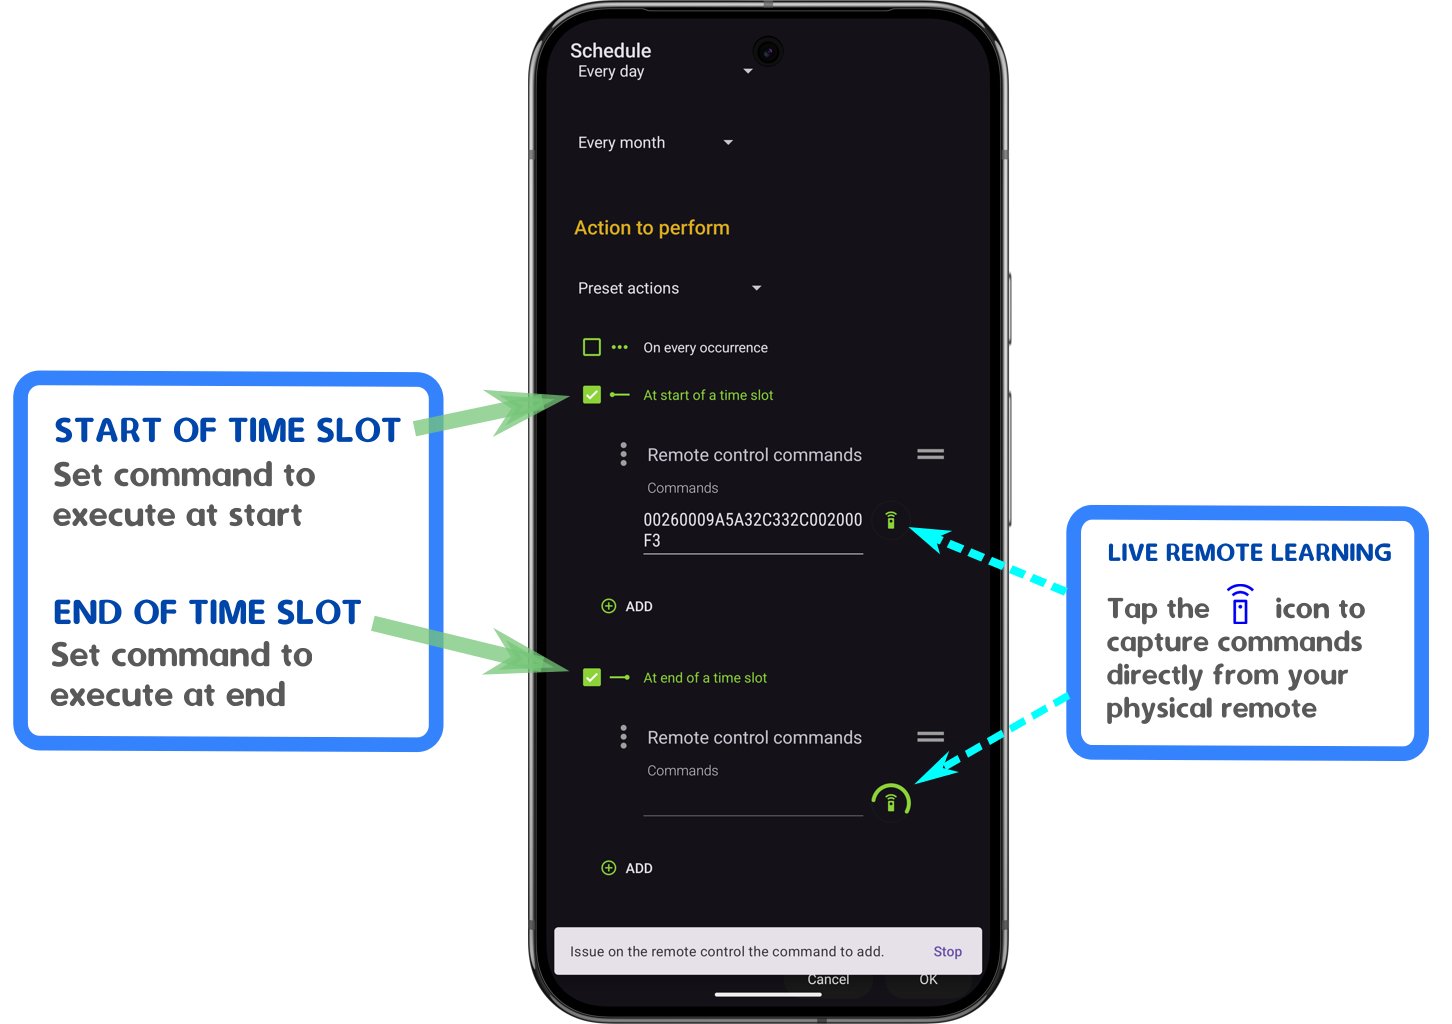
settings_remoteConfigure Start & End Actions: Define the commands executed at the beginning and end of each time slot:
At start of a time slot: Check the box, select Remote control commands, and provide the target command string for turning on the AC at the desired temperature and mode (e.g., 26C Cool). The easiest way to do this is to tap the green remote icon to capture the command live directly from your physical remote.
At end of a time slot: Check the box and follow the same steps to assign the AC OFF command.
Multi-Command Sequences & Syntax: You can enter multiple commands (one per line). Each line supports an optional repeat and delay syntax using the format: <hex_code>/<repeat_count>/<repeat_delay_ms> Example: 00260009A5A3.../3/100 sends the code 3 times with a 100 ms interval between bursts (defaults are 1 repeat and 1 ms delay if omitted).
check_circleSave and Activate: Tap OK to save. The Firefly gateway will now run the routine autonomously on the device, ensuring your home stays comfortable while saving energy.
Event-Driven Automations
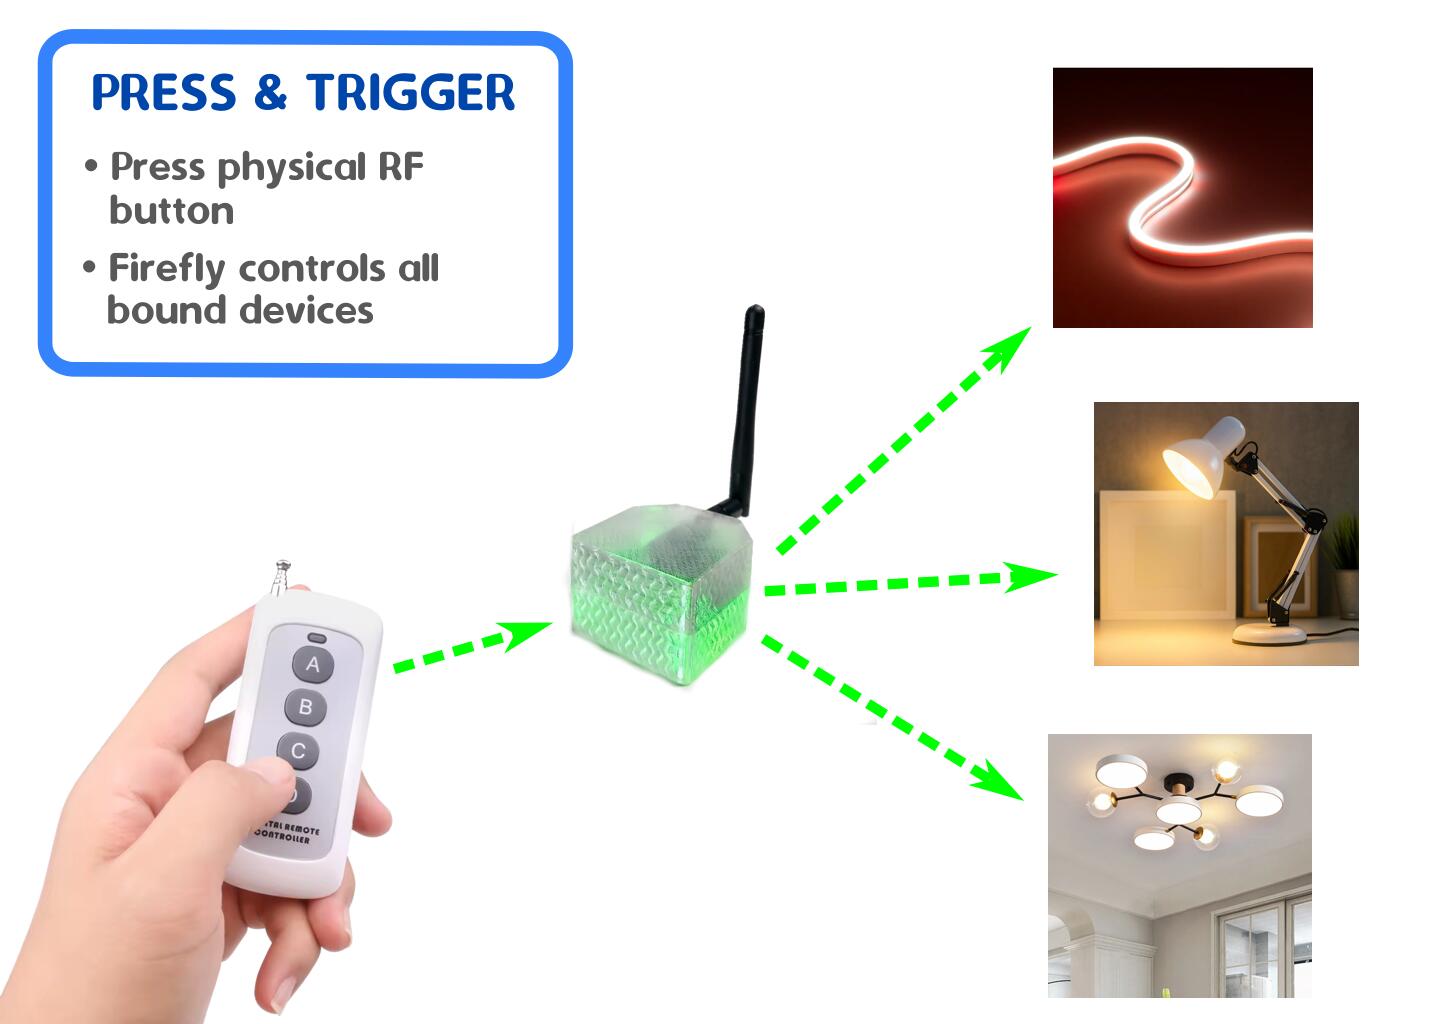
Besides time-based events, the built-in Firefly Scheduler can also trigger actions based on incoming IR and RF signals, such as toggling lights, relays, or scenes whenever a specific wireless button is pressed.
sensorsCapture the Signal: Press the physical remote button or wireless switch. Firefly intercepts the transmission and logs the unique packet under the "Receiver.RawData" property (e.g., C117D3E8).
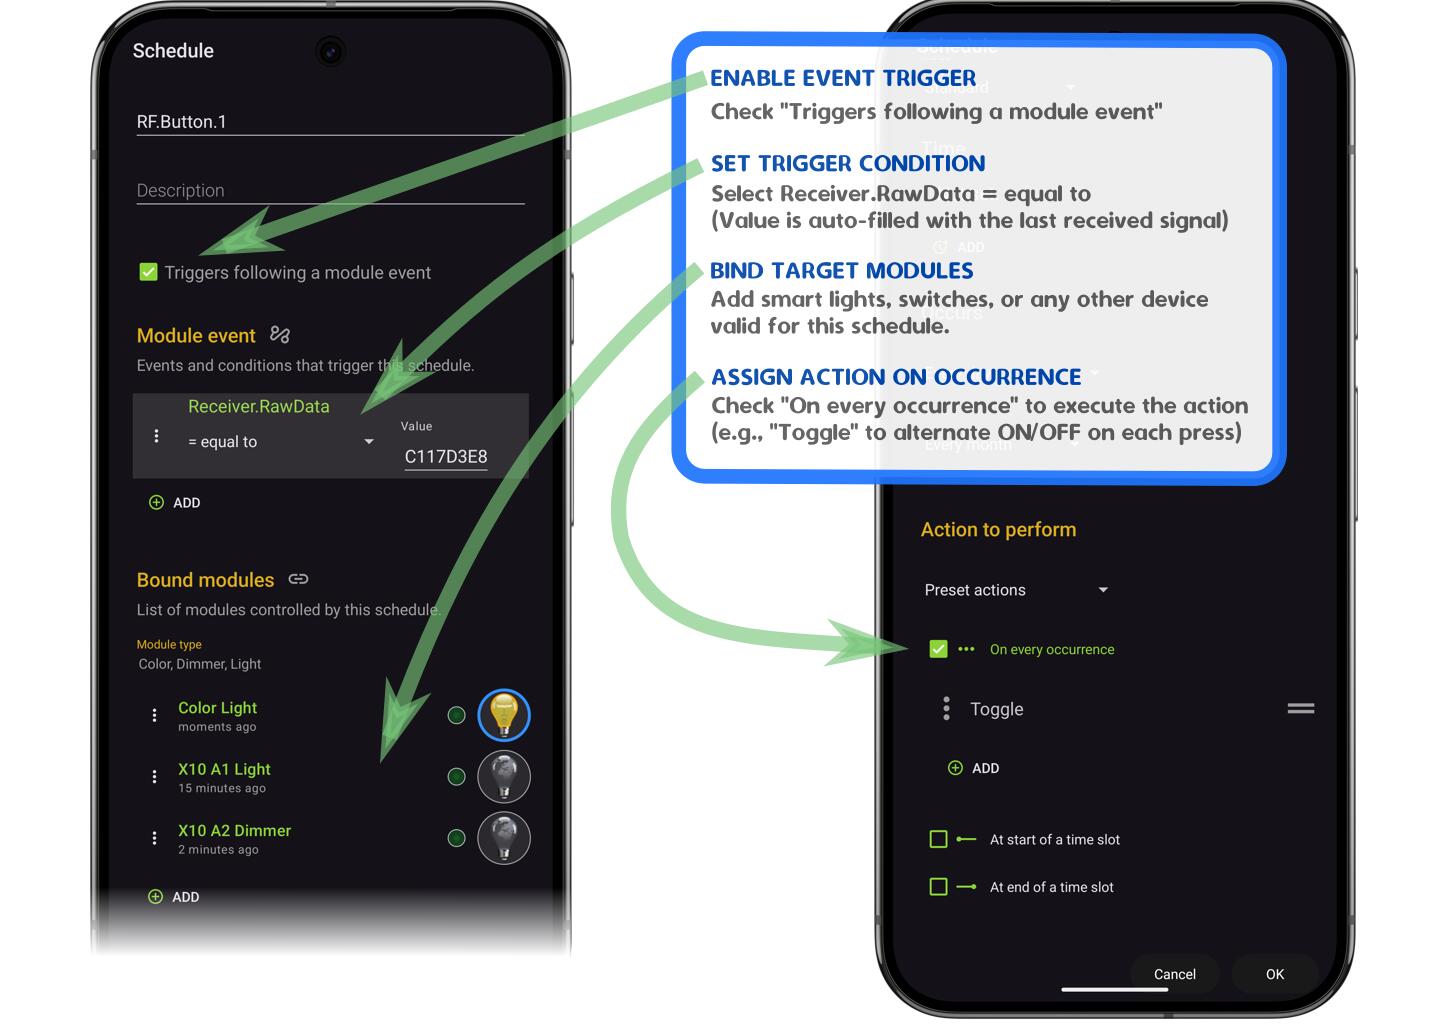
alt_routeCreate Event Trigger & Bind Devices: Access the menu of the widget (⋯) to open the schedule manager and tap the Add (+) button to create a new rule:
Enable Event Trigger: Check the box "It triggers following a module event".
Module Event: Add a condition using the "Receiver.RawData" property and the "= equal to" operator. The Value field is automatically pre-populated with the last captured signal (e.g., C117D3E8), though you can also edit or enter it manually.
Bound Modules: Add all target devices you want to control together (e.g., Color Light, X10 A1 Light, X10 A2 Dimmer). The list displays devices matching the categories configured under Module type; you can tap Module type at any time to select which device classes this schedule applies to.
toggle_onAssign Action on Occurrence: In the Action to perform section, check On every occurrence and select the command to execute:
Choose Toggle to alternate between ON and OFF on each incoming signal (or select Turn on, Turn off, Set color, Call HTTP URL, etc.).
check_circleSave and Verify: Tap OK to save the rule. Whenever Firefly detects that specific signal, it will immediately execute the assigned action on all bound modules locally.
Build Firefly
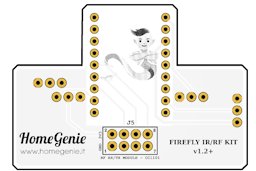
Use these files to order the PCB and enclosure from manufacturing services such as JLCPCB or PCBWay. You will also need to source and solder the 5 connectors required for the PCB (see BOM).
Connect your ESP32/ESP8266 microcontroller to your computer via USB, select your firmware version, and click "Create device" to upload the HomeGenie Mini firmware.
1. Select device type
2. Select firmware flavor
VERSION
3. Let the magic happen!
Installing firmware directly from this page works only in browsers with Web Serial API enabled.
⚠️ Having trouble uploading the firmware?
First, ensure that you do not have multiple ESP devices connected to your USB ports. Please connect only one device at a time.
If only one device is connected and the firmware uploader still fails to connect (or gets stuck at "Connecting..."), your device might need to be put into Boot Mode manually. (This is often required with development boards such as the classic ESP32-CAM).
START THIS PROCEDURE AFTER THE PORT SELECTION WINDOW APPEARS.
Unplug the device from the USB port.
Press and hold the RST and IO0 buttons.
Plug the device back into the USB port (while still pressing the buttons).
Release the buttons, then select the serial port from the list and confirm the upload.
Firefly exposes a clean REST API for seamless integration with third-party applications and custom scripts:
HTTP Examples:
# Send an IR signal (e.g. TV Power)curl"http://<device_ip>/api/HomeAutomation.HomeGenie/IR/Control.SendRaw/0000006D.../1/100"# Send a raw 433.92 MHz RF packetcurl"http://<device_ip>/api/HomeAutomation.HomeGenie/RF/Control.SendRaw/C133E068/10/100"# Turn ON X10 module A1curl"http://<device_ip>/api/HomeAutomation.X10/A1/Control.On"# Set Dimmer A2 to 50%curl"http://<device_ip>/api/HomeAutomation.X10/A2/Control.Level/50"
Source Code:
Pre-compiled binaries and source code are open-source on GitHub:


 PCB Gerber download REV. 3A (v1.2+)
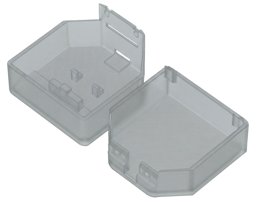 Enclosure 3MF download REV. 3A (v1.2+)