Open media
Bring intelligent vision to your projects with HomeGenie Mini firmware for ESP32 Camera. This open-source firmware transforms your ESP32 Camera module into a powerful, adaptable smart camera, seamlessly integrating with HomeGenie's advanced A.I. capabilities for unparalleled automation across diverse applications.
With HomeGenie Mini firmware, your ESP32 smart camera gains the following superpowers:
The following hardware configurations have been tested with HomeGenie Mini Smart Camera firmware. Tests were performed using maximum picture quality settings and JPEG output. Both tested boards utilized the same camera module, an OV3660 (3MP).
Test results are shown in the tables below.
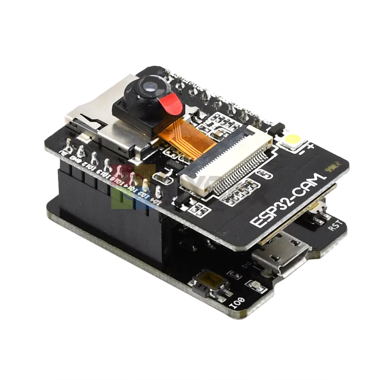
This board embed a ESP32S single core 160MHz chip with 4MB of PSRAM, enough to handle up to 5MP resolutions.
| Frame size | FPS max | Resolution |
|---|---|---|
| 480x320 | 14 | HVGA |
| 640x480 | 12 | VGA |
| 800x600 | 10 | SVGA |
| 1024x768 | 9 | XGA |
| 1280x720 | 8 | HD |
| 1280x1024 | 7 | SXGA |
| 1600x1200 | 5 | UXGA |
| 2048x1536 | 4 | QXGA |
Given these performance characteristics, the ESP32-CAM is now better suited for applications where moderate frame rates are acceptable. While smooth, real-time video is still limited, it's capable of event-triggered image capture, periodic video updates, and monitoring moderately dynamic environments. The ESP32-CAM remains an excellent choice for budget-constrained projects.
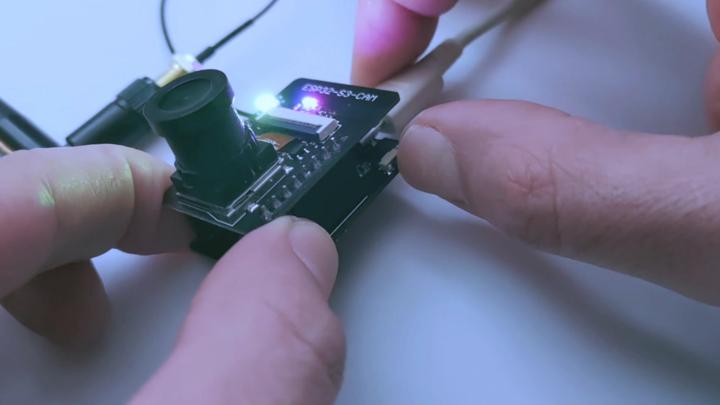
This board embeds an ESP32-S3 dual-core 240MHz chip with 8MB of PSRAM. At almost the same cost as the ESP32S-based model, this ESP32-S3-based board represents a significant upgrade in terms of processing power (dual-core vs single-core) and PSRAM (8MB vs 4MB).

| Frame size | FPS max | Resolution |
|---|---|---|
| 480x320 | 22 | HVGA |
| 640x480 | 20 | VGA |
| 800x600 | 18 | SVGA |
| 1024x768 | 15 | XGA |
| 1280x720 | 15 | HD |
| 1280x1024 | 12 | SXGA |
| 1600x1200 | 10 | UXGA |
| 2048x1536 | 7 | QXGA |
The ESP32-S3-CAM, with its significantly improved performance, opens up a wider range of possibilities.
In short, the ESP32-CAM is suitable for simple, low-bandwidth tasks, while the ESP32-S3-CAM is suitable for advanced use-cases that require better quality images or real-time analysis.
Like other ESP SoCs, both ESP CAM includes 2.4GHz Wi-Fi connectivity and also Bluetooth though only Wi-Fi is enabled in this firmware.
The HomeGenie Mini firmware leverages the ESP32 Camera's capabilities and unlocks its potential with HomeGenie's cutting-edge A.I. engine. By combining the camera's visual input with the processing power of HomeGenie, you can create truly intelligent solutions. This integration uses the latest advancements in A.I. and Machine Learning, including:
These A.I. functionalities are seamlessly integrated into HomeGenie's familiar control panel, allowing you to create complex automation rules with simple drag-and-drop interfaces, readily adaptable for any project.
To upload the HomeGenie firmware to your ESP device, connect the device to a USB port on your PC.
Configuration & Wi-Fi Setup:
Before starting the upload, customize your device settings in the form provided on the page (Output Modules, System GPIOs).
In the Wi-Fi Connection section, you can enter your SSID and Password.
Click the "Create device" button. On the subsequent screen, click "Continue", select the appropriate USB port from the list, and confirm your selection.
Wait for the firmware to be uploaded to your device.
After the upload completes, the device will restart.
Click the 'Initialize firmware' button on the upload form to finalize the setup.
If you left the Wi-Fi fields empty during the upload, the device LED will blink rapidly. You must configure the connection using one of these methods:
1. WPS Pairing (Easiest)
Press and hold the BOOT/IO0 button on the device for 4 seconds until the LED turns steady ON. Enable WPS mode on your router immediately. The connection may take several seconds. Once successfully connected, the LED will start to blink slowly.
2. Bluetooth or Serial
HomeGenie Mini devices can alternatively be connected via Bluetooth (using a smartphone) or a serial terminal.
(Note: The Bluetooth option is not available for ESP32-CAM firmware due to hardware limitations).
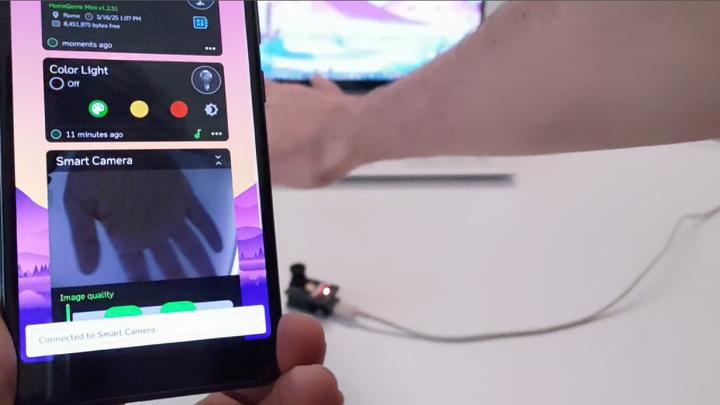
HomeGenie Panel app allows you to control the smart camera from your smartphone. To get started, open the HomeGenie Panel app, start the device discovery and then find and select your smart camera device from the list of available devices. Confirm device location and time settings and select all modules. The smart camera is now added to the panel dashboard.
By clicking the camera widget preview will open the full screen view of the smart camera. From there you can control the integrated RGB LED or take pictures. The widget also allows you to change video resolution and control various image settings including brightness, contrast, saturation and basic effects.
Clicking the status button on the toolbar allows you to check connected devices and enable MQTT Network for remote control and monitoring of the smart camera and other devices, giving you freedom to choose to use your own MQTT service or one of the public MQTT services, some of which are free and require no registration.
End-to-end encryption with offline key exchange is enabled by default for enhanced privacy and security of your data including video streams.
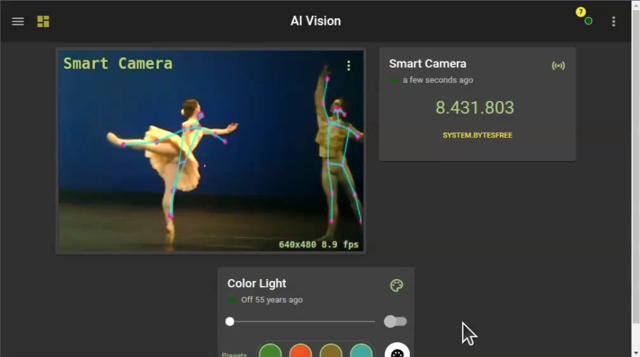
HomeGenie Server allows you to unlock the power of machine learning and AI on your ESP32 smart camera. With support for YOLO versions 8 through 26, HomeGenie Server delivers state-of-the-art, real-time object detection, even on resource-constrained ARM64 SBCs like the Raspberry Pi.
These versatile models enable a wide range of computer vision tasks, including object detection (identifying and locating objects), instance segmentation (detecting object boundaries), image classification (categorizing images), pose estimation (detecting and tracking keypoints on human bodies), and oriented object detection (OBB).
Best of all, HomeGenie Server includes the latest YOLOv26 pre-trained models for object detection and pose estimation, so you can start experimenting immediately!
Connect your ESP32/ESP8266 microcontroller to your computer via USB, select your firmware version, and click "Create device" to upload the HomeGenie Mini firmware.
Installing firmware directly from this page works only in browsers with Web Serial API enabled.
First, ensure that you do not have multiple ESP devices connected to your USB ports. Please connect only one device at a time.
If only one device is connected and the firmware uploader still fails to connect (or gets stuck at "Connecting..."), your device might need to be put into Boot Mode manually. (This is often required with development boards such as the classic ESP32-CAM).
START THIS PROCEDURE AFTER THE PORT SELECTION WINDOW APPEARS.See the Device setup page for further information about configuring a HomeGenie Mini device.
In addition to the common Device API, this device implements the following modules and API.
CAM moduleControls the camera sensor module.
HomeAutomation.HomeGenie/CAM
Sensor.ObjectDetectSensor.ObjectDetect.SubjectControls.BrightnessControls.ContrastControls.EffectControls.HMirrorControls.SaturationControls.VFlipImage.ResolutionImage.QualityCamera.GetPictureCamera.FileSaveHTTP API call (GET) to get current image:
GET /api/HomeAutomation.HomeGenie/CAM/Camera.GetPictureHTTP API call (PUT or POST) to set camera parameters:
PUT /api/HomeAutomation.HomeGenie/Config/Modules.ParameterSet/HomeAutomation.HomeGenie/CAM/
{
  "Image.Resolution": 8,         # 8 = 680x480
  "Image.Quality": 10,           # 10 = max quality
  "Controls.HMirror": "true"
}
The Image.Resolution parameter can be one of the following values:
2MP
| ID. | Resolution | Size W x H |
|---|---|---|
| 2 | QCIF | 176x144 |
| 3 | HQVGA | 240x176 |
| 5 | QVGA | 320x240 |
| 7 | HVGA | 480x320 |
| 8 | VGA | 640x480 |
| 9 | SVGA | 800x600 |
| 10 | XGA | 1024x768 |
| 11 | HD | 1280x720 |
| 12 | SXGA | 1280x1024 |
| 13 | UXGA | 1600x1200 |
3MP
| ID. | Resolution | Size W x H |
|---|---|---|
| 14 | FHD | 1920x1080 |
| 15 | P_HD | 720x1280 |
| 16 | P_3MP | 864x1536 |
| 17 | QXGA | 2048x1536 |
5MP
| ID. | Resolution | Size W x H |
|---|---|---|
| 18 | QHD | 2560x1440 |
| 19 | WQXGA | 2560x1600 |
| 20 | P_FHD | 1080x1920 |
| 21 | QSXGA | 2560x1920 |