HomeGenie Smart Light Teaser (1/2)
Open media
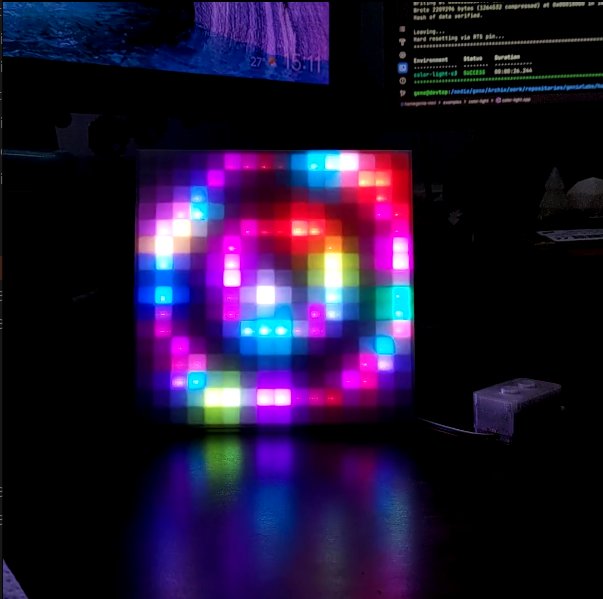
The HomeGenie Smart Light is a fully autonomous firmware designed to drive advanced, highly responsive 1D/2D addressable LED systems. Supporting both linear strips and high-density matrices up to 64x64 (4096 pixels) in any physical configuration, it operates natively as a standalone ambient light, a music-reactive visualizer, or a programmable pixel-art display.
The two videos below showcase the firmware running on a standard 16x16 LED matrix (256 pixels). The first video is a quick teaser showing the procedural Black Hole effect, while the second is a comprehensive showcase of several mathematical patterns synchronized in real-time to music.
You can explore the system's real-time rendering capabilities and custom scripting engine directly in your browser. Use the interactive LED Matrix Emulator below to preview procedural patterns, browse pre-built pixel art, and upload animations directly to your physical HomeGenie device.
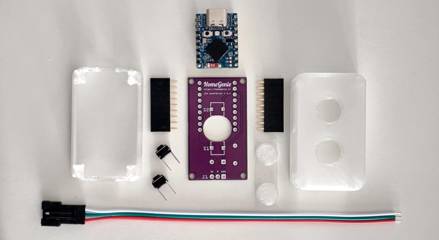
To make building your own device as simple as possible, this page introduces the LED Controller Kit: a quick-start DIY hardware project using readily available components you can find in any electronics store.
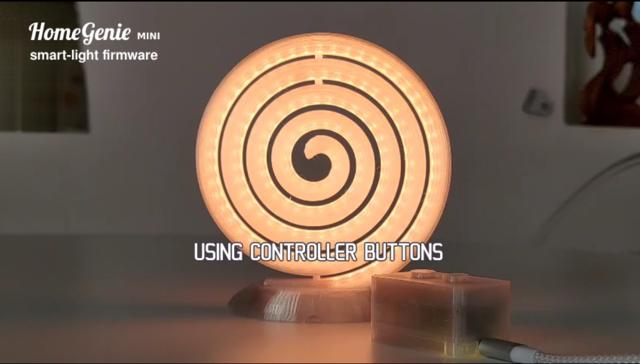
The video below demonstrates the HomeGenie DIY LED controller, providing a quick overview of its physical button controls.
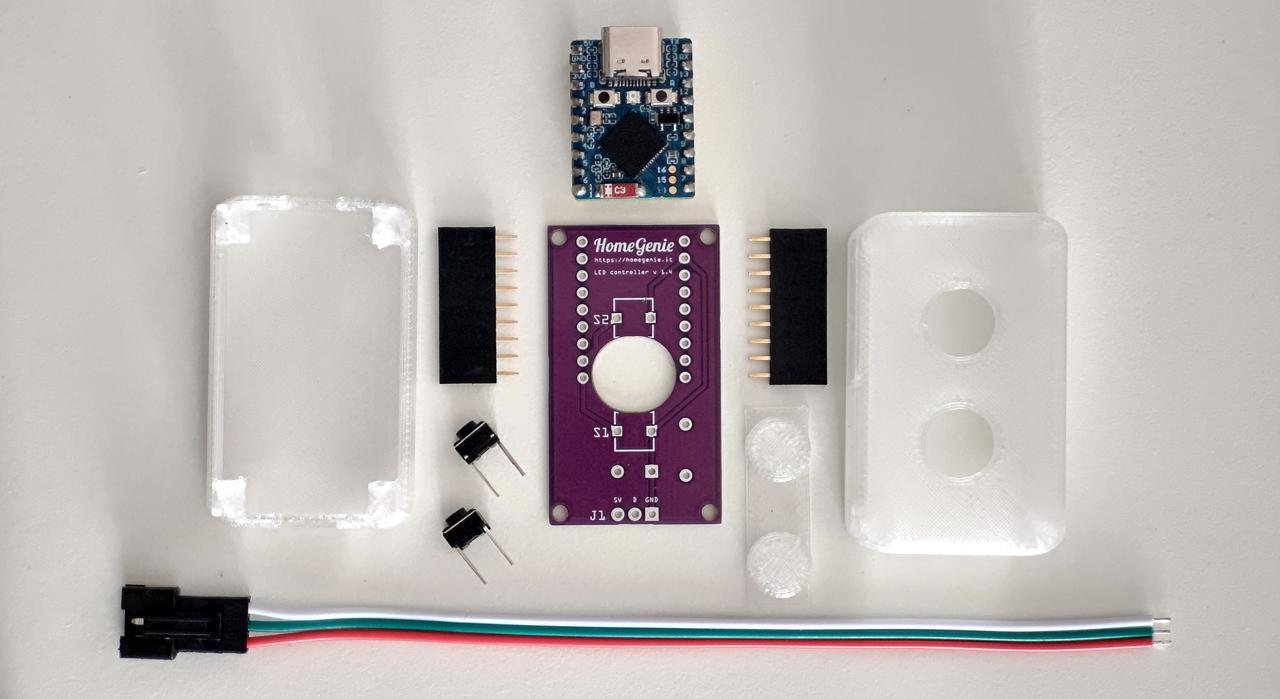
You can easily build your own DIY smart light using the HomeGenie Mini color-light firmware, combined with the custom-designed LED Controller Kit v1.5 and addressable RGB LEDs.
The project consists of three main components:
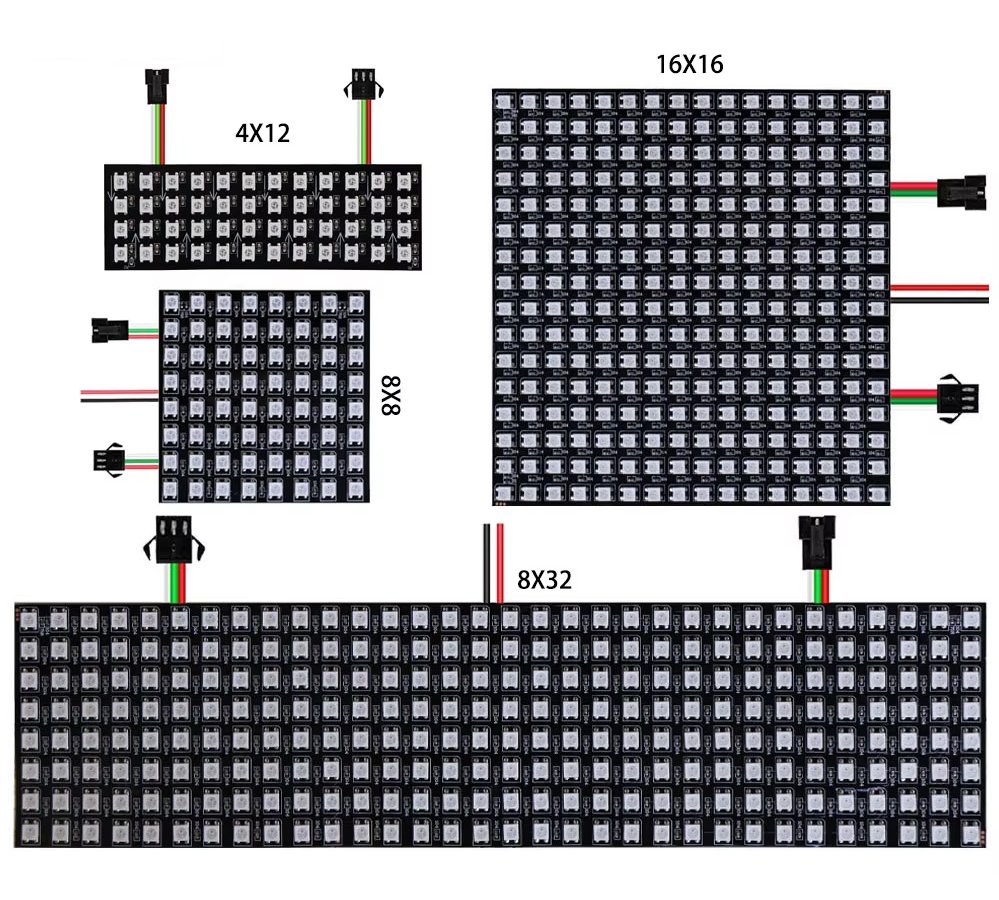
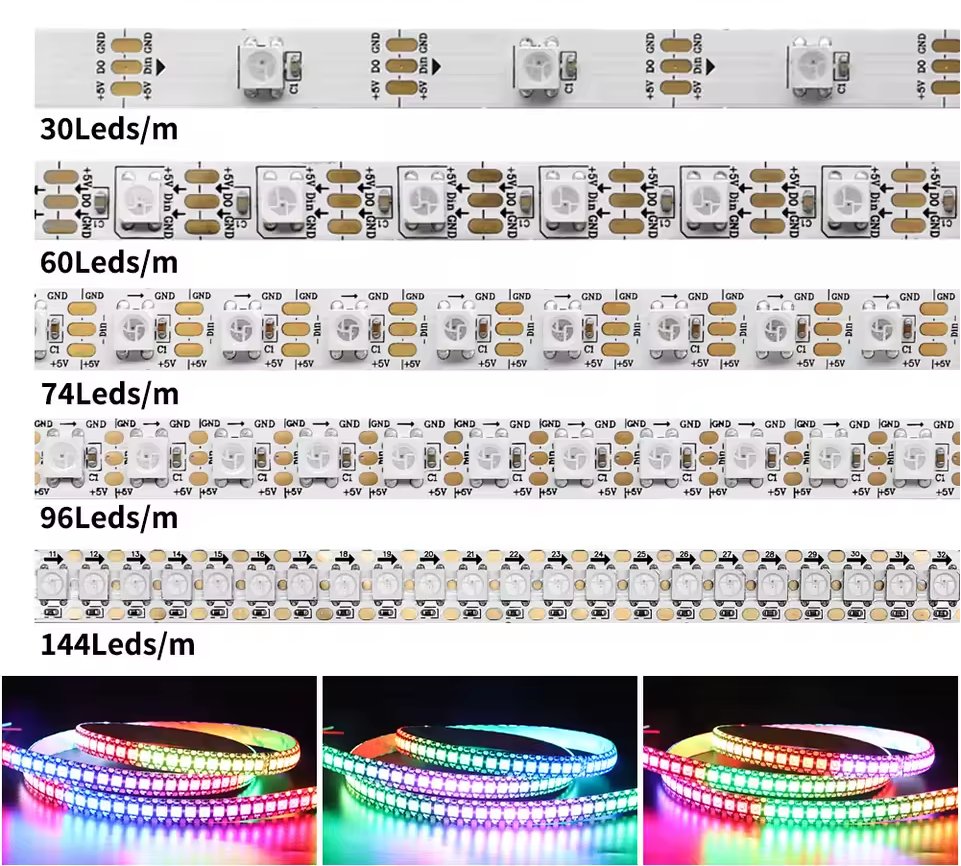
The HomeGenie controller is officially tested and optimized for WS2812B (5V) addressable LEDs. These are the most common, cost-effective, and widely supported digital RGB LEDs on the market.
WS2812B strips and matrices are easy to find online and at electronics hobbyist stores:
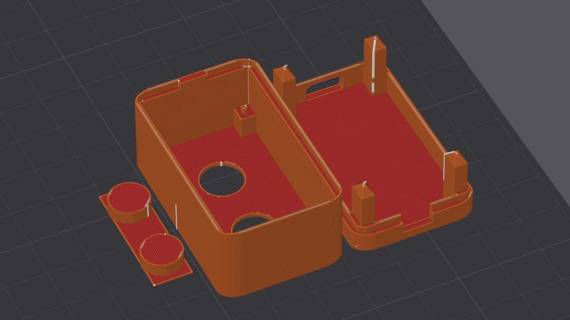
The final step in building your smart light is housing it in a 3D-printed enclosure or lamp body. A proper casing protects the electronics and diffuses the sharp light of individual LEDs into a soft, appealing glow.
You do not need to design a lamp from scratch. There are thousands of free, creative designs specifically made for WS2812B strips and 16x16 matrices.
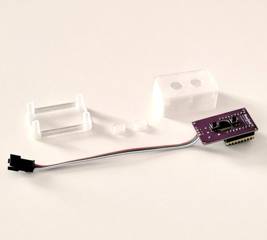
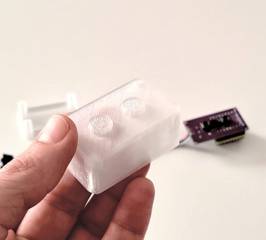
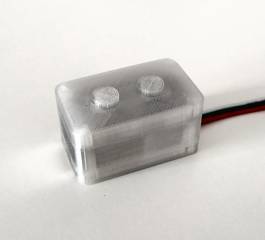
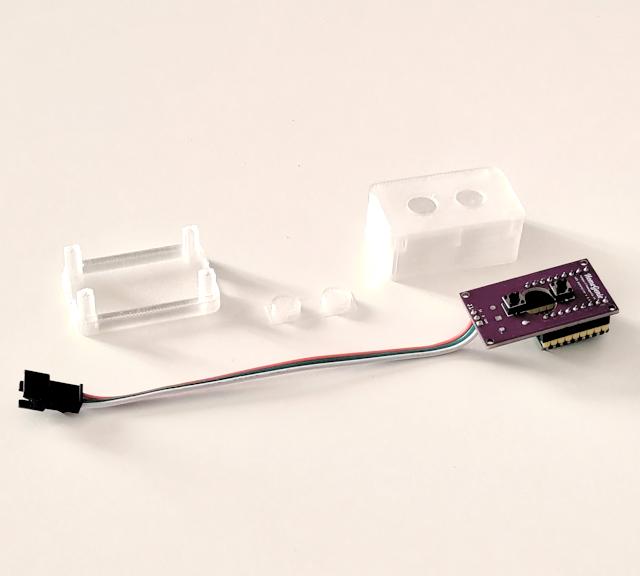
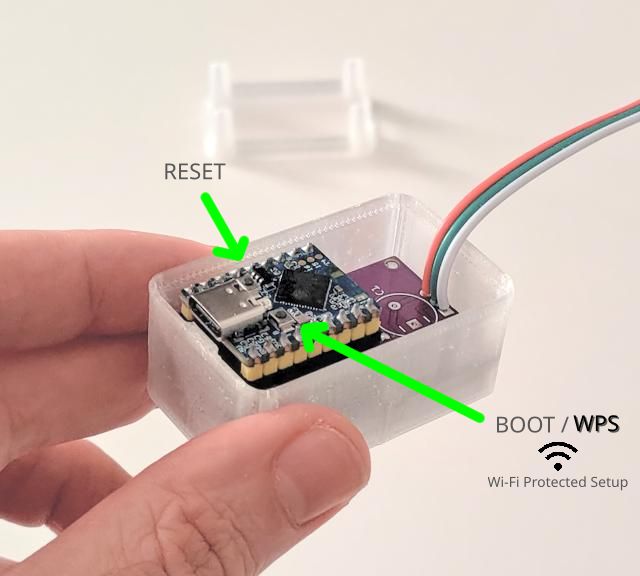
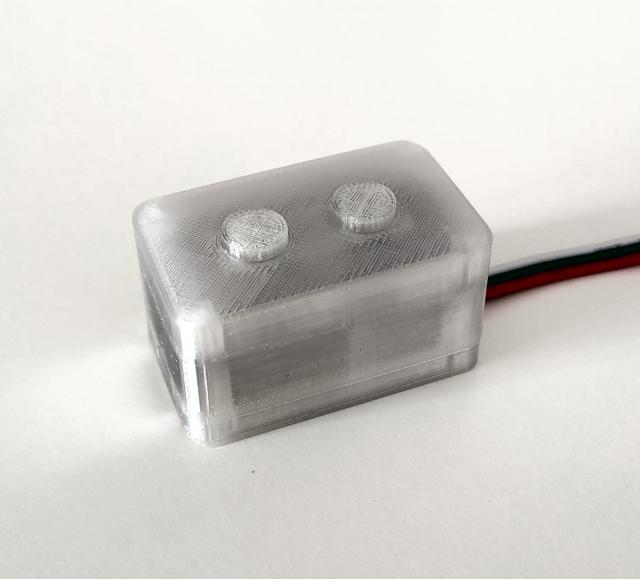
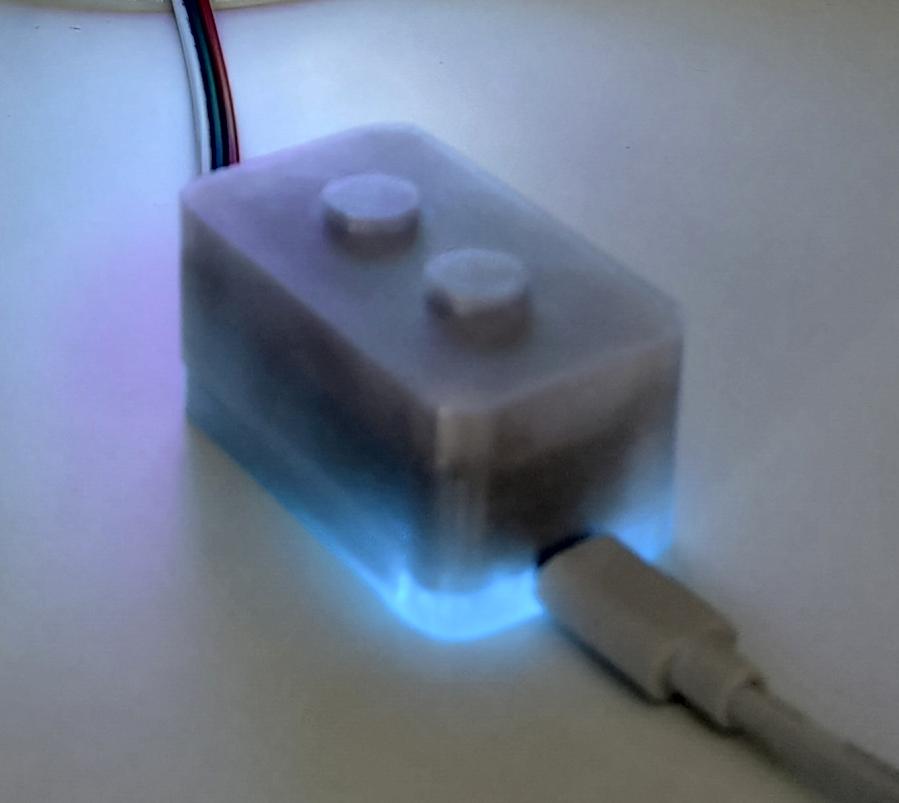
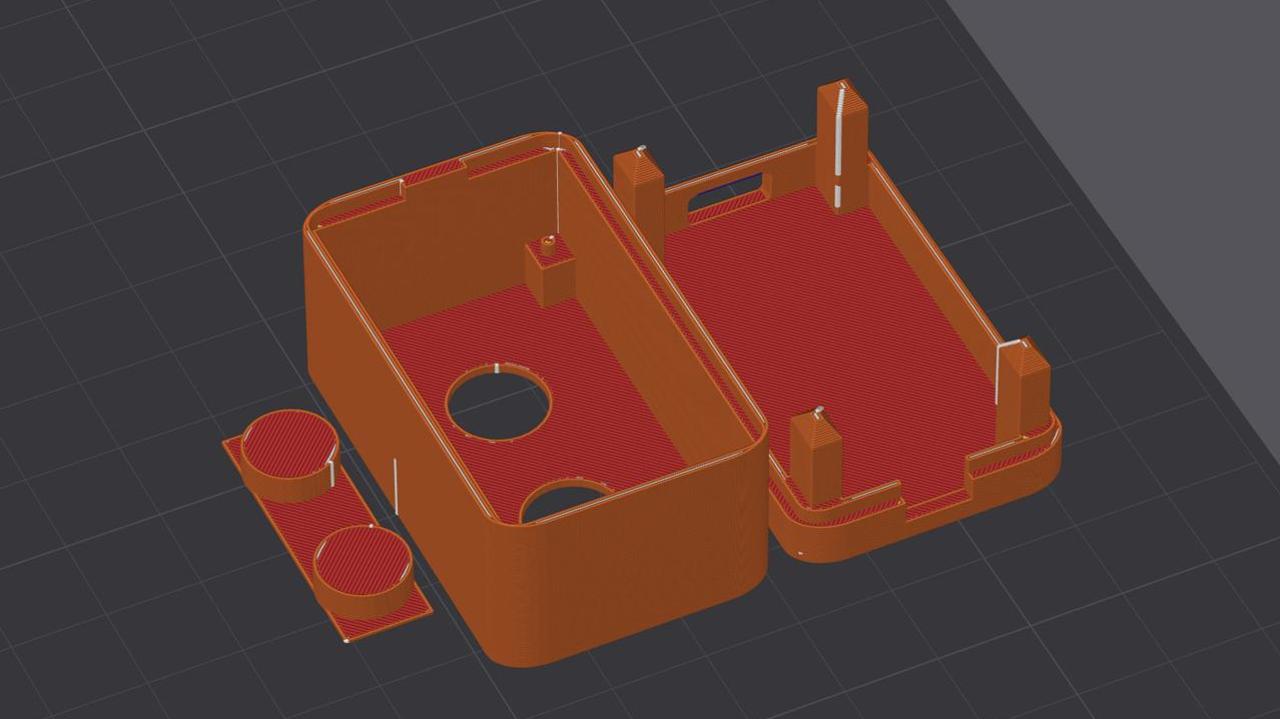
The LED controller kit consists of a custom PCB shield designed for the ESP32-C3/S3 Zero development board and a compact 3D-printed enclosure. The device can safely drive addressable WS2812x LEDs for a maximum power of 10-15W.
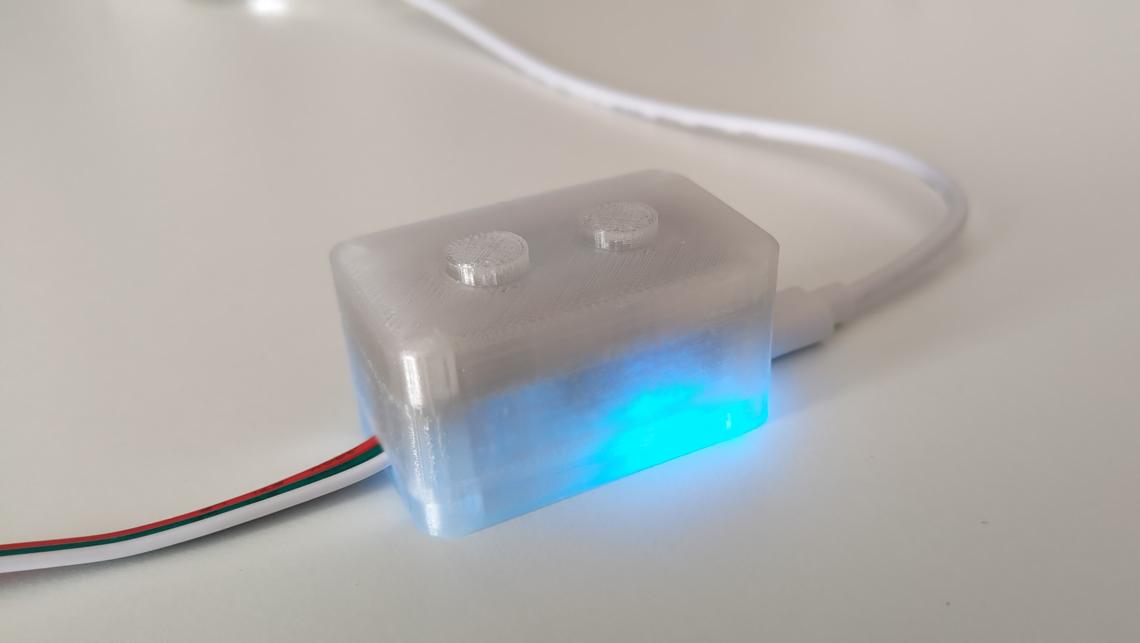
The translucent enclosure lets the onboard RGB status LED remain visible, creating a nice color/status feedback even before an external LED strip is plugged in.
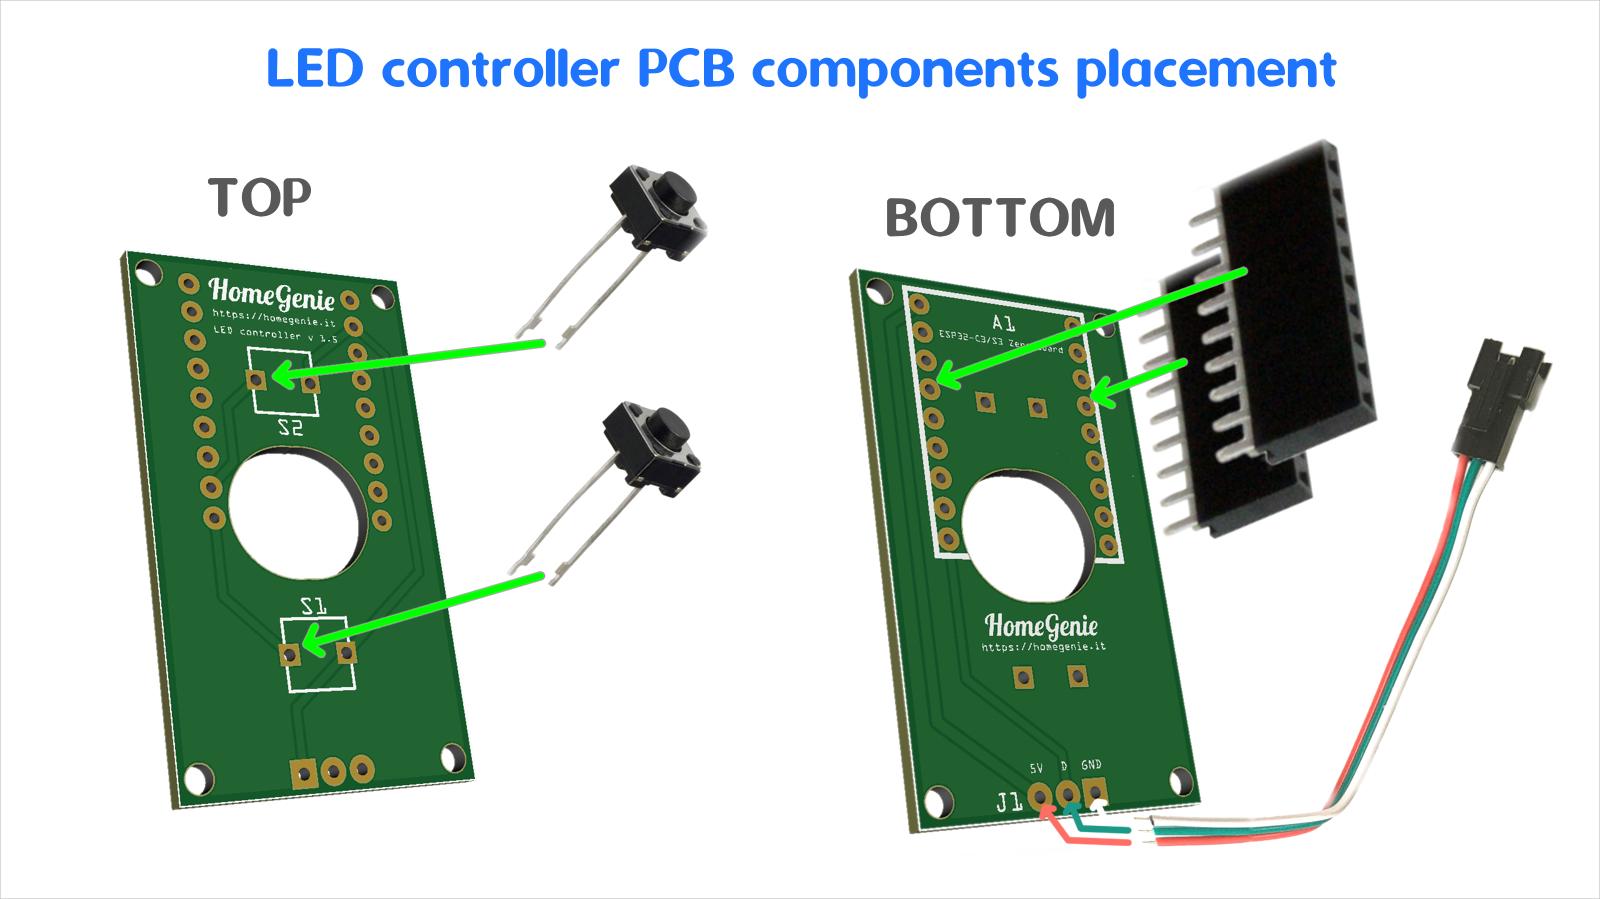
On the upper side of the PCB there are two buttons, while on the lower side there are the two 9-pin header connectors on which the ESP32 board is connected, and the JST connector cable to which the LED strip is connected.
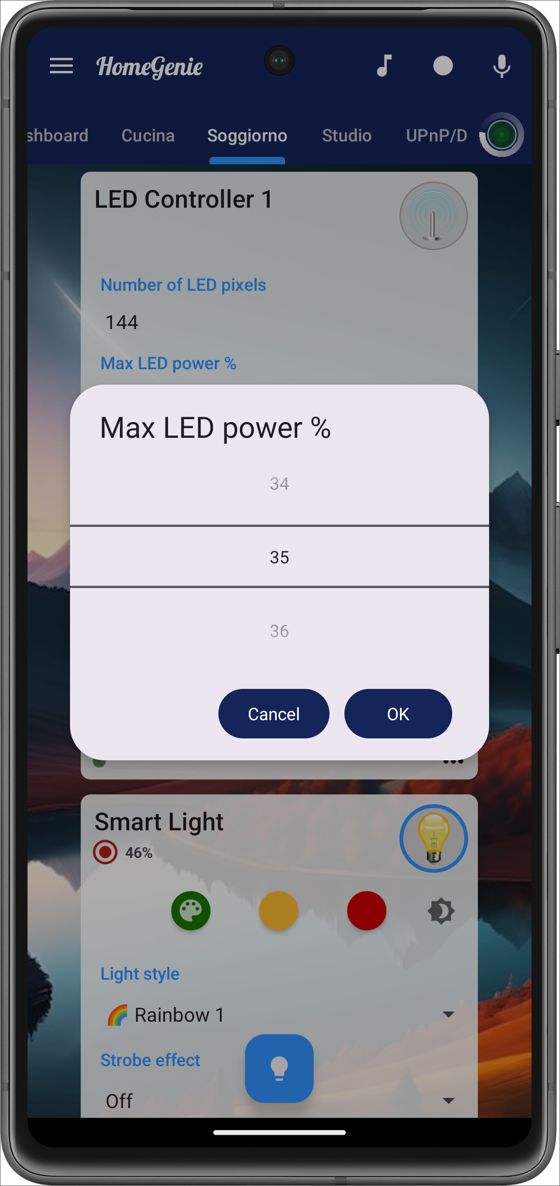
To protect your USB power supply and the controller itself, the firmware includes a configurable Max Power % limiter.
The DIY LED controller kit v1.5 is physically rated for a maximum current of 3A (3 Amps). When driving a high number of pixels (up to 4096), you must reduce the "Max Power %" setting to ensure the total current draw never exceeds this 3A threshold. To utilize more power (e.g., running massive matrix panels at full white brightness), different hardware capable of handling more than 3A is required.
The 16x16 matrix (256 pixels) used in the demonstration examples fits perfectly within these safety limits using standard USB power supplies.
Max LED power % formula:
<power_supply_ampere> / (<number_of_pixels> * <ampere_per_pixel>) * 100 = <max_ampere_perc>
Example: With a 2A power supply and a LED strip of 144 pixels (0.04A each), the limit should be set to 35%:
2 / (144 * 0.04) * 100 = 34.7%
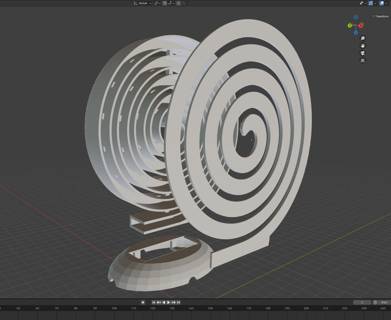
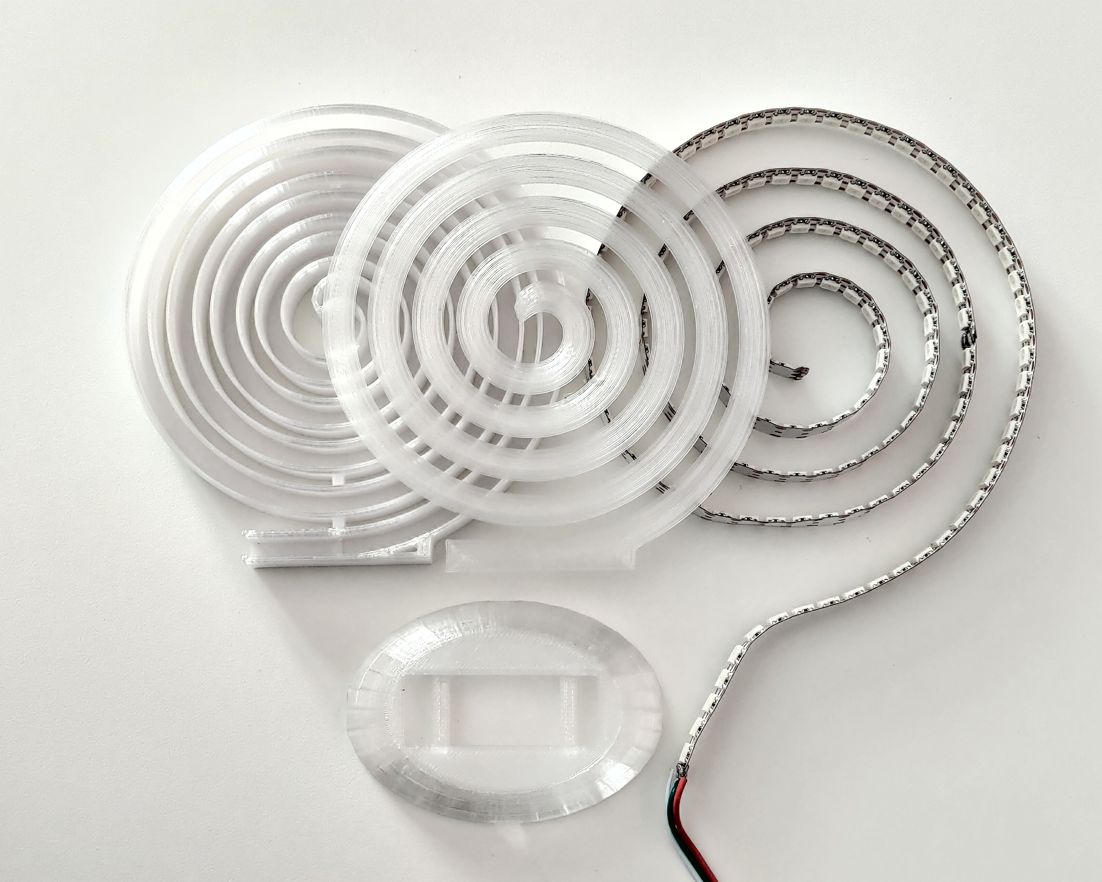
The enclosure can be printed in translucent PETG. It takes about 45 minutes on any standard 3D printer (e.g., Bambu Lab A1-mini) using a 0.4mm nozzle and a 0.16mm layer height.
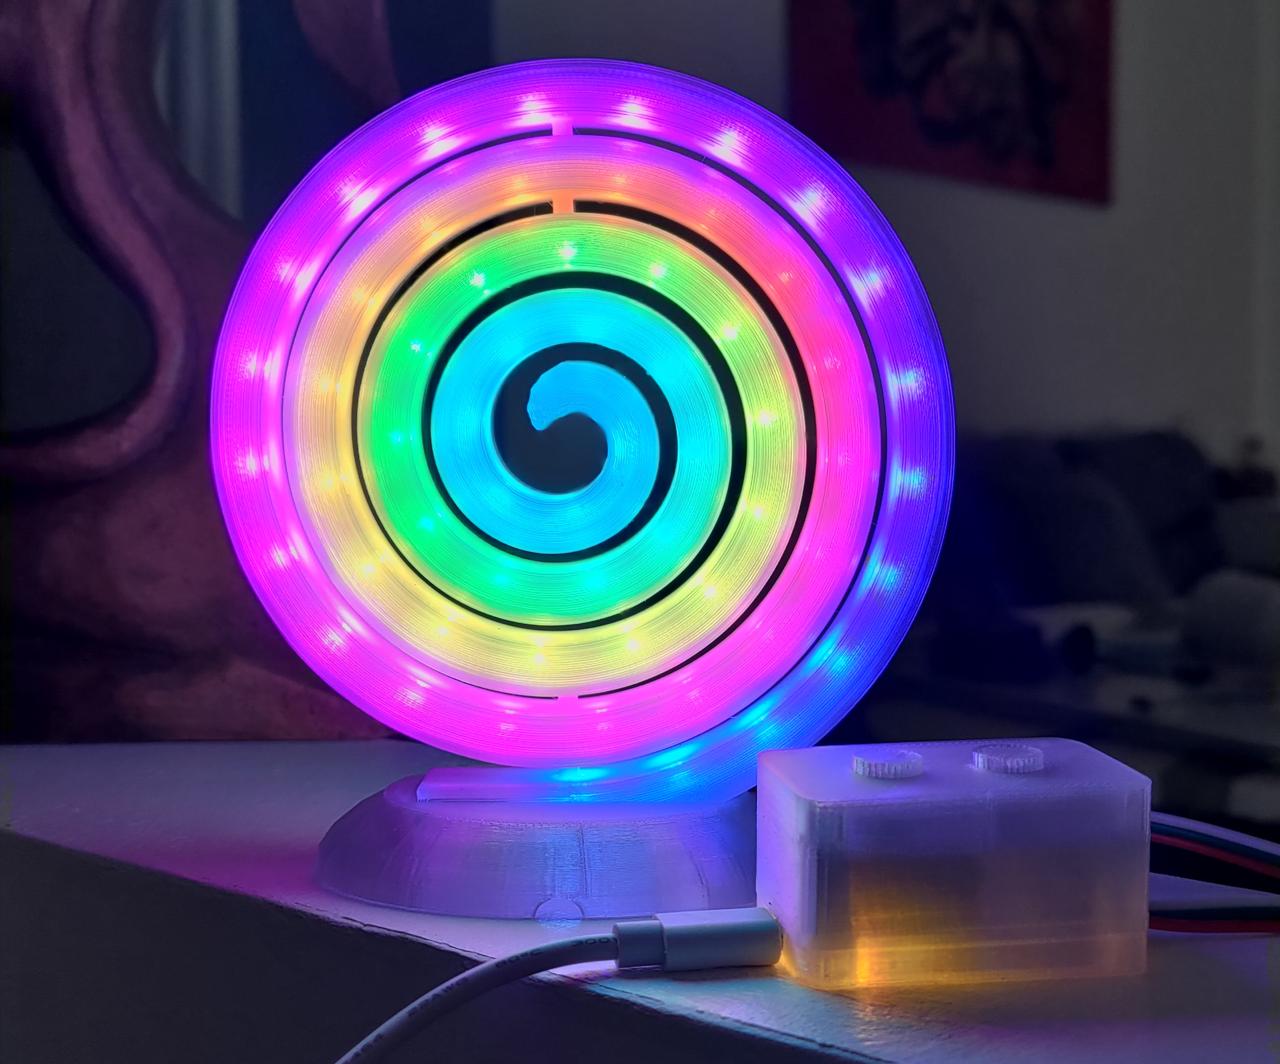
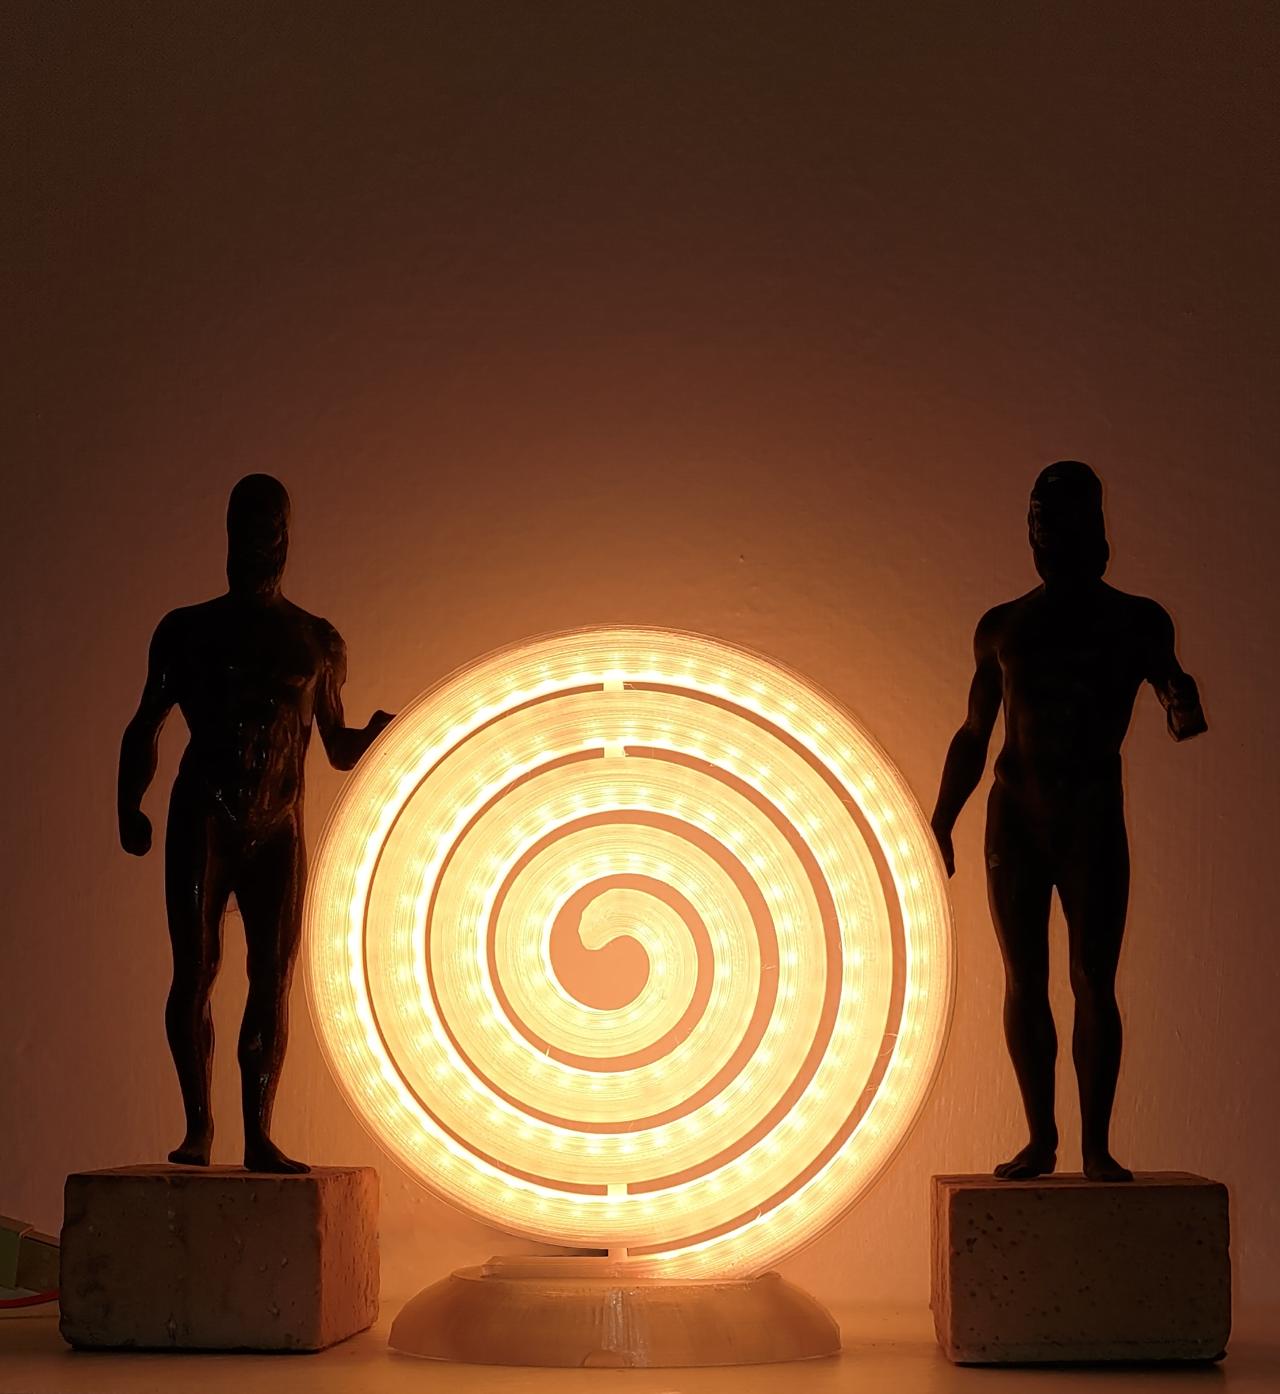
Archie is a custom 3D-printed casing for 1-meter LED strips, designed in the shape of an Archimedean spiral. The spiral is an ancient, cross-cultural symbol representing growth, natural cycles, and transformation.
Combined with the slow, non-blocking visual effects of the color-light firmware, Archie is perfect as a relaxing meditation lamp. It is also an excellent device to test in "Party Mode" using the HomeGenie Panel app while listening to your favorite ambient music.
Archie Mood Lamp is an original concept and design by G-Labs licensed under CC BY-NC 4.0![]()
![]()
![]()
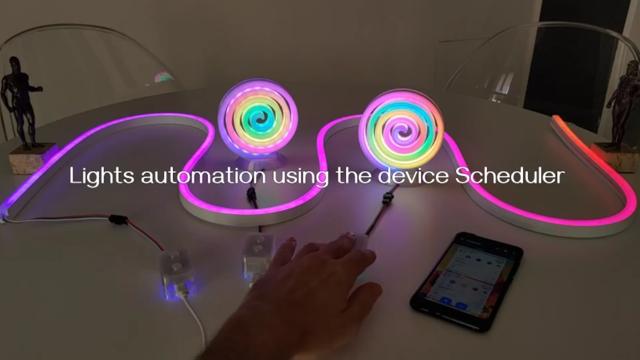
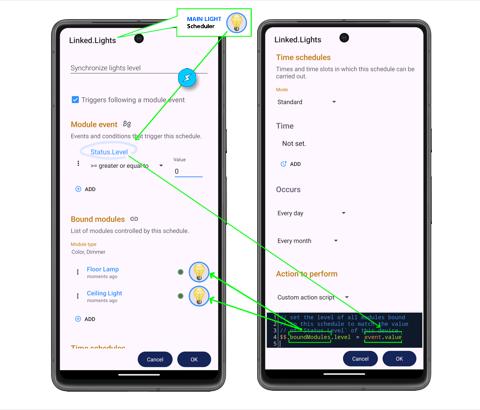
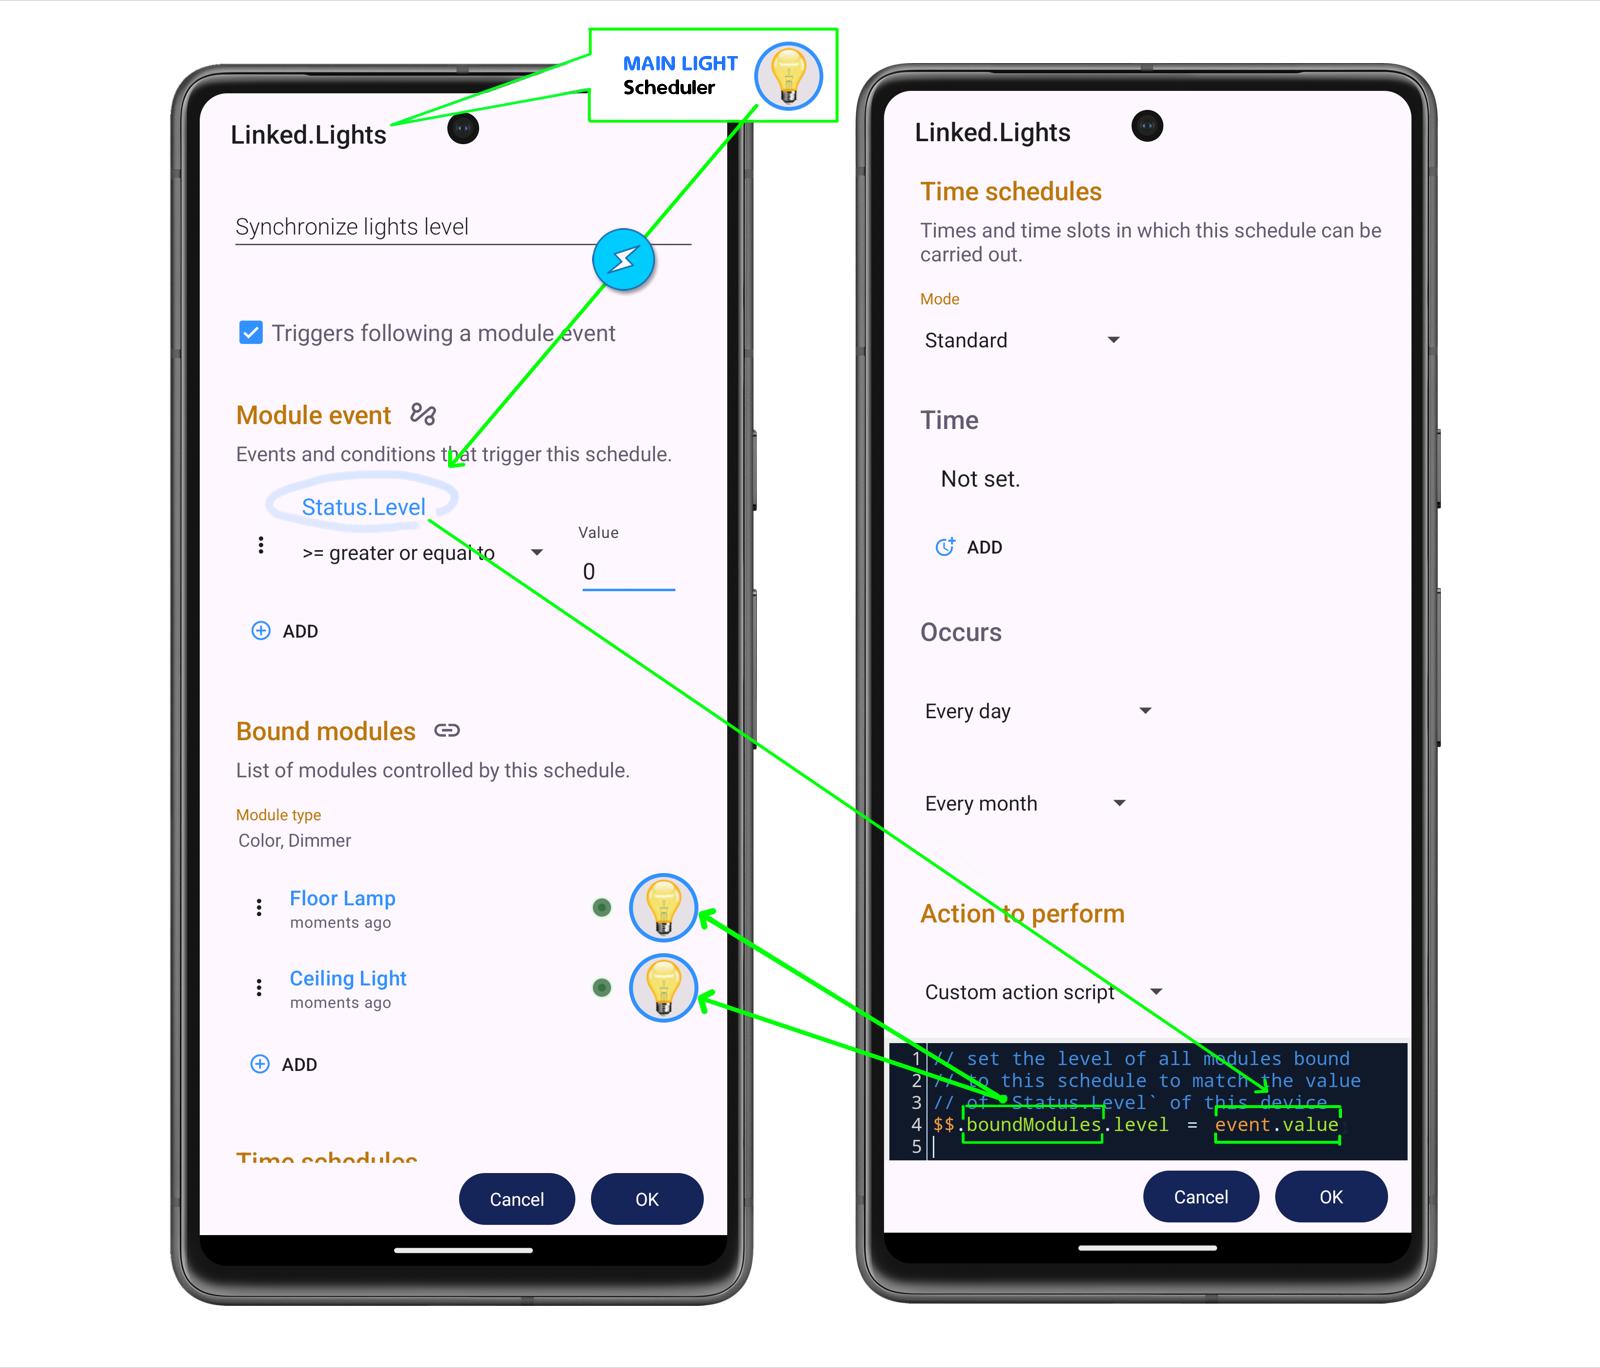
Every HomeGenie Mini device includes a built-in Scheduler capable of executing lightweight JavaScript code for customized automation.
You can link multiple devices to control them as a group. For example, adjusting the brightness of a "Main Light" can automatically synchronize the brightness of a "Floor Lamp" and a "Ceiling Light".
In the video below, we demonstrate a simple, zero-code group linking using two preset scheduler tasks.
Alternatively, you can implement a highly optimized, single-task solution using a custom JavaScript action. The script triggers whenever the master light level event occurs:
$$.boundModules.level = event.valueThe bound devices (boundModules) will automatically copy the master's active level (event.value) in real-time.
 PCB Gerber download REV. 19
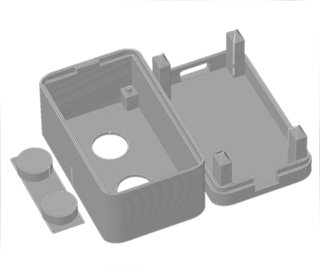 Enclosure 3MF download REV. 2
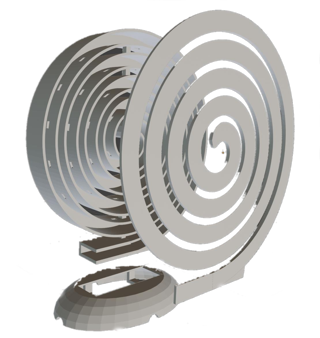 Download LED strip casing 3MF REV. 16
Smart Light project files by G-Labs licensed under CC BY-NC 4.0![]()
![]()
![]()
You can flash the pre-compiled firmware directly to your connected ESP board using the tool below. Select the appropriate target model (e.g., ESP32-C3 or ESP32-S3) and click Create device.
Connect your ESP32/ESP8266 microcontroller to your computer via USB, select your firmware version, and click "Create device" to upload the HomeGenie Mini firmware.
Installing firmware directly from this page works only in browsers with Web Serial API enabled.
First, ensure that you do not have multiple ESP devices connected to your USB ports. Please connect only one device at a time.
If only one device is connected and the firmware uploader still fails to connect (or gets stuck at "Connecting..."), your device might need to be put into Boot Mode manually. (This is often required with development boards such as the classic ESP32-CAM).
START THIS PROCEDURE AFTER THE PORT SELECTION WINDOW APPEARS.The complete source code and individual effect headers are available on GitHub:
In addition to the common Device API, the following modules and API endpoints are implemented by the color-light firmware.
C1 Module (Master Controller)This is the master module that controls all LED pixels simultaneously.
HomeAutomation.HomeGenie/C1
Status.Level (Current master brightness level, 0.0 to 1.0. For matrix styles, this dynamically scales the maximum height of the equalizers/waves).Status.ColorHsb (Current master color in HSV format. In music modes, H maps to high frequencies/notes, S maps to mid-frequencies, and V maps to bass/volume).Control.On (Turns all LEDs on to the previous state)Control.Off (Turns all LEDs off)Control.Toggle (Toggles the power state of the LEDs)Control.Level/<level>/<transition_ms> (Sets the master brightness level 0-100)Control.ColorHsb/<h>,<s>,<b>,<transition_ms> (Sets the master color. Hue and Saturation are values from 0.0 to 1.0, and b is scaled by the master dimmer).L1 ... L<num> Modules (Individual Pixels)These modules control a single, specific LED corresponding to the index number <num>.
HomeAutomation.HomeGenie/L<num>
Status.Level (Current individual LED brightness level, 0.0 to 1.0)Status.ColorHsb (Current individual LED HSV color)Control.OnControl.OffControl.ToggleControl.Level/<level>/<transition_ms>Control.ColorHsb/<h>,<s>,<b>,<transition_ms>Automation Module (Compiled Script Engine)This module manages the non-blocking execution of the compiled binary bytecode scripting engine.
HomeAutomation.HomeGenie/Automation
Script.Run/<script_text>row:col), region offsets (+length, +width:height rectangles), LEVEL scaling, HSB transitions, and control-flow instructions (#N, #REPEAT, #LOOP).Script.Clear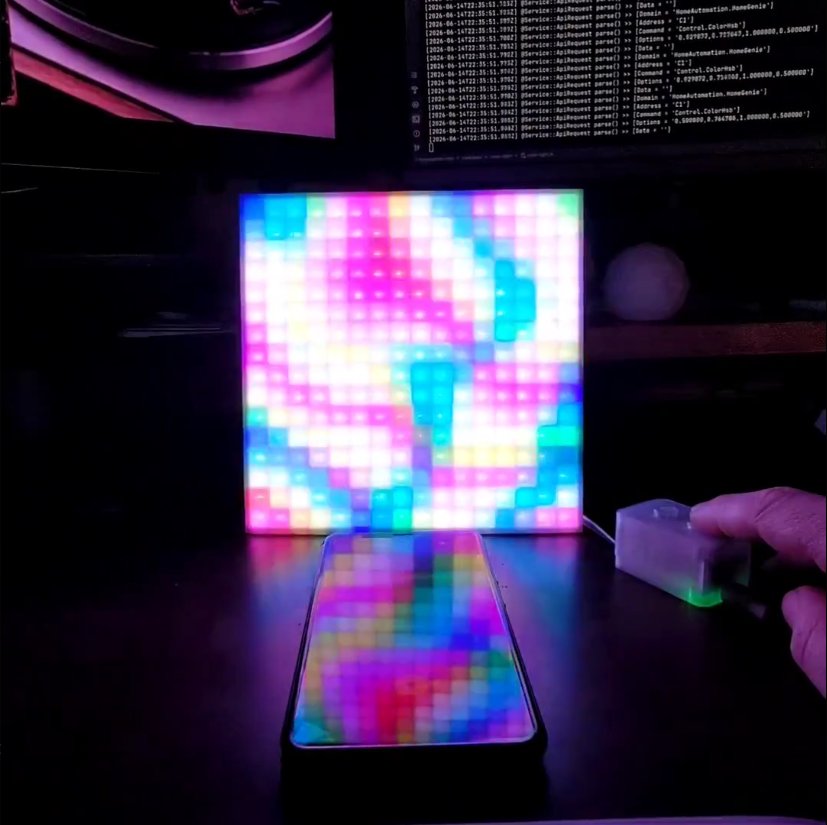


