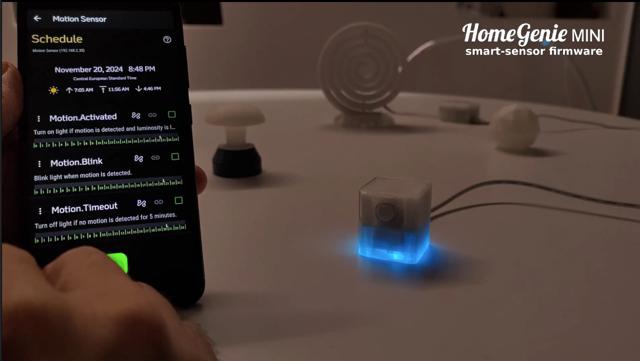
Motion.Blink schedule
Open media
This article describes how to create a DIY smart sensor with HomeGenie Mini smart-sensor firmware and ESP32-C3/S3 Mini/Zero development board. The device has a 3d printed enclosure and a PCB shield equipped with motion and light sensors.
A common application of this type of sensor is lighting control, for example, to automate switching on and off of lights based on the amount of time elapsed since last motion was detected and the actual level of perceived light.
For this purpose the smart-sensor firmware includes the following preset schedules:
The video below shows how to configure the Motion.Blink schedule to make it control the integrated status LED and other lights.
Product features:
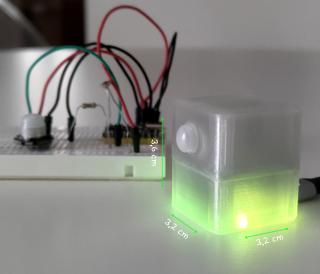
The onboard RGB LED can be used to signal when motion is detected, or to report other user-defined states using different colors.
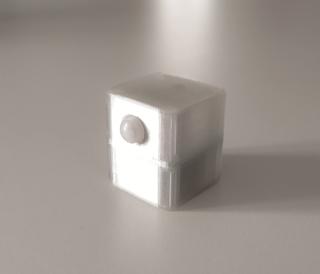
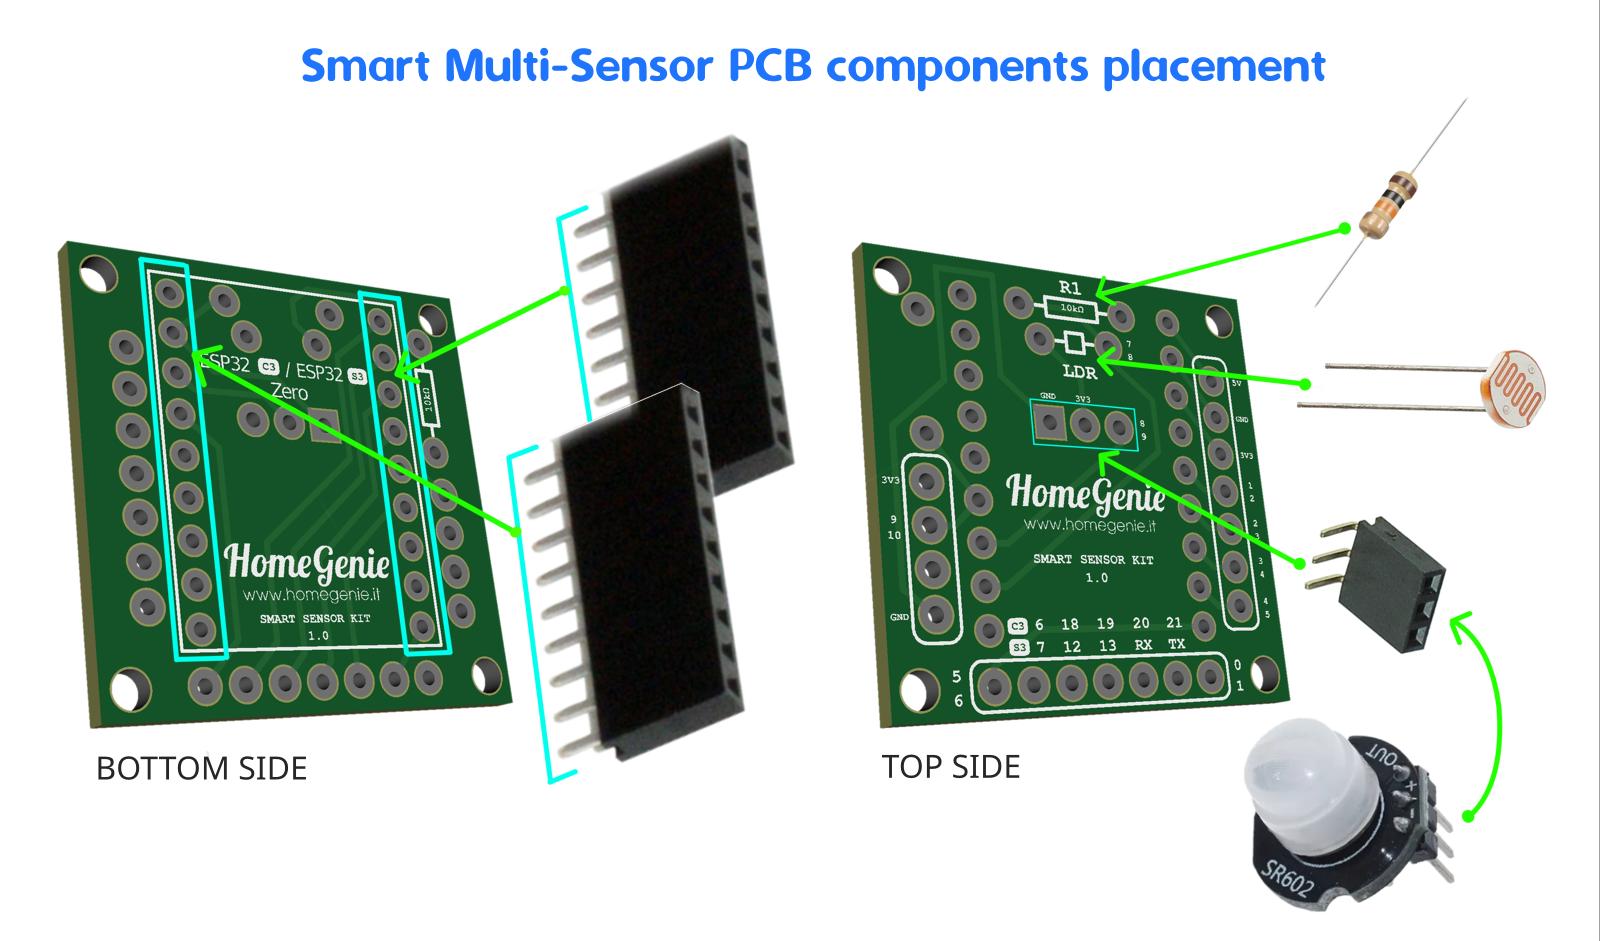
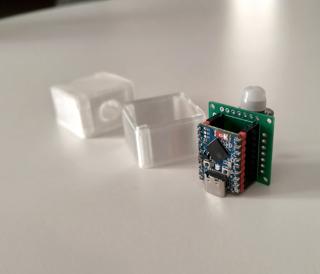
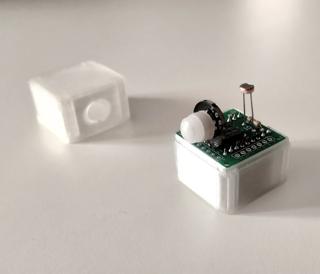
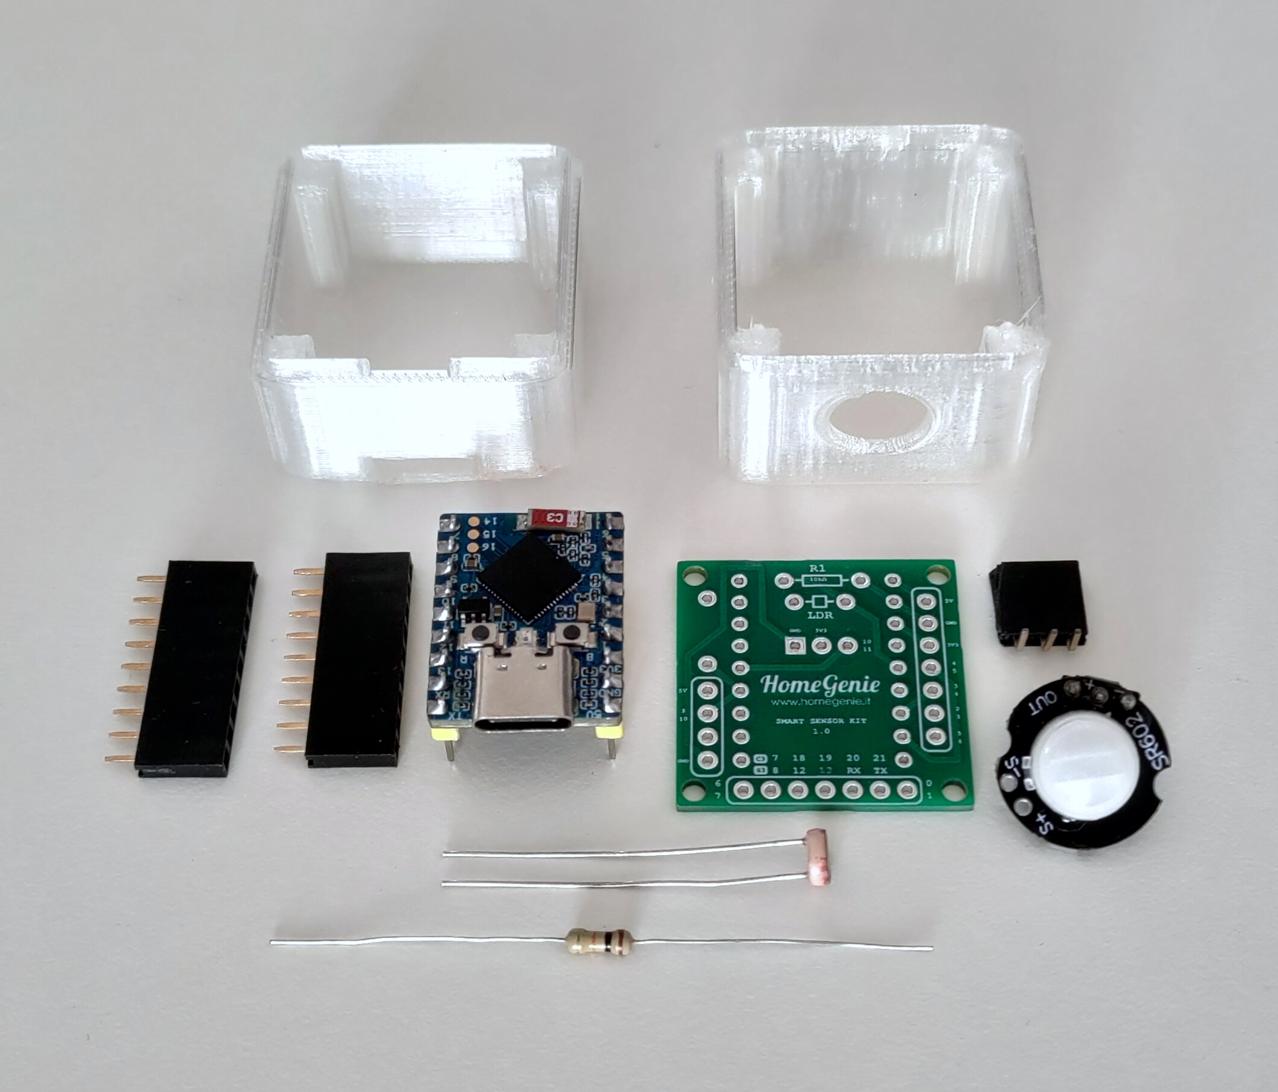
The kit consists of a translucent, small enclosure measuring 3,2 × 3,2 × 3,6 cm and a PCB shield for ESP32-C3/S3 Mini/Zero development board that can embed various sensors.
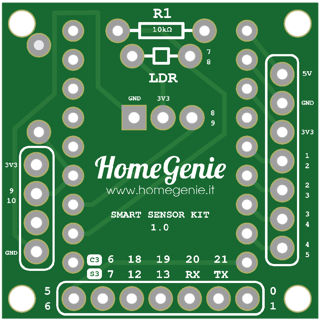
On the upper side of the PCB there are the light sensor and the motion sensor, while on the lower side there are the two 9-pin header connectors on which the ESP32 board is connected.
The PCB can eventually also embed the following components:
Other custom components might be connected too using the front expansion vias that expose further ESP32 GPIOs.
However, to keep it simple, the kit described here only includes the components that are required to implement motion + light sensing.
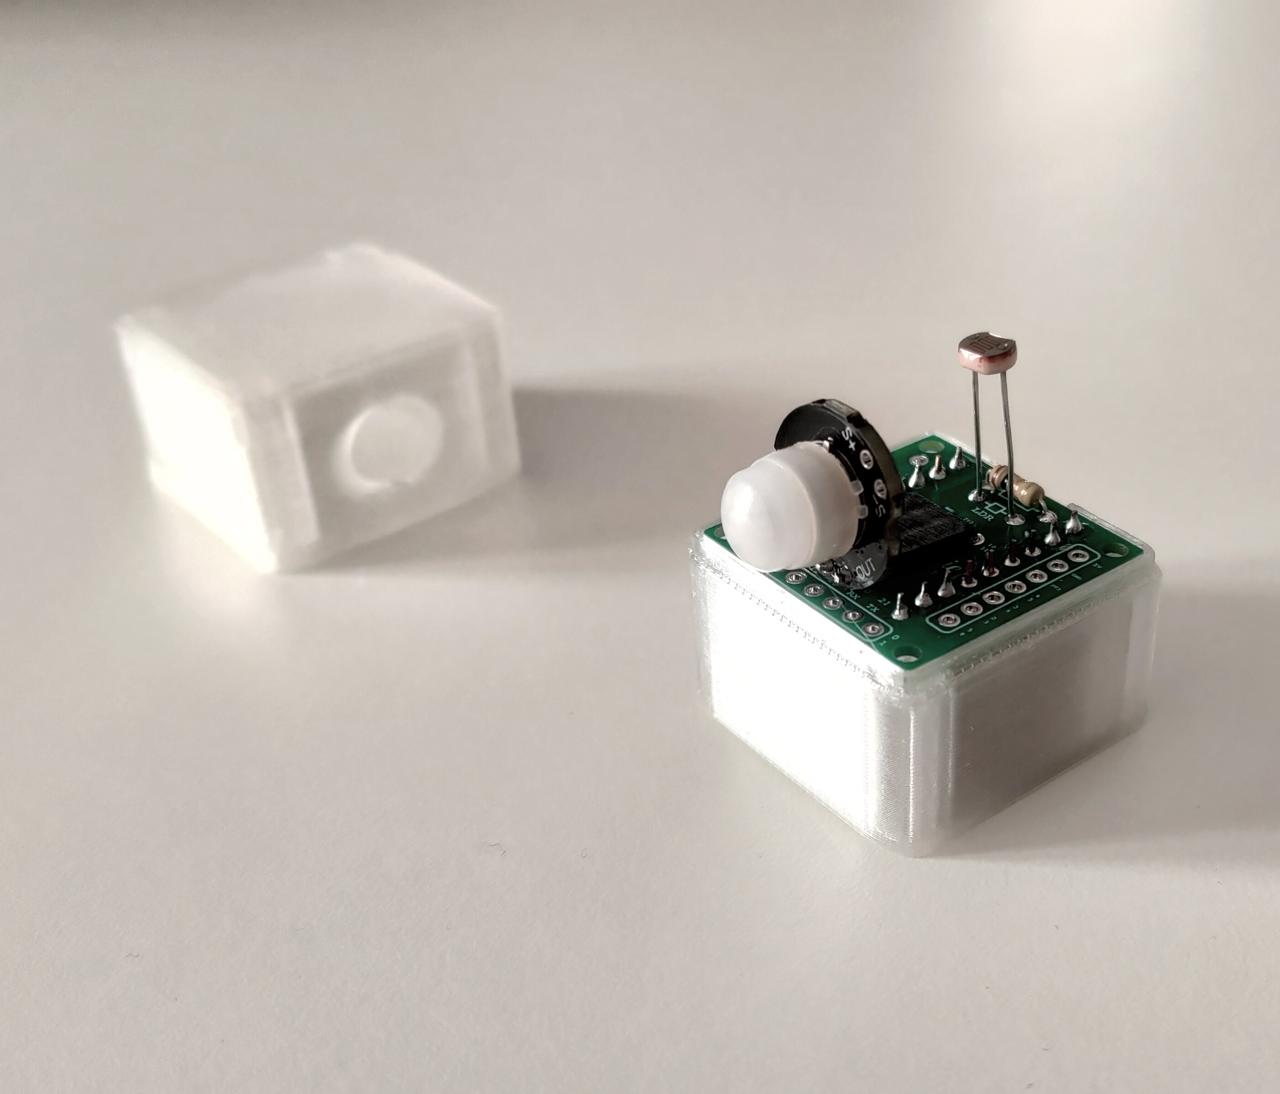
Printed using translucent PETG material, the enclosure takes about 30 minutes to print with a 0.4mm nozzle and 0.20mm layer height on an A1-mini 3D printer.
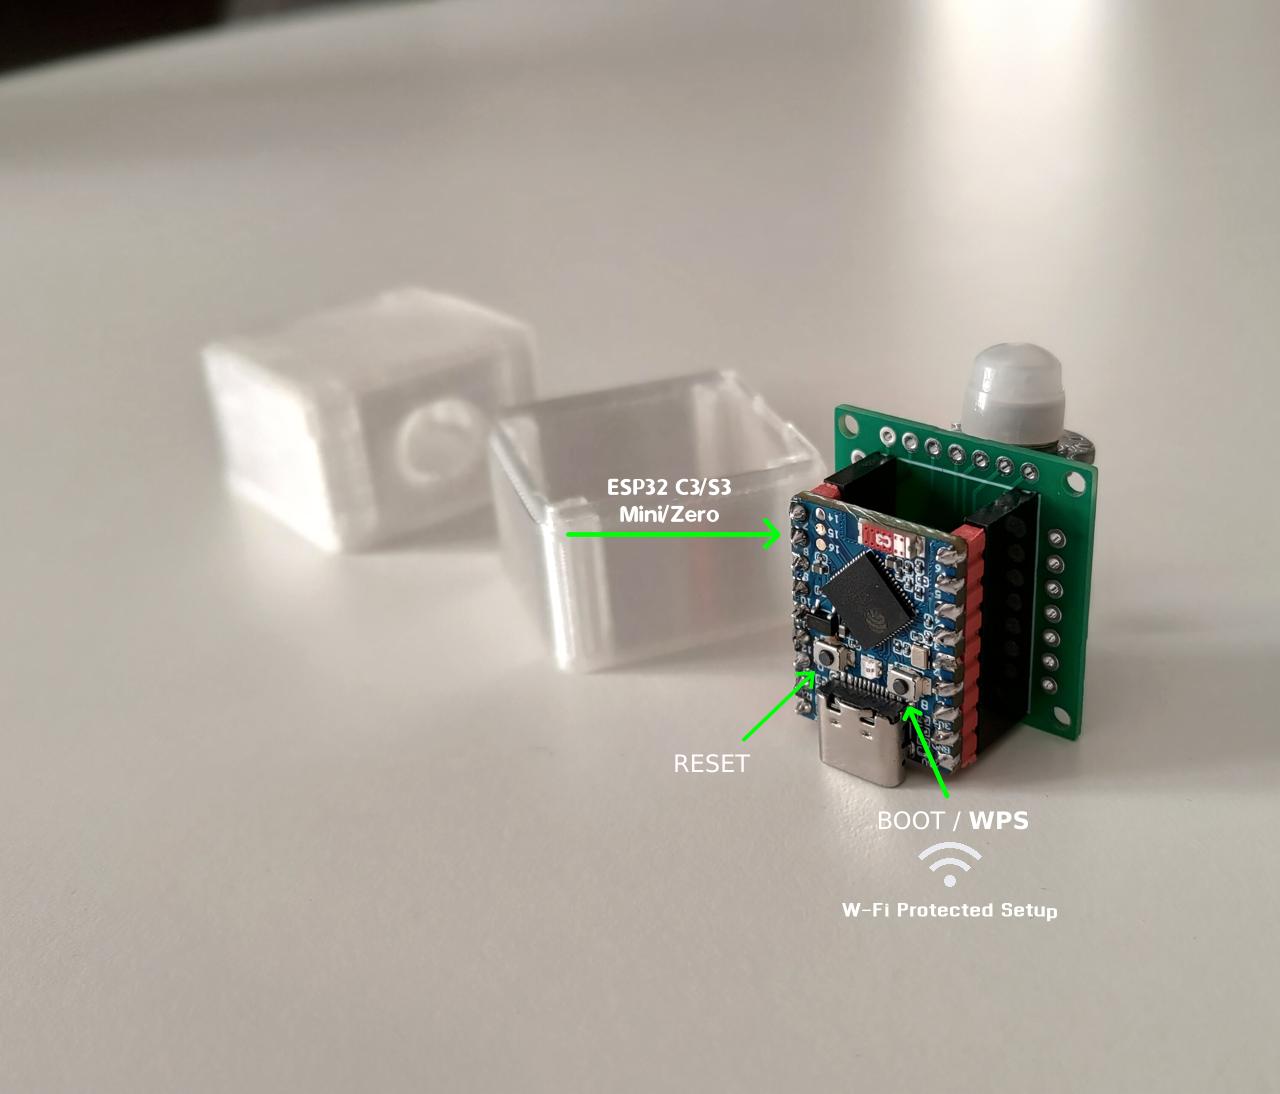
The kit is very easy to assemble:
Once assembled, to become a fully functional smart sensor, HomeGenie Mini smart-sensor firmware must be uploaded to the device.
The firmware can be uploaded directly from this page using the firmware upload form at the end of this article: select the target SoC model (ESP32-C3 or ESP32-S3 in this case) and click the "Create device" button.
Now, the smart sensor is ready to be configured and connected to Wi-Fi following the instructions in the Device Setup page.
Every HomeGenie Mini device can implement on its own even complex automated tasks thanks to the integrated Scheduler, that beside preset actions, can run JavaScript code to implement user-definable actions.
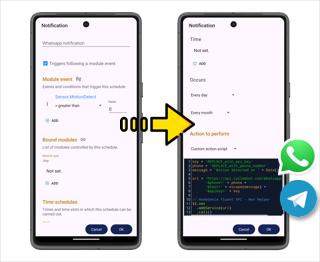
For example, by using an external services that act as a gateway for sending messages to WhatsApp and/or Telegram, it is possible to get a notification alert on your phone when motion is detected.
For this purpose, create a new schedule named "Notification" that will be triggered when motion is detected ("Sensor.MotionDetect" > 0) and with the following code in the "Action to perform" script:
key = 'REPLACE_with_api_key'
phone = 'REPLACE_with_phone_number'
message = 'Motion detected on ' + Date()

url = 'https://api.callmebot.com/whatsapp.php?' +
      '&phone=' + phone +
      '&text=' + escape(message) +
      '&apikey=' + key

// HomeGenie fluent API - Net Helper
$$.net
  .webService(url)
.call()The schedule can eventually be configured to be valid only at specific times and dates, and anyway it can be manually disabled or enabled at any time.
Now, with just few lines of code, the device can send a notification on WhatsApp or Telegram whenever motion is detected. The code in this example uses CallMeBot Free API service for sending WhatsApp messages, although any other service can be implemented by changing the url variable to match the provider's API specifications.
 PCB Gerber download REV. 1
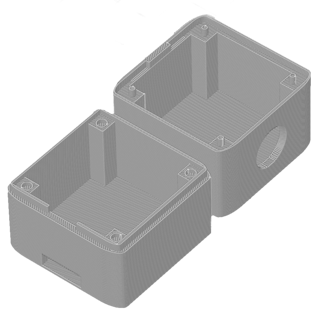 Enclosure 3MF download REV. 1
Smart Sensor project files by G-Labs licensed under CC BY-NC 4.0![]()
![]()
![]()
Connect your ESP32/ESP8266 microcontroller to your computer via USB, select your firmware version, and click "Create device" to upload the HomeGenie Mini firmware.
Installing firmware directly from this page works only in browsers with Web Serial API enabled.
First, ensure that you do not have multiple ESP devices connected to your USB ports. Please connect only one device at a time.
If only one device is connected and the firmware uploader still fails to connect (or gets stuck at "Connecting..."), your device might need to be put into Boot Mode manually. (This is often required with development boards such as the classic ESP32-CAM).
START THIS PROCEDURE AFTER THE PORT SELECTION WINDOW APPEARS.See the Device setup page for further information about configuring a HomeGenie Mini device.
This firmware pre-compiled binaries and source code are available on GitHub:
folder_open smart-sensor folder_open smart-sensor-display
In addition to the common Device API, the following modules and API are implemented by this device.
mini moduleBuilt-in sensor module.
HomeAutomation.HomeGenie/mini
Sensor.MotionDetectSensor.LuminanceSensor.ColorSensor.HumiditySensor.TemperatureC1 moduleThe onboard RGB LED.
HomeAutomation.HomeGenie/C1
Status.LevelStatus.ColorHsbControl.OnControl.OffControl.ToggleControl.Level/<level>/<tansition_ms>Control.ColorHsb/<h>,<s>,<b>,<tansition_ms>