HomeGenie - Dashboard - Demo Setup
Open media
HomeGenie is designed to be portable and frictionless. It doesn't require a complex installation process—you simply download, extract, and launch.
You can choose the method that best fits your workflow:
The simplest way to get started is to download the pre-compiled zipped folder for your platform directly from the HomeGenie release page on GitHub.
Once the download is complete, extract the archive to your preferred location and proceed to Step 2 to launch the system.
Download the .zip archive corresponding to your operating system, architecture, and hardware acceleration needs:
| Platform | Architecture | Variant | Optimized For | Technical Notes |
|---|---|---|---|---|
| Windows | x64 | win-x64 | Standard (CPU only) | Maximum stability, no GPU requirements. |
| x64 | win-x64-cuda12 | NVIDIA GPUs | High performance via CUDA 12 (LLM & Vision). | |
| x64 | win-x64-vulkan | AMD, Intel & NVIDIA | LLM via Vulkan, Vision via DirectX 12 (DirectML). | |
| Linux | x64 | linux-x64 | Standard (CPU only) | For servers or PCs without dedicated GPUs. |
| x64 | linux-x64-cuda12 | NVIDIA GPUs | High performance via CUDA 12 (LLM & Vision). | |
| x64 | linux-x64-vulkan | Generic GPUs | LLM via Vulkan, Vision via CPU (No DirectML on Linux). | |
| ARM64 | linux-arm64 | Raspberry Pi 3, 4, 5, Zero 2 | Optimized for 64-bit ARM SoCs (CPU-based). | |
| ARM | linux-arm | Raspberry Pi 2 | Legacy 32-bit ARM support. | |
| macOS | x64 / ARM | osx-x64 | Intel & Apple Silicon | Metal GPU support for Apple M1/M2/M3 acceleration. |
cuda12 variant for the best performance in LLMs and Computer Vision. (Requires up-to-date NVIDIA Drivers).vulkan variant to leverage your GPU for AI tasks. It's the best choice for non-NVIDIA hardware on Windows (via DirectX 12).osx-x64 build supports Apple Silicon (Metal) and Intel natively for maximum speed on Mac devices.linux-arm64 (for Pi 4/5 64-bit) or linux-arm (for older 32-bit systems).If you are setting up HomeGenie on a headless Linux server or a Raspberry Pi, you can perform the download and extraction directly via the terminal.
Select your target operating system and architecture from the dropdown menu below, then copy and paste the generated commands into your terminal:
Enter the following commands in a PowerShell terminal:
# Download the archive
curl -L -o homegenie_2.0.24_win-x64.zip "https://github.com/genielabs/HomeGenie/releases/download/v2.0.24/homegenie_2.0.24_win-x64.zip"
# Unzip the archive
Expand-Archive -Path homegenie_2.0.24_win-x64.zip -DestinationPath . -Force
Enter the following commands in a PowerShell terminal:
# Download the archive
curl -L -o homegenie_2.0.24_win-x64-cuda12.zip "https://github.com/genielabs/HomeGenie/releases/download/v2.0.24/homegenie_2.0.24_win-x64-cuda12.zip"
# Unzip the archive
Expand-Archive -Path homegenie_2.0.24_win-x64-cuda12.zip -DestinationPath . -Force
Enter the following commands in a PowerShell terminal:
# Download the archive
curl -L -o homegenie_2.0.24_win-x64-vulkan.zip "https://github.com/genielabs/HomeGenie/releases/download/v2.0.24/homegenie_2.0.24_win-x64-vulkan.zip"
# Unzip the archive
Expand-Archive -Path homegenie_2.0.24_win-x64-vulkan.zip -DestinationPath . -Force
Enter the following commands in a terminal:
# Download the archive
curl -L -O "https://github.com/genielabs/HomeGenie/releases/download/v2.0.24/homegenie_2.0.24_osx-x64.zip"
# Unzip the archive
unzip homegenie_2.0.24_osx-x64.zip
Enter the following commands in a terminal:
# Download the archive
wget https://github.com/genielabs/HomeGenie/releases/download/v2.0.24/homegenie_2.0.24_linux-x64.zip
# Unzip the archive
unzip homegenie_2.0.24_linux-x64.zip
Enter the following commands in a terminal:
# Download the archive
wget https://github.com/genielabs/HomeGenie/releases/download/v2.0.24/homegenie_2.0.24_linux-x64-cuda12.zip
# Unzip the archive
unzip homegenie_2.0.24_linux-x64-cuda12.zip
Enter the following commands in a terminal:
# Download the archive
wget https://github.com/genielabs/HomeGenie/releases/download/v2.0.24/homegenie_2.0.24_linux-x64-vulkan.zip
# Unzip the archive
unzip homegenie_2.0.24_linux-x64-vulkan.zip
Enter the following commands in a terminal:
# Download the archive
wget https://github.com/genielabs/HomeGenie/releases/download/v2.0.24/homegenie_2.0.24_linux-arm.zip
# Unzip the archive
unzip homegenie_2.0.24_linux-arm.zip
Enter the following commands in a terminal:
# Download the archive
wget https://github.com/genielabs/HomeGenie/releases/download/v2.0.24/homegenie_2.0.24_linux-arm64.zip
# Unzip the archive
unzip homegenie_2.0.24_linux-arm64.zip
Once you have extracted the archive, navigate into the created directory. You will find a homegenie subfolder (which contains the application binaries) and a convenient startup script.
Simply run this script to start the engine. The method varies slightly depending on your operating system:
Windows:
Double-click the start.bat file.
macOS:
Double-click the start.command file. If prompted with a security warning, you may need to right-click the file and select "Open" the first time.
Linux / Raspberry Pi:
Open a terminal in the folder and run:
./start.shA terminal window will open to start the backend server and display the system logs. Immediately after, the HomeGenie user interface will automatically launch in a dedicated, app-style desktop window.
(Tip: If HomeGenie is already running in the background, launching the script again won't cause errors; it will simply open a new UI window connected to your active session!)
To gracefully stop the application at any time, simply return to the underlying terminal window and press CTRL + C.
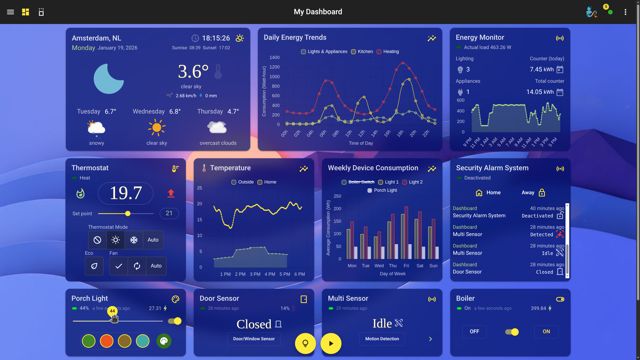
The video above demonstrates the installation process on a Raspberry Pi Zero 2 W using the official Raspberry Pi Imager with Raspberry Pi OS Lite (32-bit).
While HomeGenie automatically opens its app-like interface on the machine where it is running, it also acts as a web server. You can easily access your smart system dashboard from any smartphone, tablet, or web browser on your local network.
URL: http://<server_ip>:<port>/
<server_ip> is the local IP address of the machine where HomeGenie is running.<port> is 80. If port 80 is busy, HomeGenie will automatically use the first available port starting from 8080. (Example: http://192.168.1.150:8080/)To find the exact address and port currently in use (especially useful for headless setups like a Raspberry Pi), check the serviceaddress.txt file generated in the homegenie folder after the first run:
cat homegenie/serviceaddress.txtYou can change the port settings from theSettings > Maintenance page or by manually editing the systemconfig.xml file (make sure the HomeGenie service is stopped before editing).
Since HomeGenie features advanced AI automation engines (like Gemini Automan) capable of generating, compiling, and executing code on the fly, we highly recommend running the application in a restricted, sandboxed environment to ensure maximum system security when executing AI-generated code.
homegenie) with a nologin shell. Grant this user read/write permissions strictly to the HomeGenie installation folder, isolating it from the rest of your OS.data directory.For instructions on how to run HomeGenie as a system service and for other advanced settings, please see the Optional Post-Installation Steps guide.


