
Settings is where you customize HomeGenie to fit your home: connect devices, configure services, add new features, and organize your smart environment. You can open it anytime from the main application menu.
The interface is organized into three primary tabs:
- Configuration — Manages built-in hardware interfaces and service settings.
- Packages — Lets you install and manage software programs.
- Groups — Organizes devices into dashboard control groups.
For system backups, server options, and HomeGenie software updates, choose the Maintenance option from the main menu instead.
Protect HTTP access
Password protection is configured separately under HTTP in the Maintenance section. Turn on the Password protected access option, choose a strong and unique password, and click the Confirm button. By default, the username is "admin". Without a password, any client device that can reach the service can access its administrative APIs.
Configure your devices and services
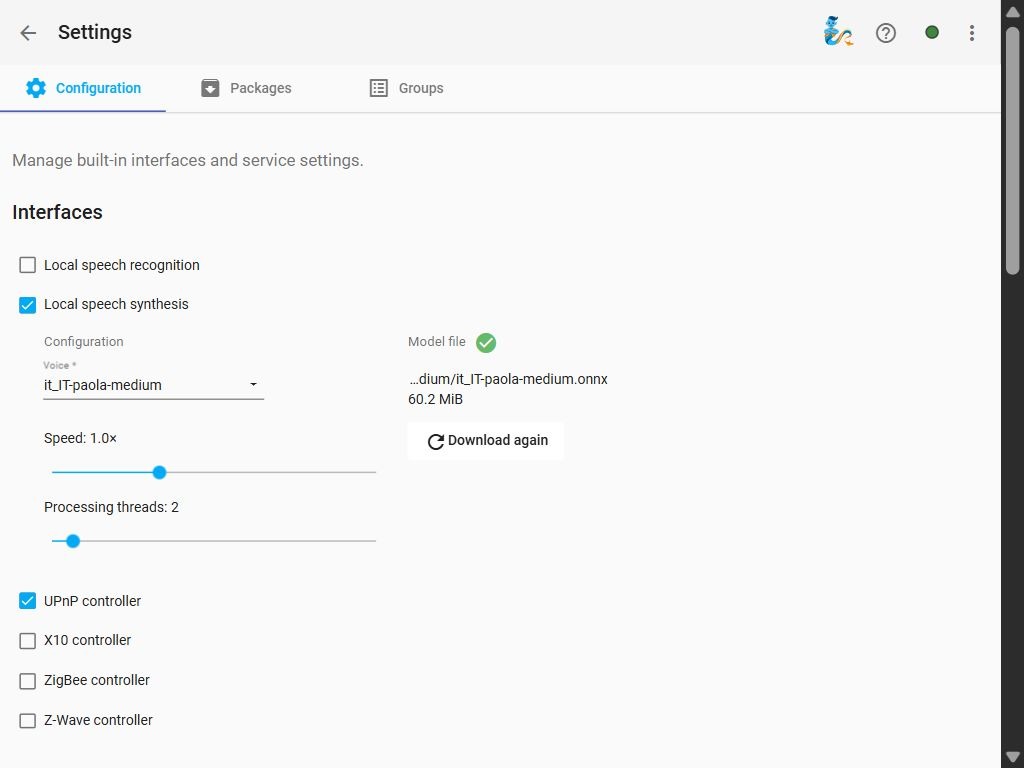
Begin by selecting the Configuration tab at the top of the page. The upper section lists the built-in interfaces that HomeGenie uses to communicate with hardware or provide core services such as speech. Below them, you will find additional settings provided by your installed programs.
Enable an interface
Find the interface you want to use, enable it, and configure the options that appear. A hardware controller may require a connection address or serial port, while a speech service requires a voice model. Only settings relevant to that specific interface are displayed.
For local voice interaction, Local speech recognition converts your microphone recordings into text using Whisper, while Local speech synthesis reads responses aloud using Piper. You can select the required model files and monitor their download progress directly in these settings. These voice models are completely separate from the language models that Lailama uses to process queries.
If you are setting up voice for the first time, consult the Setup guide for detailed instructions.
Open a program's settings
Scroll down to the Programs section and select the feature you want to configure. For example, open Weather Forecast to enter your location settings, or open Gemini Genie to configure your API key and model selection.
Entries are organized by category based on the programs you have installed and enabled. If an entry is missing, visit the Packages tab to ensure the corresponding program is installed and active.
Certain programs can also attach settings directly to existing devices. For example, the Smart Device program can add an automatic turn-off timer to a light. To adjust that timer, open the settings for that individual light.
Choose your default AI assistant
In AI - Machine Learning, open AI Genie and select the Default AI Genie option. This is the assistant HomeGenie uses for automated background tasks when no specific assistant is chosen—such as scheduler jobs set to Default.
Next, configure each assistant individually: Gemini Genie requires an API key and model selection, while Local AI uses a locally downloaded model via Lailama. Each assistant maintains its own chat history and permissions. Open the chat window to specify which data the assistant can access and which actions it may execute.
For more details, consult the dedicated guides for Cloud AI, Local AI, and the Scheduler.
Add features with software packages
A software package bundles programs and resources that add new capabilities to HomeGenie. For example, a smart-home package can provide energy monitoring, thermostat automation, and custom device behaviors, allowing you to install a complete solution in one step.
Open the Packages tab. The Repositories selector lets you choose which package collection to browse. The official homegenie repository contains verified packages. Select any package name to view its description, contents, and installed status.
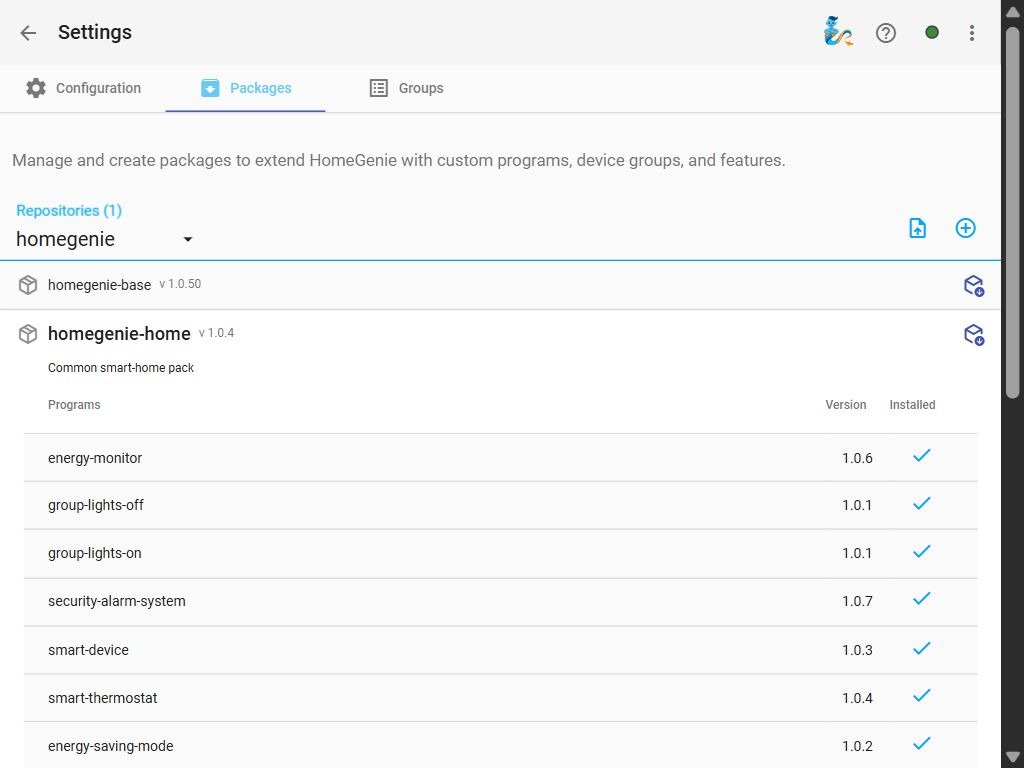
Click the Install button to add a package. If any required components are missing, the button displays Restore instead to complete the setup. Once installed, you can open a package with Edit or remove it using Uninstall.
You may also see a Requires section. This lists package dependencies: programs needed for proper operation that may be supplied by another package. Review these requirements before starting an installation.
Choose a software package
The official catalog provides packages tailored for different use cases:
homegenie-base— Provides core shared services used throughout the system. Keep this package installed.homegenie-home— Adds everyday smart-home capabilities, including Smart Device automations, energy monitoring, security, and climate control.homegenie-home-demo— Includes virtual devices and simulated sensors for testing without physical hardware.homegenie-ml-ai— Bundles machine learning features, including Gemini Genie, Lailama, and computer-vision programs.homegenie-iot-netandhomegenie-iot-sharp— Offer programs and examples for connected hardware interfaces and component libraries.
Import or create a software package
To import a package, click the Upload package option and choose its ZIP archive.
To package your own custom programs and resources, select the Create package button.
Custom software packages typically use this repository name:
userYou can choose a different repository name. You can edit the package contents and export a ZIP file for use in another HomeGenie installation. The included programs are also available in the program editor whenever you want to inspect or adapt the code.
Keep your programs up to date
To check for program updates, open Programs and select Show upgradable programs to view pending updates. This option is always available, and a badge displays the count of available items. If everything is current, the page displays the System is up to date message.
When updates are available, you can update a single program or click Update all to install all of them at once. This view also lists missing required programs—components that your installed packages need—and displays the progress and results of the update operation.
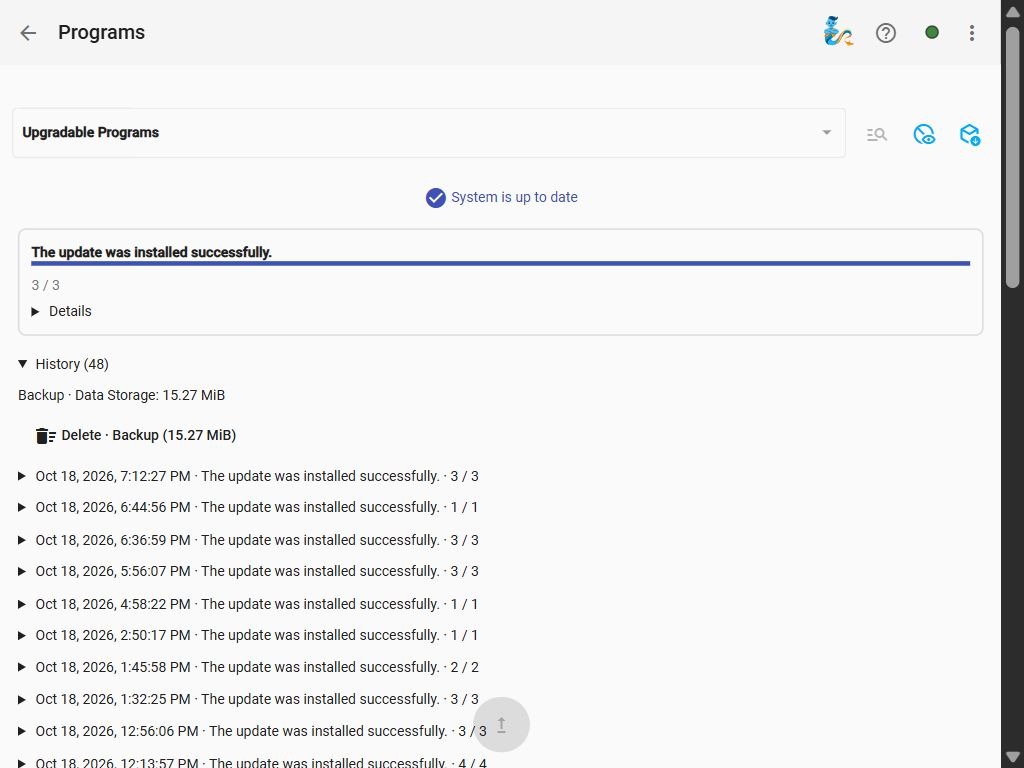
You can leave the page while an update is running. HomeGenie continues working on the server; return to this view to check its status. Open the Details view to see what happened to each program. If something failed or needs attention, review that information before trying again.
HomeGenie can also send you a notification when updates are available, including a direct shortcut back to this page.
Review previous updates and backups
Visit the History section to review earlier updates. HomeGenie saves program backups during updates and displays the storage space they consume. These backups help you recover a program if an update encounters an issue.
To free up storage space, click the Delete · Backup button and confirm the action. HomeGenie removes the eligible backups created during successful updates while preserving your update history. Hover over the button to view the exact backup folder location. Automatic cleanup can remove successful-update backups after seven days and ordinary failed-update backups after thirty days. It runs during update-service maintenance, rather than at an exact expiry time. Backups for interrupted operations or cases requiring manual recovery are protected.How long are program-update backups kept?
Program-update backups are separate from system configuration backups. To save your entire system setup, download a configuration backup from the Maintenance page instead.
Group your devices and programs
A control group contains a custom collection of devices or programs with a name you choose. For example, you can create a Living Room group for a single room, or an Exterior Lights group for fixtures around the house. HomeGenie refers to each device or program as a module, which is why that term appears throughout group settings.
Open the Groups tab and choose a group to view its members. To create a new group, click "Add group", enter a name, and select the items to include. Later, you can use the "Edit group" option to change its name or members. Drag the handles beside the items to change their display order, or select an individual item to open its controls.
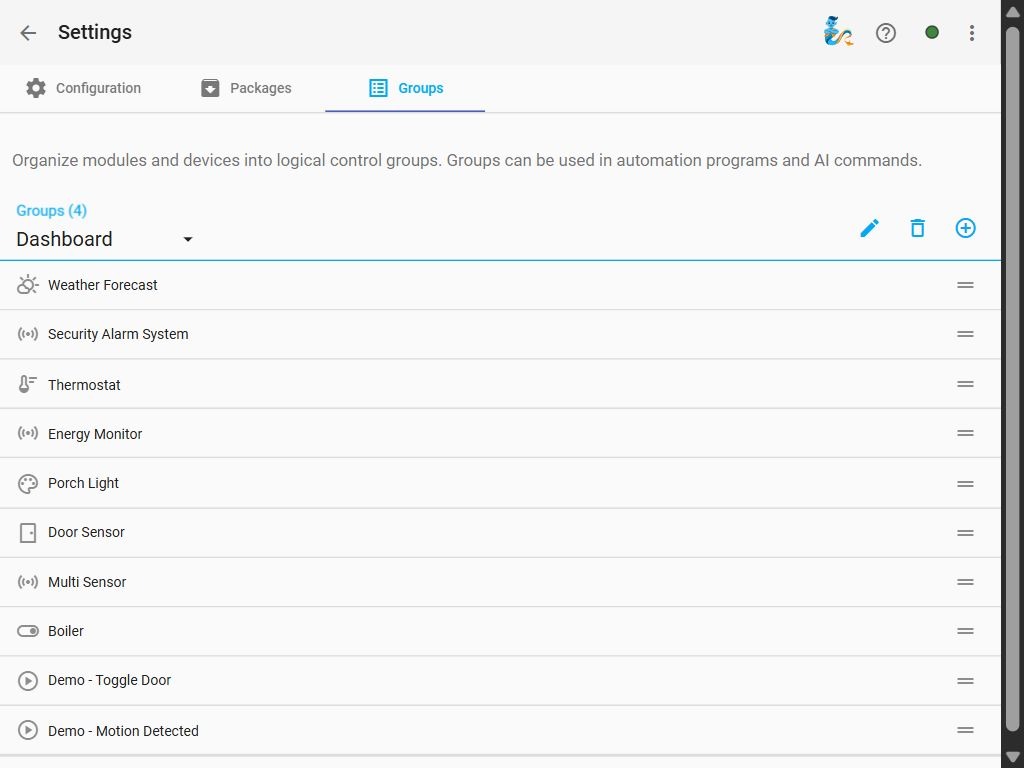
Groups are useful when an automation should work with several devices together—for example, turning off all exterior lights at once. They are also integrated into the HomeGenie Panel application.
A group can serve as the starting point for a dashboard, though each has a distinct purpose: groups determine which modules belong together, while dashboards arrange their widgets on screen. Modifying a group does not automatically alter or synchronize dashboard layouts.
Find and manage notifications
Click the Notifications icon in the top toolbar to view messages from HomeGenie and its programs. When the Persistent Notifications feature is installed and enabled, messages remain saved on the server, even those delivered while your browser was closed.
Switch between the Active view for current notifications and the Archive view for past alerts. Click any notification to read its full message. You can easily navigate between notifications to archive or restore them. Read and unread messages are styled differently so you can quickly spot new alerts.
Certain notifications include actionable shortcuts, such as links to pending program updates. Review the message details before selecting an action button.
To adjust message storage limits and retention periods, open the Persistent Notifications settings under the Configuration tab.
Maintain and back up your system
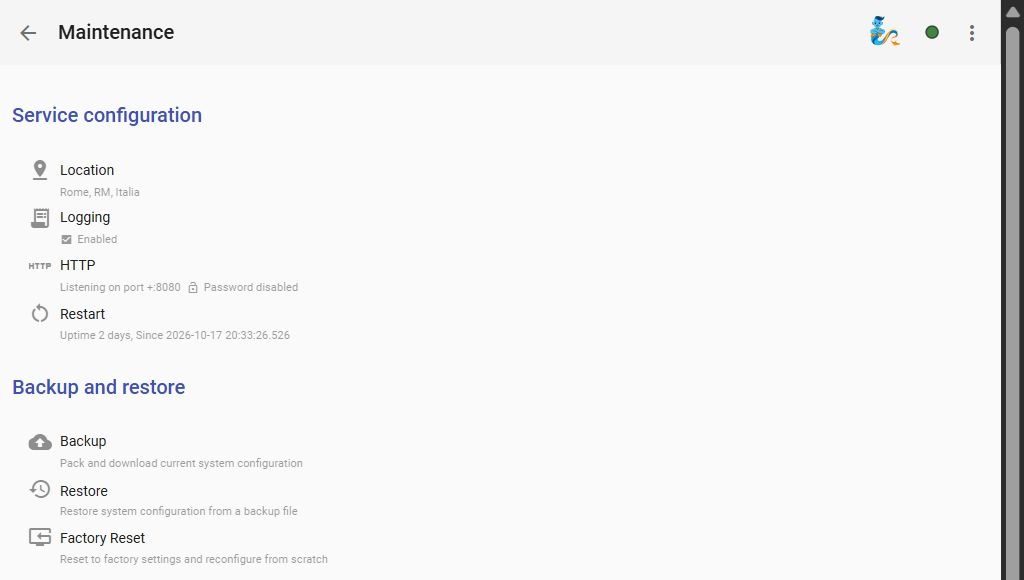
Access the Maintenance section from the main system menu whenever you need to save backups, update HomeGenie, or adjust server settings.
Save a configuration backup
Select the Backup option to download a ZIP archive containing your current configuration. Store this backup outside the HomeGenie installation folder so it remains safe if you ever need to restore the system.
To restore an existing setup, choose the Restore option, upload your backup ZIP archive, and follow the prompts in the dialog. The "Restore" button in the package manager serves a different purpose: it reinstalls missing components for a software package.
The Factory Reset command restores HomeGenie to its default out-of-the-box settings so you can restart configuration from scratch. Always create a backup of your current setup before resetting the system.
Change server options
The Service configuration section provides these settings:
- Location — Sets geographic coordinates for sunrise and sunset scheduling.
- Logging — Records system activity to assist with diagnostics and troubleshooting.
- HTTP — Configures the server network address, listening port, and access rules.
- Restart — Sends a command to reboot the background service.
If you modify the network address or port, use the new URL to reconnect. HomeGenie restarts automatically through its service manager or startup script. If HomeGenie was started directly from a command-line terminal, you will need to restart it manually.
Install a HomeGenie update
Under the Software updates section, check for a new release and choose Upgrade when one is available. The dialog prompts you to back up your current configuration before proceeding.
Track the download progress, then select Install once the release is ready to begin setup. You can pause the download and resume it later. Closing the dialog does not cancel the download: when you return, HomeGenie checks your saved progress and resumes the file or reuses a completed download. If a download cannot be resumed safely, it starts over automatically.
During installation, the dialog displays progress and waits while the background service restarts. When the updated service starts, it automatically checks for and installs any missing required programs across your installed packages. To manage updates for specific add-on features, visit the Programs page.
In summary: use the Maintenance page to update the core HomeGenie system, and use the Programs page to update individual feature packages.